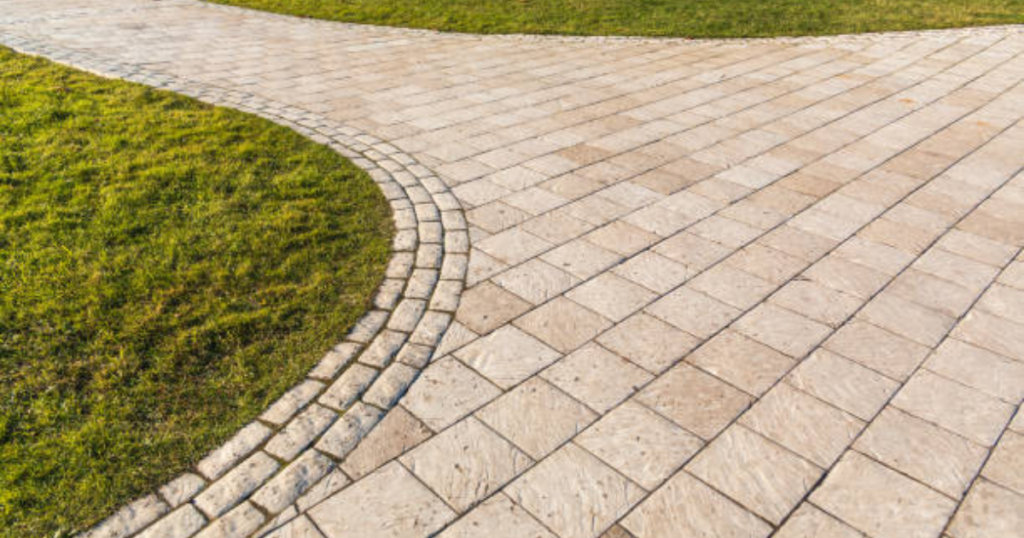
A well-designed paver walkway does more than just connect point A to point B; it significantly boosts your home’s curb appeal and overall market value. However, the difference between a path that lasts decades and one that shifts after the first rain lies in the technical execution. If you are wondering how to install a paver walkway that stands the test of time, you need a strategy that balances DIY grit with professional-grade standards.
In this comprehensive 2026 guide, we break down every phase of the installation process. Whether you are planning a weekend DIY project or looking to hire a concrete contractor to ensure a flawless finish, this guide provides the technical depth missing from basic blogs.
How to Install a Paver Walkway: The Quick Answer
To install a paver walkway, start by excavating the area to a depth of 7–9 inches. Lay a 4-inch compacted gravel base, followed by a 1-inch layer of leveling sand. Arrange your pavers in the desired pattern, set edge restraints, fill joints with polymeric sand, and compact the surface to lock everything in place.
1. Pre-Installation: Planning and Permitting
Before you move a single shovelful of dirt, you must have a blueprint.
- Utility Lines: Always call your local “dig safe” hotline. Striking a water or gas line is a costly disaster.
- Drainage: Your walkway must slope away from your home’s foundation. Aim for a 1-inch drop for every 4 to 8 feet of length.
- Permits: Depending on your municipality, a new permanent walkway may require a permit, especially if it affects site drainage or historical aesthetics.
2. Essential Tools and Materials Checklist
To achieve professional results, you need more than just a shovel.
- Materials: Road base (crushed stone), bedding sand, pavers, edge restraints, and polymeric joint sand.
- Tools: Plate compactor (rental is recommended), masonry saw, rubber mallet, 2×4 screed board, leveling pipes, and a string line.
3. Step-by-Step Installation Process
Step 1: Marking and Excavation
Use stakes and string lines to outline your path. Excavate deep enough to account for 4 inches of base, 1 inch of sand, and the thickness of the paver itself.
Step 2: Subgrade Compaction
The soil at the bottom of your trench must be firm. Use a plate compactor to ensure the ground won’t settle later.
Step 3: Laying the Base
This is the most critical step. Add your crushed stone in 2-inch layers, wetting it slightly and compacting it between each layer. This creates a rock-solid foundation that prevents “dipping.”
Step 4: Screeding the Sand
Lay down two 1-inch pipes and pour bedding sand between them. Slide a straight 2×4 board across the pipes to create a perfectly level “floor” for your pavers.
Step 5: Placing the Pavers
Start at a straight edge or a corner. Lay pavers flat-do not slide them into place, as this disturbs the sand. Use a masonry saw for any custom cuts at the ends.
Step 6: Edge Restraints and Finishing
Install heavy-duty plastic or metal edging to keep the pavers from spreading outward. Sweep polymeric sand into the cracks, vibrate the surface with the compactor, and mist with water to “lock” the joints.
4. Why Precision Matters: The “Invisible” Layers
Most homeowners focus on the color of the stones. However, the best concrete contractor knows that the “invisible” layers (the gravel and sand) dictate the lifespan. Without proper compaction, even the most expensive pavers will crack or become a tripping hazard within two seasons.
5. Common DIY Mistakes to Avoid
- Ignoring the Slope: Water pooling on your walkway leads to moss, ice, and foundation damage.
- Thin Foundations: Skipping the 4-inch minimum gravel base is the #1 cause of walkway failure.
- Poor Joint Sealing: Using regular play sand instead of polymeric sand allows weeds to grow through the cracks.
6. When to Hire a Concrete Contractor
While a small garden path is a manageable DIY task, complex projects require professional intervention. You should consider looking to hire a concrete contractor if:
- The walkway integrates with a driveway or large patio.
- The terrain has significant elevation changes requiring retaining walls.
- You want a specialized “stamped concrete” look that mimics pavers but offers more durability.
7. How to Choose the Best Concrete Contractor
Finding a reliable professional is about more than just the lowest bid. Here is how to compare options:
Check for Specialization
Some companies only do large-scale commercial work. Look for someone who specializes in residential hardscaping and “local services” like sidewalks and decorative paths.
Verify Licenses and Insurance
Never hire a contractor who cannot provide a current COI (Certificate of Insurance). This protects you from liability if an accident occurs on your property.
Ask the Right Questions
- “How deep do you excavate for the base?”
- “What type of drainage solutions do you recommend for my specific yard?”
- “Can you provide a portfolio of local projects completed in the last 12 months?”
Expert Tip: The best concrete contractor will always provide a written contract that includes a timeline, material specs, and a clear payment schedule.
Benefits of Hiring a Professional
- Industrial Equipment: Pros use heavy-duty excavators and hydraulic compactors that DIY rentals can’t match.
- Warranty: Most reputable contractors offer a 1-year to 5-year guarantee against settling.
- Speed: What takes a homeowner three weekends, a professional crew can often finish in two days.
Conclusion
Learning how to install a paver walkway is a rewarding journey that enhances your home’s outdoor living space. By following a rigorous step-by-step process focused heavily on the foundation and drainage, you can create a stunning entrance.
However, if the physical labor or technical requirements seem daunting, don’t settle for a subpar DIY result. Reaching out to a professional concrete contractor ensures that your investment is protected and your walkway remains beautiful for decades to match your home’s quality.
Ready to transform your home’s exterior?
Get a Free Professional Quote Today and see the difference expert craftsmanship makes!
8. Frequently Asked Questions
Is it cheaper to do a paver walkway or a concrete walkway?
Poured concrete is usually cheaper upfront. However, pavers offer a higher ROI and are easier to repair if a single stone breaks.
How long does a paver walkway last?
When installed correctly with a proper base, a paver walkway can last 25 to 50 years.
How do I find the best concrete contractor near me?
Search for contractors with high ratings on Google and verify their local physical address. Always ask for recent references.
How much maintenance does a paver path require?
Very little. You should re-apply polymeric sand every 3–5 years and power wash the surface occasionally to remove debris.