
How to Lay a Paver Walkway in New York City
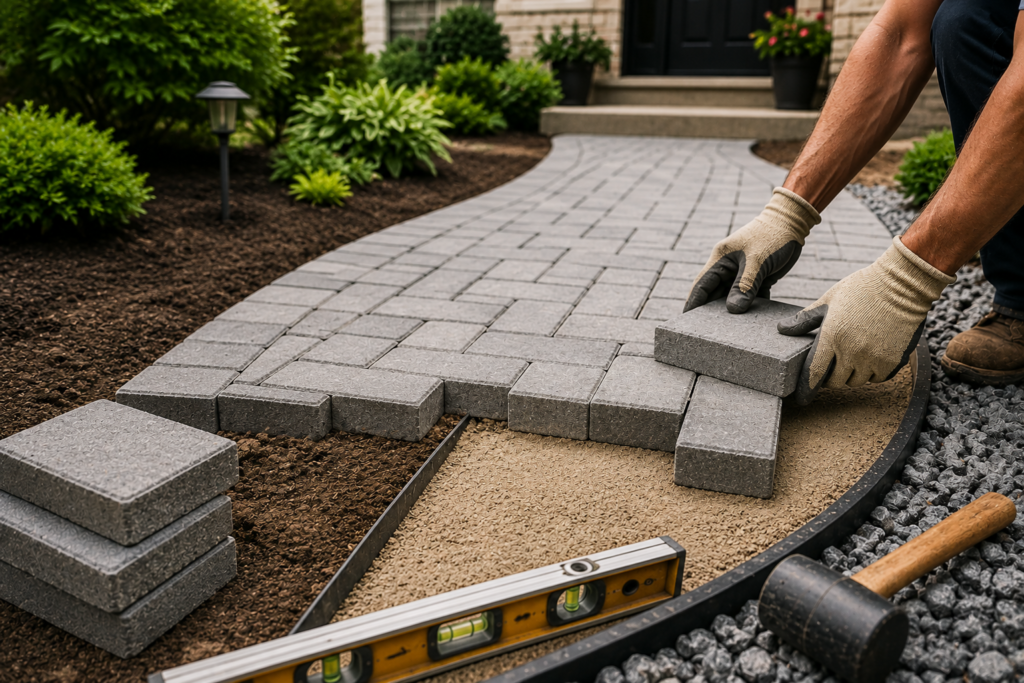
Laying a paver walkway looks simple from the sidewalk. It isn’t. What you see on top the pattern, the color, the clean joint lines is maybe 20% of the actual job. The other 80% happens underneath, where nobody ever looks once the project is done: excavation depth, base material, compaction, slope, and edge restraint. Get those wrong, and the walkway might look fine for a season. Then a New York winter hits, the ground freezes and thaws a few times, and pavers that were level in October are rocking underfoot by March. This guide walks through how to lay a walkway the way it actually needs to be built, not the shortcut version. Whether you’re planning to do the work yourself or just want to understand what a contractor should be doing on your property, the steps below cover what matters and why. Can You Install a Paver Walkway Yourself? Yes, for some projects. No, for others. It depends less on your motivation and more on the site itself. A short, straight walkway across a flat, well-drained yard with no utilities nearby is a realistic DIY project for someone who’s comfortable with physical labor and willing to be patient about getting the base right. Excavation and grading aren’t complicated in concept; you’re just removing soil to a consistent depth and sloping it slightly away from the house. The part that trips people up is patience. It’s tempting to eyeball the depth and skip re-checking it every few feet. That’s usually where problems start. Compaction is where a lot of DIY walkways go wrong. A plate compactor isn’t hard to run, but base material needs to go down in layers, not dumped in all at once and compacted a single time. Skipping that step doesn’t show up immediately. It shows up eight months later as a low spot. Cutting pavers is another sticking point. A rented paver saw or splitter, can handle straight cuts along a border reasonably well, but curves, tight corners around steps, or matching an existing pattern take practice most homeowners haven’t had. A few bad cuts on a small job are forgivable. A lot of them on a long walkway start to look obviously off. Drainage is where DIY projects most often go sideways in New York, specifically. If the walkway runs close to a foundation, crosses an existing drainage path, or sits somewhere water already tends to pool, getting the grade wrong can send water toward the house instead of away from it. That’s not a cosmetic mistake; it’s a foundation and basement problem waiting to happen. If your project involves significant excavation, old concrete removal, drainage correction, retaining walls, or utilities you’re not fully sure about, that’s usually where it makes sense to bring in someone who does this for a living. What You’ll Need to Lay a Paver Walkway Material/Tool What It’s Used For Why It Matters Pavers (concrete, brick, or natural stone) The visible walking surface Material choice affects cost, durability, and how the walkway handles freeze-thaw cycles Base material (typically crushed stone/gravel) Structural foundation beneath the walkway A properly compacted base is what actually holds the walkway in place over time Bedding sand Thin leveling layer between base and pavers Creates a consistent, level surface for setting pavers, not a substitute for a solid base Edge restraints Plastic, metal, or paver-set borders along the sides Keeps pavers from spreading or shifting outward over time Polymeric or joint sand Fills the gaps between pavers Locks pavers together and helps limit weed growth and insect intrusion Shovel and rake Excavation and rough grading Basic tools for removing soil and shaping the sub-base Level and string line Checking slope and alignment Confirms the walkway is sloped correctly and running straight Plate compactor Compacting base material and bedding sand Without proper compaction, settling is almost guaranteed Paver saw or splitter Cutting-edge pavers Needed for clean cuts along borders, curves, and obstacles How to Lay a Walkway With Pavers: Step by Step Step 1: Plan the Walkway Before any digging starts, work out the route, width, and pattern. Think about where the walkway needs to connect: a driveway, a porch, a gate, and whether it needs to accommodate two people walking side by side or just one. Check for existing structures, tree roots, and downspouts along the path. In New York, it’s also worth confirming the location of any underground utility lines before excavation begins; contact the appropriate utility locating service for your area rather than guessing. Once the route and width are set, you can work out roughly how much paver material, base stone, and sand the project will need. Step 2: Mark the Area Use stakes and string, or marking paint, to lay out the exact walkway boundaries. Stand back and look at the layout from a few angles before committing to it. Walkways that look fine on paper sometimes look awkward once they’re staked out against the actual house and landscaping. This is the cheap step to get right; changing your mind now costs nothing. Changing your mind after excavation costs a lot more. Step 3: Excavate the Walkway This is where the “how deep should you dig” question actually depends on your specific project rather than a single number that applies everywhere. Excavation depth is driven by the paver thickness, the depth of base material your soil conditions call for, drainage needs, and how much foot or vehicle traffic the walkway will see. A basic residential garden path and a commercial walkway that needs to handle heavier use and stricter drainage aren’t excavated to the same depth. Soil type matters too. Clay-heavy soil that holds water differently than sandy or well-draining soil often needs a different base depth to perform reliably through New York’s freeze-thaw cycles. If there’s an old concrete walkway or existing pavers to remove first, factor that demolition work into the timeline. Removing old material, especially concrete, adds real time and labor before the actual walkway installation even begins.