How Long Does Concrete Take to Cure? A New York Contractor Explains
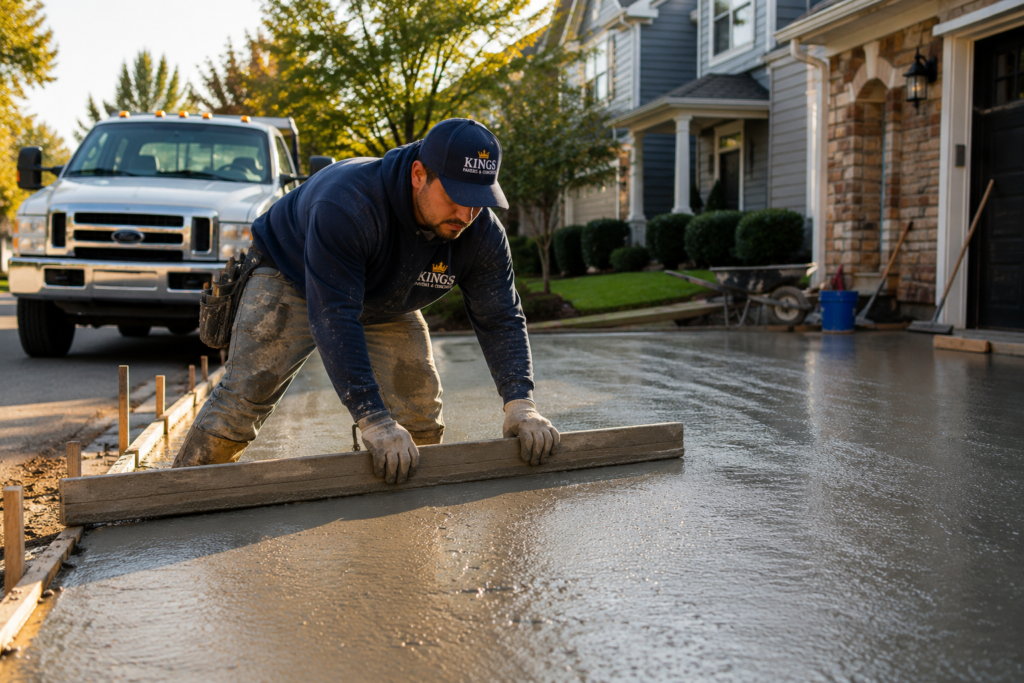
Every single customer I’ve ever worked with asks the same question the moment we finish a pour: “So when can I use it?” I get it. You’ve just invested real money into a new driveway, patio, or sidewalk, and you want to start enjoying it. But rushing the curing process is one of the most common and most damaging mistakes a homeowner can make. After more than 20 years pouring concrete across New York, I’ve seen what happens when people ignore this part. Cracked driveways. Tire ruts—completely avoidable surface damage. And I’ve also watched plenty of homeowners do it right and end up with a slab that lasts for decades. So let me walk you through exactly how long concrete takes to cure, what the milestones mean, and what you should and shouldn’t do at each stage. How Long Does Concrete Take to Cure? The short answer: concrete reaches about 70% of its full strength within 7 days and hits its full design strength at 28 days. But it doesn’t just stop there; concrete actually continues to gain strength very slowly for years after that. That said, “full strength” at 28 days is what engineers and contractors design for. That’s the number on the spec sheet, and it’s the threshold that matters for practical purposes. Here’s a breakdown of what’s happening at each stage: Time After Pour Concrete Strength What Happens Recommended Use 24 Hours ~16% Surface firms up No foot or vehicle traffic 48 Hours ~25% Slab holds a light load Light foot traffic only, carefully 7 Days ~70% Most strength reached Normal foot traffic; avoid heavy loads 14 Days ~85% Nearing full strength Light vehicles OK on residential 28 Days ~99% Full design strength All normal traffic and loads One thing I always tell customers: the 24-hour mark feels like a long time when you’re waiting, but it’s nothing compared to what happens if you drive on it too soon. I’ve seen a delivery truck park on a 4-day-old driveway and leave ruts that didn’t come out. The homeowner had to rip it up and start over. Concrete Drying vs Concrete Curing This is the part most people get wrong, and it’s worth taking a minute to explain. Drying and curing are not the same thing. Drying means the water is evaporating out of the mix. Curing is a completely different process; it’s a chemical reaction called hydration, where the water actually bonds with the cement particles to create a hard, strong material. Here’s the confusing part: you actually need moisture to cure properly. If concrete dries out too fast, it doesn’t finish curing, and you end up with a weaker slab. I always use this analogy with customers: imagine trying to bake a cake, but the oven turns off halfway through. The outside might look done, but the inside isn’t. That’s what happens when concrete dries too fast without curing. Concrete can look and feel dry on the surface within 24 to 48 hours. A lot of people see that and think it’s ready. It’s not. The chemical process happening below the surface takes weeks, and that’s what actually gives the concrete its strength. What Affects Concrete Curing Time? Not every pour cures the same way. New York weather throws all kinds of variables at us: brutal winters, humid summers, and everything in between. Here are the main factors that will affect how quickly (or slowly) your concrete cures. Factor Speeds Up Curing Slows Down Curing Temperature Warm (70–80°F ideal) Cold below 50°F or heat above 90°F Humidity Moderate humidity Very low humidity (dries too fast) Wind None High wind (pulls moisture out) Mix Design Normal water-cement ratio Too much water was added on-site Slab Thickness Thinner slabs cure faster Thick slabs take longer throughout Temperature: Ideal curing happens between 50°F and 85°F. Once you drop below 40°F, the hydration process slows dramatically. Below 32°F, it can stop entirely or, worse, the water in the mix can freeze and cause permanent damage before the concrete has a chance to gain strength. Summer heat above 90°F creates the opposite problem: the surface can dry out too fast before curing finishes. Humidity: High humidity is actually your friend during curing. Low humidity, especially combined with wind, pulls moisture out of the surface faster than the concrete can handle. Wind: Wind is a concrete contractor’s enemy during a pour and during the early curing phase. I’ve seen hot, dry, windy days in New York cause more surface cracking than anything else. We take wind speed seriously when we plan a pour. Mix Design: The water-to-cement ratio in the mix matters enormously. Sometimes workers on a job site add water to make the mix easier to work with. Every extra gallon of water reduces the final strength. I don’t allow that on my jobs. Slab Thickness: A 4-inch driveway slab cures differently than a 12-inch foundation wall. Thinner slabs lose moisture faster from both surfaces. Thicker sections retain heat from the hydration reaction longer, which affects curing throughout. When Can You Walk on New Concrete? For most sidewalks, patios, and residential slabs, you can walk on new concrete after 24 to 48 hours but carefully. No running, no dragging heavy items, and definitely no high heels. I’m serious about the heels. They concentrate incredible pressure on a small point and can leave marks in concrete that hasn’t fully set. For commercial jobs or anywhere with heavier foot traffic, I recommend waiting the full 7 days. It’s not just about whether the surface holds; it’s about whether you might be causing micro-damage that shows up months later. With patios, I also tell people to wait before setting up furniture. A patio table dragged across uncured concrete can scratch the surface finish permanently. And if you’re adding any kind of sealer or stain, wait the full 28 days. Applying a sealer too early traps moisture inside and can cause a host of problems. When Can You Drive on New Concrete? This is
Can Concrete Be Poured in Winter? What New York Property Owners Need to Know
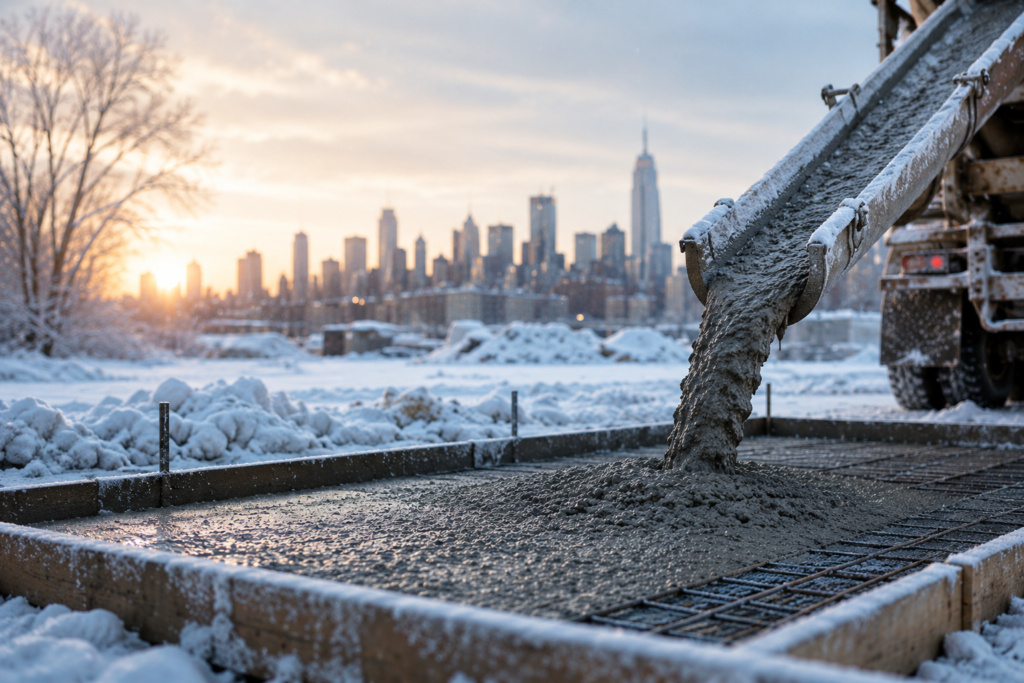
If you’ve been putting off a driveway, patio, or foundation project because winter is coming or already here, you’re not alone. I hear this from property owners all the time. “Can we even do this in the cold?” or “My last contractor told me to wait until spring.” Here’s what I tell them: winter doesn’t have to shut down your concrete project. It just means we need to be smarter about how we approach it. I’ve been pouring concrete across New York for over 20 years. I’ve done driveways in January, foundations in February, and commercial slabs when there was frost on the ground. Winter concrete work is absolutely doable, but it requires preparation, experience, and respect for what the cold can do to fresh concrete if you’re not careful. Can Concrete Really Be Poured in Winter? The short answer is yes, with conditions. The American Concrete Institute (ACI) defines “cold weather concreting” as any period when the air temperature drops below 40°F for more than three consecutive days. That covers a big chunk of the New York calendar from late November through March. The key issue isn’t the pouring itself; it’s the curing. Fresh concrete needs time and warmth to gain strength. When temperatures drop too low, that chemical process slows down dramatically. Below 27°F, water inside the mix can freeze, and if that happens before the concrete has cured, you’re looking at a compromised slab cracking, scaling, and structural weakness. That said, experienced contractors know how to manage all of this. We’ve been doing it for decades. Temperature Range Can Concrete Be Poured? Special Precautions Required 40°F – 60°F Yes Standard cold weather protocols; insulating blankets recommended 27°F – 39°F Yes, with preparation Heated materials, ground warming, and insulated curing blankets are essential Below 27°F Not recommended Extreme risk; requires enclosures, heaters, and high added cost Below 10°F Generally avoided Risk too high; most reputable contractors will reschedule Why Cold Weather Affects Concrete To understand winter concrete, you need to understand what actually happens when concrete cures. When you mix cement, water, sand, and aggregate together, you’re kicking off a chemical reaction called hydration. That reaction is what makes concrete hard and strong, and it generates its own heat in the process. The problem is, cold temperatures slow that reaction way down. Below freezing, it can stop altogether. Fresh concrete that freezes before it reaches adequate strength, typically around 500 psi, can lose up to 50% of its potential strength. That’s not a recoverable situation. You’d be looking at tearing it out and starting over. On top of that, frozen ground creates its own headaches. If you pour on ground that’s heaved or frost-hardened, the slab can shift and crack as the ground thaws in spring. I’ve seen beautiful driveways installed by well-meaning contractors get destroyed by April because nobody accounted for what was happening six inches below the surface. The risks are real, but they’re also manageable. That’s the part most people don’t hear. How Contractors Successfully Pour Concrete in Winter When I take on a winter concrete project, my approach is methodical. Here’s what the process actually looks like on a job site. Step 1: Monitor Weather Forecasts We don’t just check the morning of. I’m watching extended forecasts for at least a week before the pour and planning around the best window. Ideally, I want temperatures to stay above 40°F during the pour and for at least 48 hours after. A good pour day followed by a hard freeze the next night is a problem. Timing matters enormously. Step 2: Prepare the Ground Ground preparation in winter takes extra work. If the ground is frozen, we use heating blankets or propane heaters to thaw it out, sometimes for 24 to 48 hours before we pour. The subbase needs to be thawed and stable. Skipping this step is one of the biggest mistakes I see other contractors make. Step 3: Use Heated Materials When Necessary In colder conditions, we adjust the concrete mix. Hot water is used in the mixing process to bring the concrete temperature up, typically between 55°F and 75°F at delivery. Sometimes we’ll use accelerating admixtures that speed up the hydration process. Ready-mix plants in New York are accustomed to these requests; it’s not unusual at all. Step 4: Protect Fresh Concrete This is where most of the work happens after the pour. We cover the slab with insulating curing blankets almost immediately after finishing. In more severe cold, we set up temporary enclosures around the work area and use propane or electric heaters to maintain the temperature. The goal is to keep the concrete above 50°F for at least 48 to 72 hours longer under harsher conditions. Step 5: Monitor Curing Conditions We don’t just walk away. We check the site the next morning, monitor temperatures, and adjust coverage as needed. If temperatures drop more than expected overnight, we add more insulation. The curing phase is where winter concrete either succeeds or fails. Benefits of Winter Concrete Projects Here’s something most property owners don’t think about: winter can actually be a great time to get concrete work done. Contractor Availability. Winter is slower for most concrete crews. That means you’re not fighting for a spot on someone’s schedule. Projects that would take weeks to get started in the summer can often begin within days in January. Early Spring Readiness. If you pour a driveway or patio in January or February and cure it properly, it’s fully hardened and ready to use by the time spring arrives. No waiting through mud season while your neighbors are still scheduling their projects. Potentially Faster Project Completion. Fewer competing jobs mean your crew isn’t splitting time across multiple sites. Your project often gets more focused attention. No Heat-Related Curing Issues. Extreme summer heat has its own challenges for concrete curing. In moderate winter temperatures (say, 35°F to 45°F), with proper protection, the slower cure can actually produce a denser, stronger slab. Common Winter Concrete Mistakes
How Long Does Concrete Take to Dry? Complete Timeline for Homeowners and Contractors
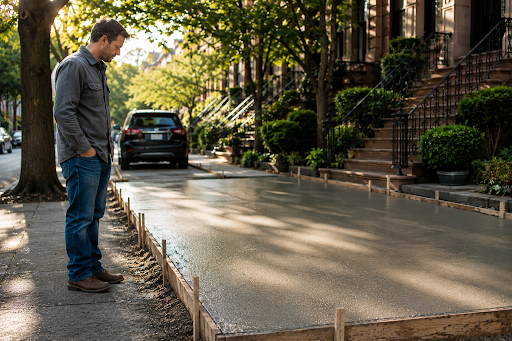
I get this question on almost every job. The slab is freshly poured, still has that smooth gray sheen, and the homeowner is already asking when they can park their car on it. It’s a fair question. You just spent good money on new concrete, and you want to use it. The short answer is: it depends. But I know that’s not what you came here for, so let me break it down properly. How Long Does Concrete Take to Dry? Here’s the quick version most people need: These are general guidelines. Weather, mix design, and slab thickness all play a role. I’ll get into all of that below. Concrete Stage Time Required What You Can Do Initial set 2–4 hours Nothing stay off completely Surface hardened 24 hours Light foot traffic only Early strength 3–7 days Furniture, foot traffic, light loads Vehicle-ready 7 days Passenger cars and SUVs Full cure 28 days Heavy vehicles, full normal use Drying vs. Curing: What’s the Difference? A lot of people use these words interchangeably. They’re not the same thing, and the difference actually matters. Drying is just the surface water evaporating. When concrete looks dry, it might feel solid enough to walk on, but that doesn’t mean much structurally. Curing is a completely different process. It’s a chemical reaction called hydration, where water bonds with cement particles to form the crystalline structure that gives concrete its strength. That process takes weeks, not hours. Think of it like baking bread. The outside of the loaf can look done and feel firm while the inside is still raw. Walk on concrete too early, and you’re essentially cutting into bread that isn’t finished. The surface dries first. The strength builds from the inside out, over the full 28-day curing period. Factors That Affect Concrete Drying Time This is where things get more nuanced. Two slabs poured on the same day can behave completely differently depending on conditions. Heat speeds up chemical reactions, but too much of it can cause problems. In direct summer sun, the surface can dry out too fast and crack before it’s had time to cure properly. Cold temperatures slow everything down. Below 40°F, the curing process essentially stalls. In freezing temperatures, fresh concrete can be destroyed. High humidity slows evaporation, which is actually fine for curing; the slab stays moist longer. Very low humidity and dry air pull moisture out too quickly, which can weaken the surface. Rain Rain on freshly poured concrete is a legitimate concern. In the first few hours after the pour, heavy rain can wash out the surface, cause pitting, and weaken the finish. Light rain after 4–6 hours is generally less damaging, but you still want to protect the surface. Wind dries out the surface faster than almost anything else. On a breezy day, we take extra precautions to keep the concrete from drying unevenly. Mix Design: Not all concrete is the same. Standard residential mixes hit about 2,000–3,000 PSI at 28 days. High-strength mixes used for commercial work or heavy-load applications can hit 5,000 PSI or more and may cure differently. Some mixes include additives that speed up or slow down the set time. Thickness of the Slab: A 4-inch residential driveway slab and a 12-inch commercial foundation don’t cure the same way. Thicker slabs take longer to reach full cure throughout their depth. New York Weather Conditions Working in New York means dealing with everything: brutal July heat, cold snaps in October, and unpredictable spring weather. We adjust our pour schedules, mix designs, and curing methods based on the forecast. A contractor who doesn’t factor in weather is asking for problems. How Long Before You Can Walk on Concrete? For most residential slabs, a driveway, a patio, or a sidewalk, you’re looking at 24 to 48 hours before it’s safe to walk on. I usually tell customers: wait until the next morning. Don’t let kids or pets on it that same day, no matter how firm it looks. At 24 hours, the surface can support a person walking carefully. That doesn’t mean it’s “done”; it’s still curing, but it won’t hold a footprint. If you walked on it for 6 hours and left footprints? That’s going to be there permanently. The surface was still soft enough to deform, and now you’ve got marks in your new concrete. For stamped or decorative concrete, I recommend waiting the full 48 hours before any foot traffic. The surface finish on decorative work is more delicate, and scuffs or scrapes are much more visible. How Long Before You Can Drive on Concrete? This one causes more problems than walking, because people underestimate how heavy vehicles are and how much stress a stationary load puts on a slab that’s still curing. Here’s how I break it down: Vehicle Type Minimum Wait Time Notes Passenger car (sedan) 7 days Standard residential mix SUV or minivan 7 days Same guideline Pickup truck (loaded) 10–14 days Heavier axle loads Delivery truck 28 days Wait for full cure Heavy commercial vehicle 28+ days May require a higher-strength mix Seven days is not a suggestion; it’s the minimum for a standard residential driveway. I’ve had customers park on a new slab for 3 or 4 days and get lucky. I’ve also seen cracking from exactly that mistake. The problem is that you don’t always see the damage right away. Cracks can appear weeks later as the slab finishes curing under stress it wasn’t ready to handle. Step-by-Step Guide to Protect Fresh Concrete Once the crew packs up and leaves, the concrete’s fate is partly in your hands. Here’s what to do. Step 1: Keep Foot Traffic Off. Put up barriers if you have to. Use orange cones, caution tape, whatever works. Keep kids and pets away for at least 24 hours, ideally 48. Even light scuffs on the first day can leave marks. Step 2: Prevent Standing Water After the initial set, standing water on the surface can weaken it. If it rains,
How to Fix Cracks in a Concrete Driveway (DIY Methods That Actually Last)
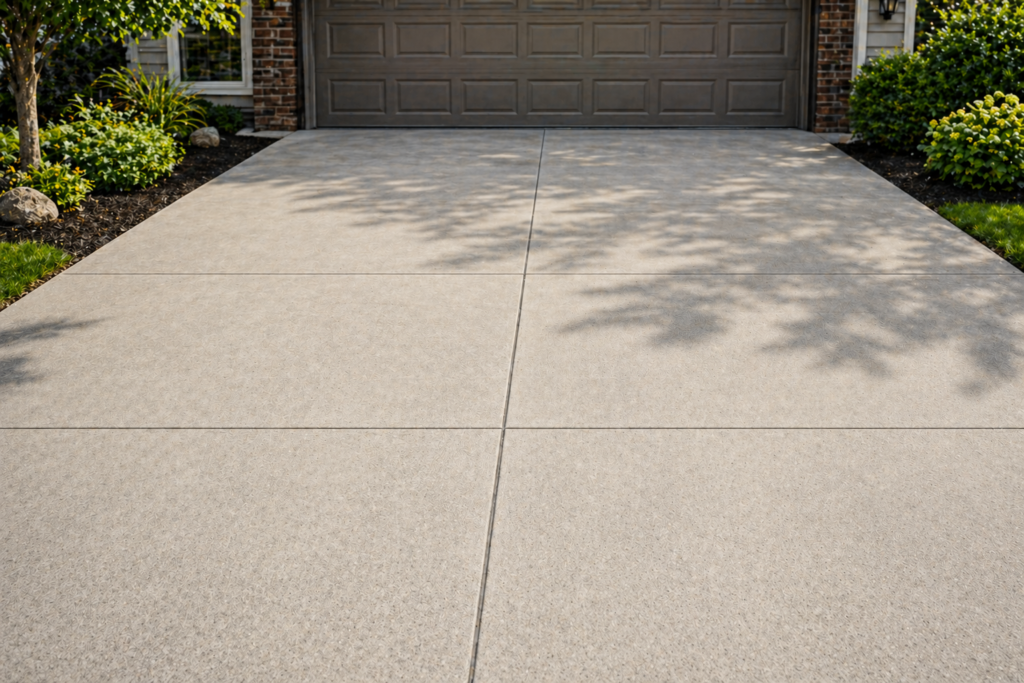
Cracks in a concrete driveway are more than just an aesthetic blemish on your property’s curb appeal; they are early warning signs of structural fatigue. For most homeowners, a driveway is one of the most expensive components of their exterior landscape. Yet, it is often the most neglected. The primary enemy of concrete isn’t actually the weight of its water. When a crack opens, even a hairline one, it creates a direct highway for moisture to reach the sub-base. Once that moisture enters, the clock starts ticking on a “domino effect” of damage that can lead to thousands of dollars in replacement costs. In this guide, we provide the most comprehensive look at how to fix cracks in concrete driveway slabs to ensure your home remains safe and valuable. 1. The Science of Concrete Failure: Why Driveways Break Before you can master how to fix cracks in concrete driveway issues, you must understand the material itself. Concrete is essentially a rigid sponge. It is incredibly strong under compression but very weak under tension. Thermal Expansion and Contraction Concrete is a “living” material that breathes. On a hot summer day, a 50-foot driveway can expand by as much as half an inch. Without proper expansion joints, the internal pressure becomes so great that the concrete must “relieve” itself by cracking. Sub-Base Erosion If the soil underneath your driveway was not compacted properly or if water has washed away the sand bedding, the concrete slab is essentially “bridging” a vacuum. When a 4,000-pound SUV drives over that bridge, the concrete snaps. This is why learning how to fix cracks in concrete driveway early is vital; it prevents the water from reaching that sub-base in the first place. The PSI Limit Most residential driveways are poured to a strength of 3,000 to 4,000 PSI (Pounds per Square Inch). While this is plenty for a standard car, heavy delivery trucks or construction machinery can easily exceed this limit, causing immediate structural failure. 2. The Danger Zone: What Happens If You Ignore Cracks? Many homeowners wait until a crack is wide enough to trip over before researching how to fix cracks in concrete driveway. By then, the damage is often irreversible. The Freeze-Thaw Exploder In regions where temperatures drop below freezing, water enters the crack, turns to ice, and expands by approximately 9%. This exerts thousands of pounds of pressure against the walls of the crack, forcing it wider every single night. Hydrostatic Pressure Water trapped under the slab can push upward (heaving), especially during heavy monsoon seasons or rapid snowmelts. This pressure can tilt entire slabs, creating dangerous trip hazards. Vegetation Sabotage Wind-blown dirt fills open cracks, creating a perfect seedbed for weeds. As roots grow, they act like biological wedges, slowly prying the concrete apart from the inside out. Knowing how to fix cracks in concrete driveway gaps prevents this “biological weathering.” 3. Material Science: Choosing the Right Sealant Stop using cheap “hardware store” mortar. If you want to know how to fix cracks in concrete driveway permanently, you need to understand polymers. Polyurethane Sealants (The Gold Standard) Polyurethane is a reactive polymer that stays flexible once cured. Since driveways move, you need a material that can stretch and compress. Polyurethane bonds chemically to the concrete walls, creating a waterproof seal. Epoxy Resins If the crack is on a vertical surface or requires structural “gluing,” epoxy is the answer. It is stronger than the concrete itself once cured, though it lacks the flexibility of polyurethane. Self-Leveling vs. Non-Sag 4. The Professional Tool Kit Gather these items before you begin. Having the right tools is 50% of the battle when learning how to fix cracks in concrete driveway. 5. Step-by-Step Restoration: How to Fix Cracks in Concrete Driveway Step 1: Deep Cleaning and Preparation Start by scrubbing the crack with a wire brush. If there is moss or deep-seated dirt, use a pressure washer. Important: If you use water, you must wait at least 24–48 hours for the concrete to be bone-dry. Most sealants will not bond to a damp surface. Step 2: The Undercutting Technique (The Pro Secret) Most DIYers just pour filler into a thin crack. To truly understand how to fix cracks in concrete driveway, you must use the “Undercut.” Use a hammer and chisel to widen the crack slightly, creating an inverted “V” shape (wider at the bottom than the top). Step 3: Removing the Dust After chiseling, the crack will be full of fine white powder. This powder acts like a “release agent” that prevents the sealant from touching the concrete. Use a shop vac to get the crack perfectly clean. Step 4: Installing the Backer Rod If your crack is deeper than 1/2 inch, do not fill it entirely with sealant. Press a foam backer rod into the crack until it sits about 1/4 inch below the surface. This ensures “two-point” bonding (the sealant sticks to the two side walls but doesn’t get sucked into the bottom of the crack). Step 5: Applying the Sealant Apply your chosen polyurethane filler. Start at the highest point of the driveway and work down. Let the material flow and settle. Following this professional process is the most effective way for how to fix cracks in concrete driveway permanently. Step 6: The Texture Match Fresh sealant is often shiny. While the sealant is still tacky, you can lightly sprinkle a bit of fine sand over it or brush it with a stiff-bristled broom to match the surrounding rough texture. 6. Comprehensive Troubleshooting Guide Even with a guide on how to fix cracks in concrete driveway, issues can arise. My Filler is Bubbling This usually happens if the concrete was damp or if the temperature was too high during application. The “outgassing” of the concrete creates air pockets in the sealant. The Sealant is Sinking You likely skipped the backer rod. Without a solid base, the liquid sealant will continue to sink into the sub-grade until it cures, leaving a dip in