If your pavers are shifting, separating, or sinking after a season or two, the edging is almost always the culprit. Not the pavers themselves. Not the base. The edging or the lack of properly installed edging.
Most DIY guides skip straight to “push the spike in, and you’re done.” That’s why so many installations fail. This guide covers every step the right way, including the prep work most people skip, so your paver edging holds for decades instead of seasons.
What Actually Goes Wrong With Paver Edging
Before the steps, let’s be honest about the failure points because understanding why things go wrong makes each step make sense.
Pavers expand and contract with temperature changes. Without a firm perimeter holding them in place, they migrate outward. Once the edge starts to drift, the entire field loses its stability. Joints open up, weeds push through, and eventually you’re redoing the whole job.
The three most common mistakes:
- Wrong edging material for the application. Thin plastic snap-together edging is fine for mulch beds. For pavers, you need heavier-duty plastic edging (at least 1/8-inch thick), aluminium, or steel. Aluminium and steel are the gold standard for straight runs. Heavy plastic with a wide base works fine for curves.
- Skipping the trench depth. If the edging isn’t set low enough, it rides above the paver surface, looks terrible, and eventually pops out.
- Spike spacing is too wide. Manufacturers say every 12 inches. In practice, every 8–10 inches on curves and every 12 on straight runs gives you real holding power.
What You’ll Need
- Heavy-duty paver edging (plastic, aluminium, or steel)
- 10-inch galvanised spikes (12-gauge minimum)
- Rubber mallet
- String line and stakes
- Measuring tape
- Spade or flat edging shovel
- Plate compactor or hand tamper
- Coarse gravel (for trench base)
- Polymeric joint sand
Step 1: Mark Your Layout Before You Touch a Shovel
This step gets rushed, and it shouldn’t. Spend time here, and every step after it becomes easier.
Use stakes and a string line to mark the exact perimeter of your paver field. For straight runs, pull the line tight and stake it at both ends. For curves, use a garden hose or spray paint to mark the radius, then follow that line exactly.
Why this matters: Edging installed even an inch off your intended line will force you to cut pavers or leave awkward gaps. Mark it, step back, look at it from multiple angles, then dig.
Step 2: Dig the Edging Trench
Dig a narrow trench along your marked line. The trench needs to be deep enough so that once the edging is in place, the top lip sits flush with or just slightly below the top surface of your pavers.
For most residential paver installations with a 4-inch paver, your trench depth will be around 5 to 6 inches.
Width should be just wide enough to set the edging flange flat on the bottom, typically 3 to 4 inches.
Keep the interior wall of the trench vertical and tight. A sloppy trench means the edging will wobble before you even spike it.
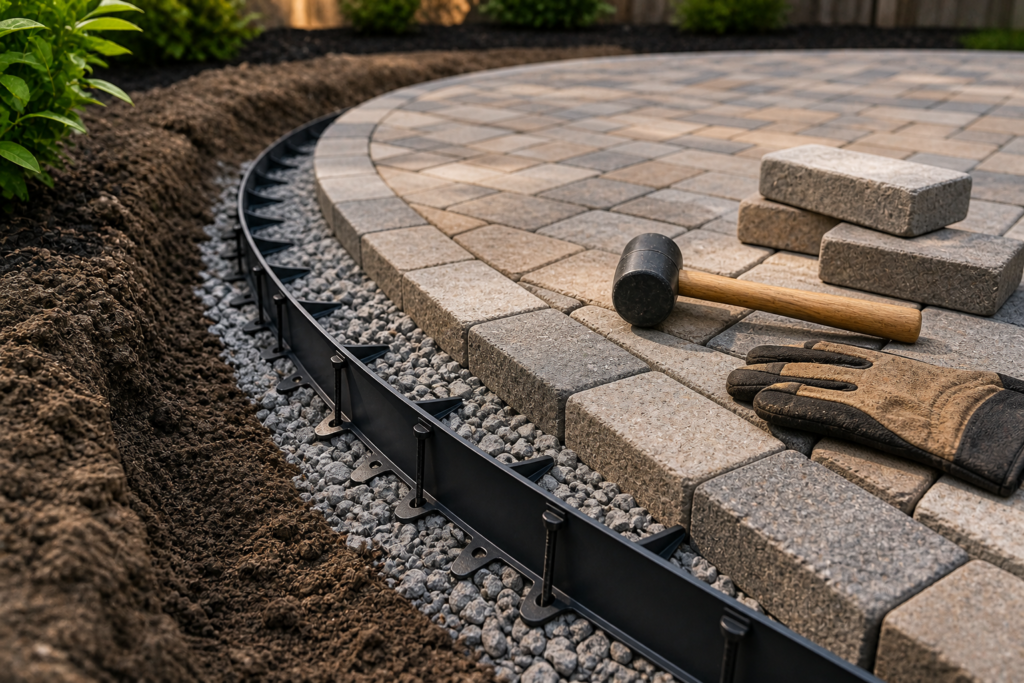
Step 3: Set a Gravel Base in the Trench
Add 1 to 2 inches of coarse gravel to the bottom of the trench and compact it with a hand tamper. This is the step most DIYers skip entirely, and it’s why their edging migrates.
The gravel does two things: it gives the edging something stable to sit on, and it provides drainage so water doesn’t pool and freeze under the edging in winter. Freeze-thaw cycles are what push edging up and out of position over time in colder climates.
Compact the gravel until it doesn’t shift under your foot. Then set the edging in and check the height before moving on.
Step 4: Position and Align the Edging
Set the edging into the trench and run it along your string line. The top edge should sit at or just slightly below paver height. You’ll fine-tune this as you install.
For straight runs, aluminium or steel edging stays true with minimal effort. For curves, heavy plastic edging can be bent to follow gradual curves. For tighter curves (less than a 4-foot radius), score the back of the edging every few inches with a utility knife, so it flexes without kinking.
Check your alignment every few feet. Don’t assume the trench will hold the edging true; it won’t.
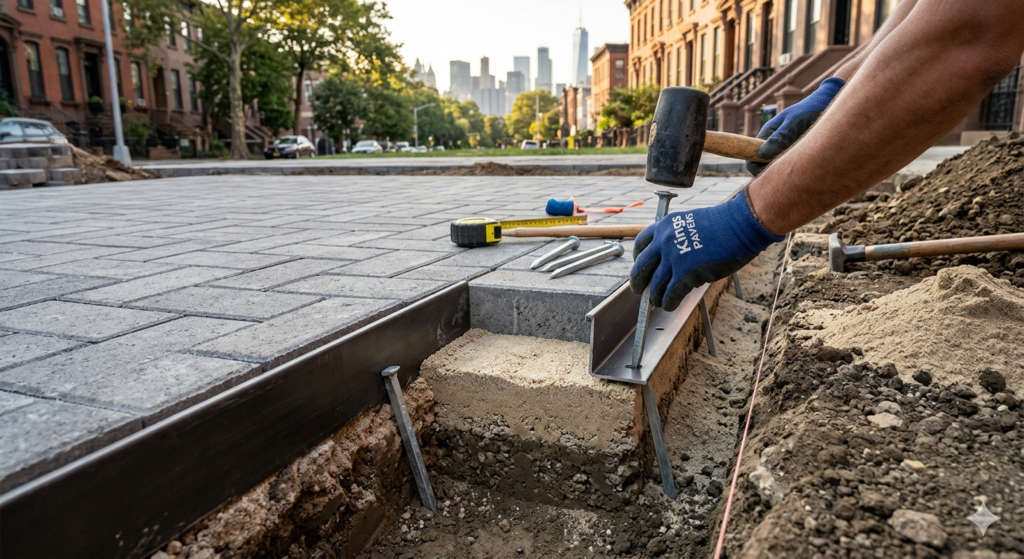
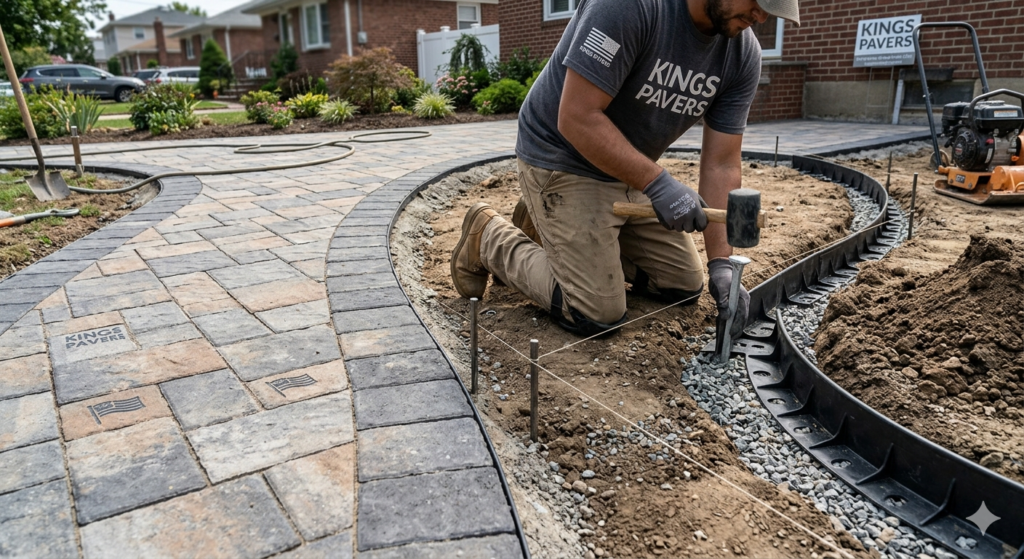
Step 5: Drive the Spikes
This is where most of the holding power comes from, so don’t rush it.
Drive 10-inch galvanised spikes through the pre-punched holes in the edging flange at a very slight outward angle (away from the paver field), about 5 to 10 degrees off vertical. This angle helps the spike resist the outward pressure pavers exert against the edging over time. Straight-vertical spikes pull straight out. Angled spikes have to fight against the direction of the load.
Spacing: 12 inches on straight runs, 8 inches on curves and corners. Use a rubber mallet, not a steel hammer; a steel hammer will deform the spike head, making it harder to drive it flush.
Drive each spike until the head sits flat against the edging. No gaps. If a spike bends during driving, pull it and start with a fresh one in a slightly different spot.
Step 6: Backfill and Compact
Once the edging is spiked in, backfill the trench on the outside with the excavated soil, then compact it firmly with a hand tamper or a plate compactor. This is what locks the system together; the edging can’t move outward if there’s compacted soil pressing back against it from the outside.
Work in 2-inch lifts: add a little soil, tamp it, add more, tamp again. Don’t try to compact the entire trench in one pass.
Check the edging alignment after compaction. The vibration from a plate compactor can shift things slightly. Make any small corrections now, before the pavers go in.
Step 7: Sweep in Joint Sand and Do a Final Check
With the edging secured and the paver field complete, sweep polymeric joint sand into all the joints – including the joint between the pavers and the edging itself. Polymeric sand hardens when wet, which adds lateral resistance and blocks weed germination.
Sweep, compact with a plate compactor, sweep again, then mist with water to activate the binding agents. Let it cure for 24 hours before heavy foot traffic.
Do a final perimeter walk. Push on the edging at several points. It should feel completely solid, no flex, no movement. If any section moves under hand pressure, add spikes before calling the job done.
Why Choose Kings Pavers for Paver Edging
Choosing the right contractor can make the difference between paver edging that lasts decades and one that fails within a few seasons. At Kings Pavers, every installation is done with proper base preparation, precise alignment, and professional-grade materials to ensure long-term durability and a clean finish.
- Proper trench depth and compacted gravel base (no shortcuts)
- Heavy-duty edging materials: aluminum, steel, or reinforced plastic
- Tight spike spacing for long-term stability (no shifting or spreading)
- Clean, precise layout for patios, driveways, and walkways
- Built to handle weather, drainage, and heavy traffic
- Serving Brooklyn, Queens, Manhattan, Bronx & Staten Island
- Free estimates with professional installation from start to finish
Get a free estimate and ensure your paver edging is built to last
When to Call a Pro
Straight residential runs under 100 linear feet are a reasonable DIY project if you have a plate compactor and the time to do the prep work right.
For anything involving complex curves around pools or water features, commercial driveways, slopes steeper than 5%, or areas with heavy vehicle traffic, this is a job for a licensed contractor. The edging systems and base requirements are different, and the margin for error is much smaller.
If you’re in New York City and need paver edging installed on a driveway, patio, or commercial property in Brooklyn, Queens, Manhattan, Staten Island, or the Bronx, Kings Pavers handles the full job from base prep to final compaction. Get a free estimate.
How long does paver edging installation take?
For a standard residential patio (200–400 sq ft), plan on a full day if you’re doing the work yourself; the trench prep and backfill take longer than most people expect. A professional crew typically completes the edging portion in 2–4 hours.
Can I install paver edging without digging a trench?
You can, but the edging won’t hold long-term. Without a trench, spikes can’t reach full depth, and there’s no compacted base for the edging to sit on. Surface-spiked edging is a temporary fix at best.
What’s the best paver edging material?
Aluminium and steel for straight runs, they don’t bend, warp, or degrade. Heavy-duty plastic for curves, it flexes without kinking. Avoid thin plastic snap edging entirely for paver applications.
How often do paver edging spikes need to be replaced?
Galvanised spikes in a properly installed system don’t need replacement. If spikes are pulling out, the problem is usually incorrect angle, too-wide spacing, or inadequate base prep not spike quality.