
Laying a paver walkway looks simple from the sidewalk. It isn’t. What you see on top the pattern, the color, the clean joint lines is maybe 20% of the actual job. The other 80% happens underneath, where nobody ever looks once the project is done: excavation depth, base material, compaction, slope, and edge restraint. Get those wrong, and the walkway might look fine for a season. Then a New York winter hits, the ground freezes and thaws a few times, and pavers that were level in October are rocking underfoot by March.
This guide walks through how to lay a walkway the way it actually needs to be built, not the shortcut version. Whether you’re planning to do the work yourself or just want to understand what a contractor should be doing on your property, the steps below cover what matters and why.
Can You Install a Paver Walkway Yourself?
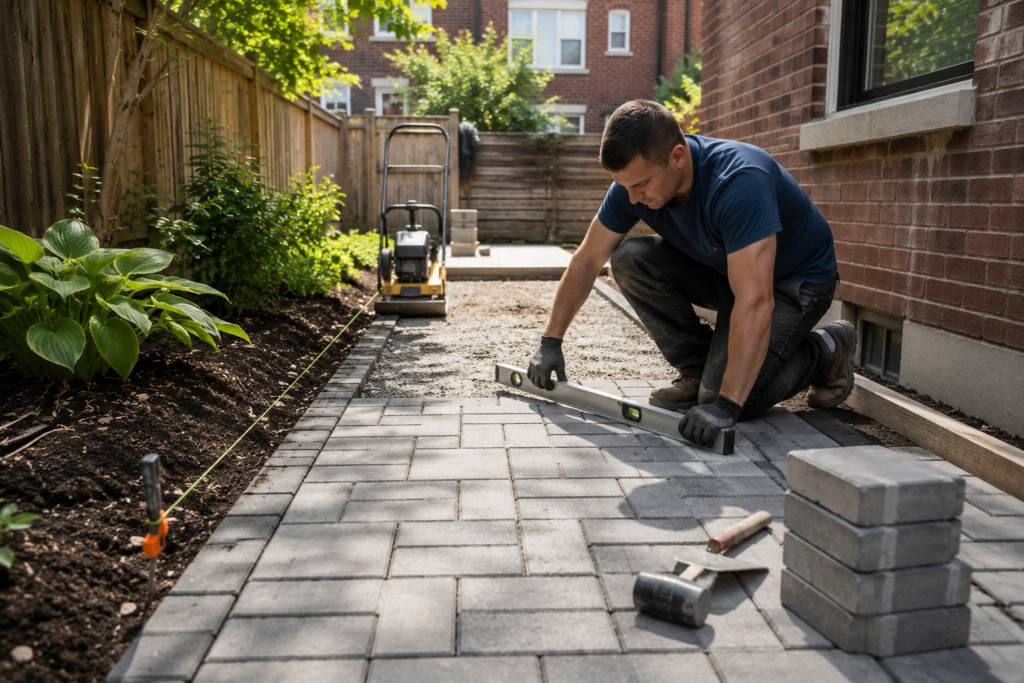
Yes, for some projects. No, for others. It depends less on your motivation and more on the site itself.
A short, straight walkway across a flat, well-drained yard with no utilities nearby is a realistic DIY project for someone who’s comfortable with physical labor and willing to be patient about getting the base right. Excavation and grading aren’t complicated in concept; you’re just removing soil to a consistent depth and sloping it slightly away from the house. The part that trips people up is patience. It’s tempting to eyeball the depth and skip re-checking it every few feet. That’s usually where problems start.
Compaction is where a lot of DIY walkways go wrong. A plate compactor isn’t hard to run, but base material needs to go down in layers, not dumped in all at once and compacted a single time. Skipping that step doesn’t show up immediately. It shows up eight months later as a low spot.
Cutting pavers is another sticking point. A rented paver saw or splitter, can handle straight cuts along a border reasonably well, but curves, tight corners around steps, or matching an existing pattern take practice most homeowners haven’t had. A few bad cuts on a small job are forgivable. A lot of them on a long walkway start to look obviously off.
Drainage is where DIY projects most often go sideways in New York, specifically. If the walkway runs close to a foundation, crosses an existing drainage path, or sits somewhere water already tends to pool, getting the grade wrong can send water toward the house instead of away from it. That’s not a cosmetic mistake; it’s a foundation and basement problem waiting to happen.
If your project involves significant excavation, old concrete removal, drainage correction, retaining walls, or utilities you’re not fully sure about, that’s usually where it makes sense to bring in someone who does this for a living.
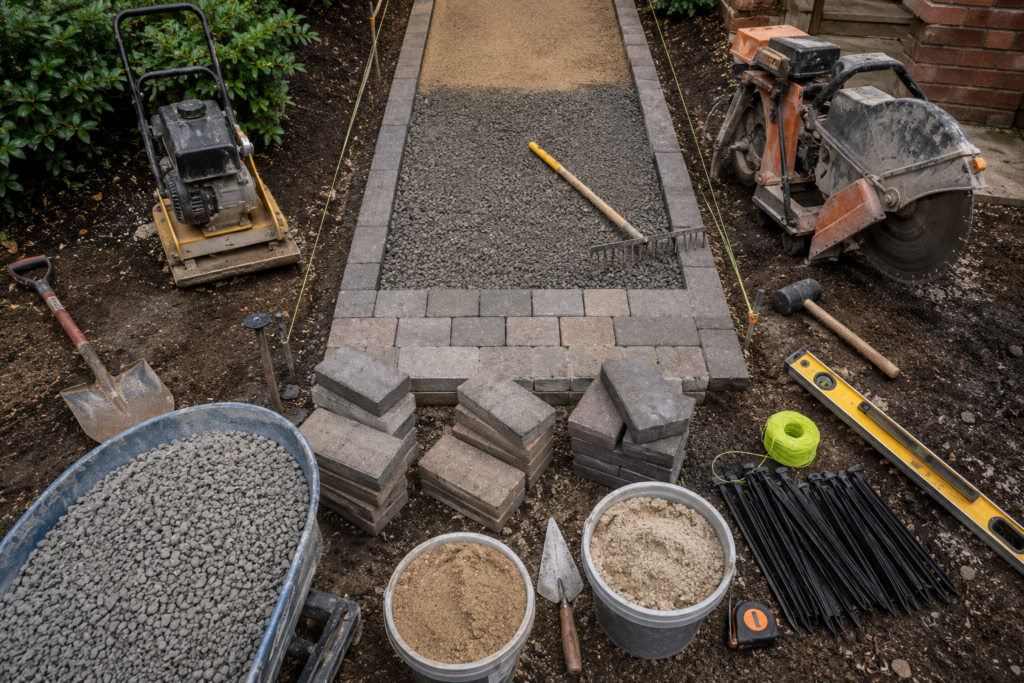
What You’ll Need to Lay a Paver Walkway
| Material/Tool | What It’s Used For | Why It Matters |
| Pavers (concrete, brick, or natural stone) | The visible walking surface | Material choice affects cost, durability, and how the walkway handles freeze-thaw cycles |
| Base material (typically crushed stone/gravel) | Structural foundation beneath the walkway | A properly compacted base is what actually holds the walkway in place over time |
| Bedding sand | Thin leveling layer between base and pavers | Creates a consistent, level surface for setting pavers, not a substitute for a solid base |
| Edge restraints | Plastic, metal, or paver-set borders along the sides | Keeps pavers from spreading or shifting outward over time |
| Polymeric or joint sand | Fills the gaps between pavers | Locks pavers together and helps limit weed growth and insect intrusion |
| Shovel and rake | Excavation and rough grading | Basic tools for removing soil and shaping the sub-base |
| Level and string line | Checking slope and alignment | Confirms the walkway is sloped correctly and running straight |
| Plate compactor | Compacting base material and bedding sand | Without proper compaction, settling is almost guaranteed |
| Paver saw or splitter | Cutting-edge pavers | Needed for clean cuts along borders, curves, and obstacles |
How to Lay a Walkway With Pavers: Step by Step
Step 1: Plan the Walkway
Before any digging starts, work out the route, width, and pattern. Think about where the walkway needs to connect: a driveway, a porch, a gate, and whether it needs to accommodate two people walking side by side or just one. Check for existing structures, tree roots, and downspouts along the path. In New York, it’s also worth confirming the location of any underground utility lines before excavation begins; contact the appropriate utility locating service for your area rather than guessing. Once the route and width are set, you can work out roughly how much paver material, base stone, and sand the project will need.
Step 2: Mark the Area
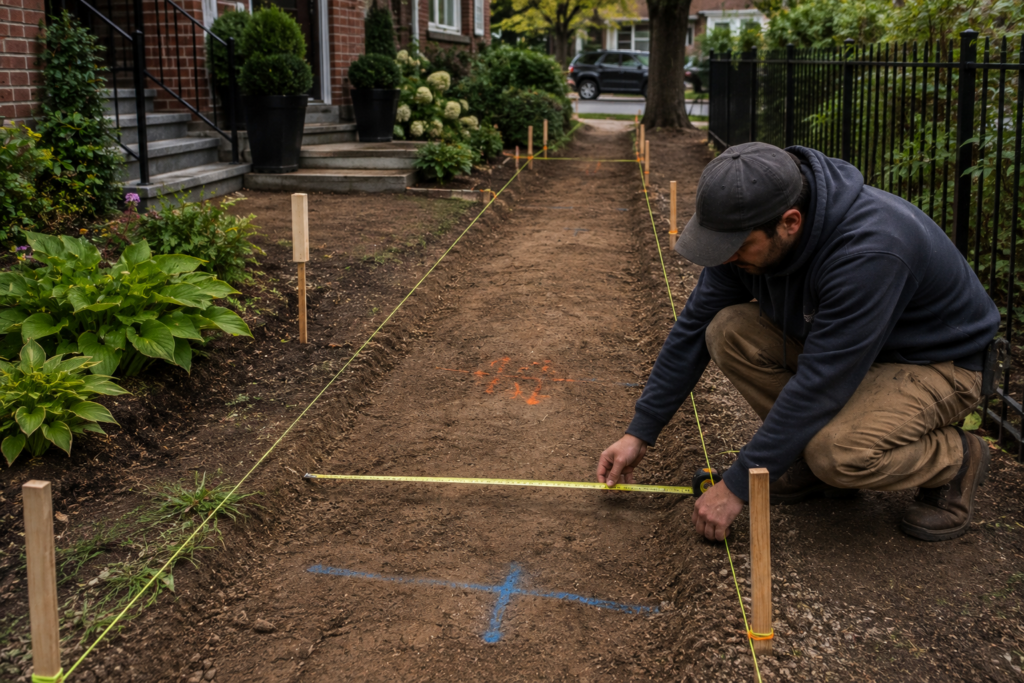
Use stakes and string, or marking paint, to lay out the exact walkway boundaries. Stand back and look at the layout from a few angles before committing to it. Walkways that look fine on paper sometimes look awkward once they’re staked out against the actual house and landscaping. This is the cheap step to get right; changing your mind now costs nothing. Changing your mind after excavation costs a lot more.
Step 3: Excavate the Walkway
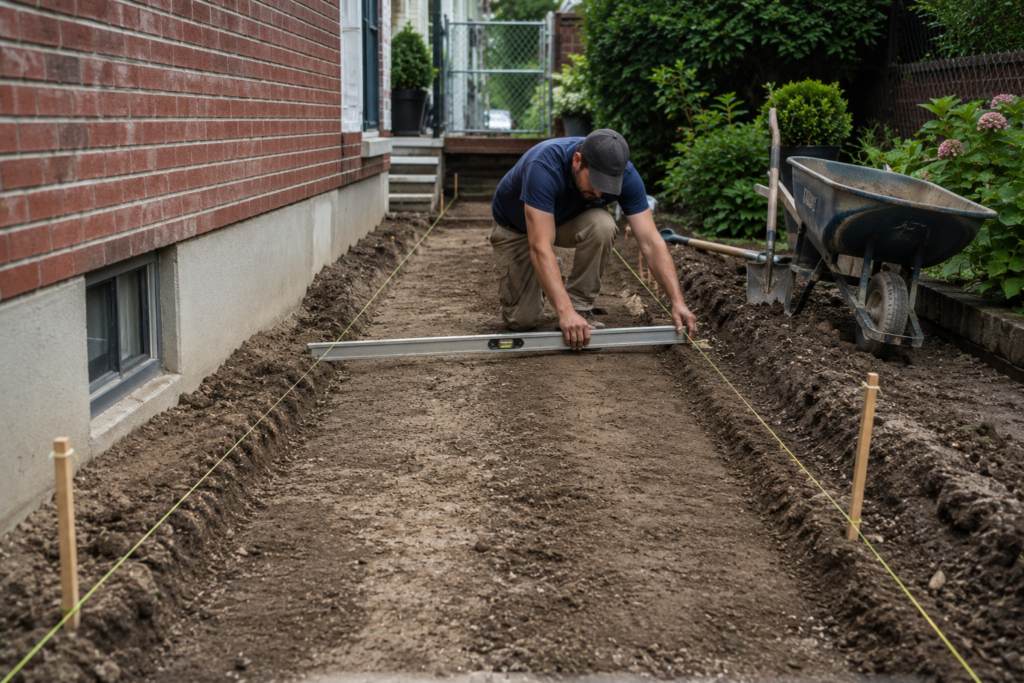
This is where the “how deep should you dig” question actually depends on your specific project rather than a single number that applies everywhere. Excavation depth is driven by the paver thickness, the depth of base material your soil conditions call for, drainage needs, and how much foot or vehicle traffic the walkway will see. A basic residential garden path and a commercial walkway that needs to handle heavier use and stricter drainage aren’t excavated to the same depth. Soil type matters too. Clay-heavy soil that holds water differently than sandy or well-draining soil often needs a different base depth to perform reliably through New York’s freeze-thaw cycles.
If there’s an old concrete walkway or existing pavers to remove first, factor that demolition work into the timeline. Removing old material, especially concrete, adds real time and labor before the actual walkway installation even begins.
Step 4: Establish the Grade and Drainage
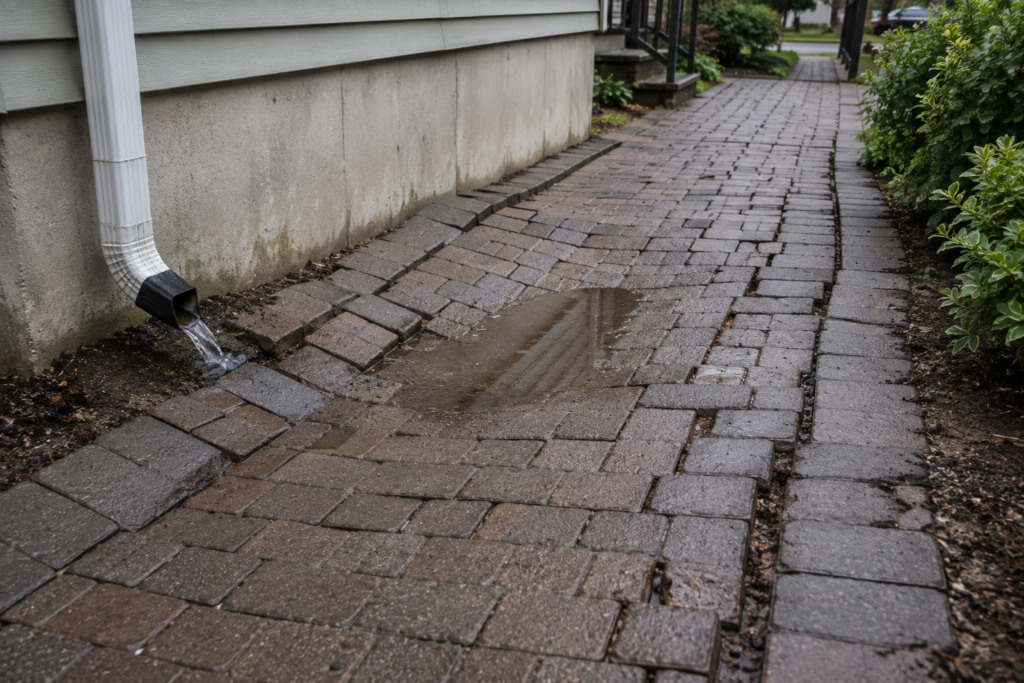
Once the area is excavated, the base needs to be shaped with a slight slope generally away from the house or building, never toward it. Think of it less as “building a walkway” and more as “building a shallow channel that happens to have a walking surface on top.” Water needs somewhere to go. If the walkway sits flat or, worse, tips slightly toward the foundation, water will follow that path every time it rains, and in New York that adds up over a full year of rain, snowmelt, and ice.
Low spots are the enemy here. Even a small dip that doesn’t look like much when the base is exposed will collect water once the walkway is finished, and that water sitting under the pavers is exactly what accelerates freeze-thaw movement.
Step 5: Install and Compact the Base
This step matters more than any other in the entire process. Inadequate base preparation is the single biggest reason paver walkways settle, develop low spots, or shift out of alignment within a few years.
The base material should go down and get compacted in layers, often called lifts, rather than being filled in all at once. Compacting a thick layer of loose material in one pass tends to leave the bottom under-compacted even when the surface looks solid. Each lift needs to be spread evenly, checked for grade, and run over with a plate compactor before the next layer goes on top. It’s slower than dumping the whole depth in at once. It’s also the difference between a walkway that stays flat for years and one that starts dipping after its first real winter.
Step 6: Add the Bedding Layer
A thin layer of bedding sand goes on top of the compacted base, screeded flat and level, right before the pavers are set. This layer’s job is to give the pavers a smooth, consistent surface to sit on, not to fix problems in the base underneath. If the base has a low spot, adding extra bedding sand to level things out over that spot is a shortcut that tends to fail. Sand compresses differently than crushed stone, and a thicker-than-normal pocket of bedding sand under one section of walkway often settles at a different rate than the rest, creating a new low spot right where the “fix” was applied.
Step 7: Lay the Pavers
Start from a straight, reliable reference line, often a building edge or a taut string line, and work outward from there, keeping the pattern consistent as you go. Check alignment regularly rather than waiting until the end to notice the joints have drifted out of line. Try not to walk directly on the bedding sand any more than necessary before the pavers are down; disturbing that layer creates inconsistencies you’ll be compensating for later. Keep joint spacing even across the whole walkway. Inconsistent gaps are one of the more obvious signs of a rushed installation.
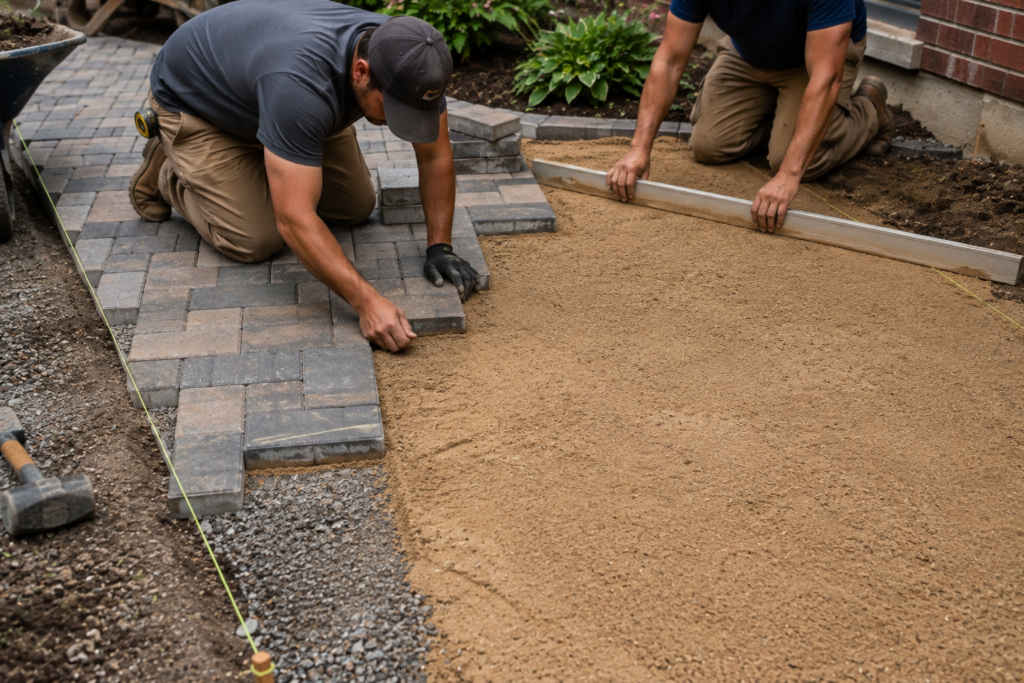
Step 8: Cut Edge Pavers
Full pavers won’t fit perfectly along every border, curve, or obstacle, so cutting becomes necessary at the edges. Plan cuts, so you’re not left with slivers of paver smaller than roughly a third of a full unit. Those small pieces tend to crack or pop loose more easily than a properly sized cut. A little upfront planning on layout can reduce how many awkward cuts you end up needing.
Step 9: Install Edge Restraints
Edge restraints run along both sides of the walkway to hold the outer row of pavers in place. Without them, or with restraints installed loosely, the outer pavers gradually creep outward under foot traffic and seasonal ground movement. Once that starts, the joints along the edges widen, sand washes out of them faster, and the whole border can start to look ragged within a couple of seasons, even if the rest of the walkway is holding up fine.
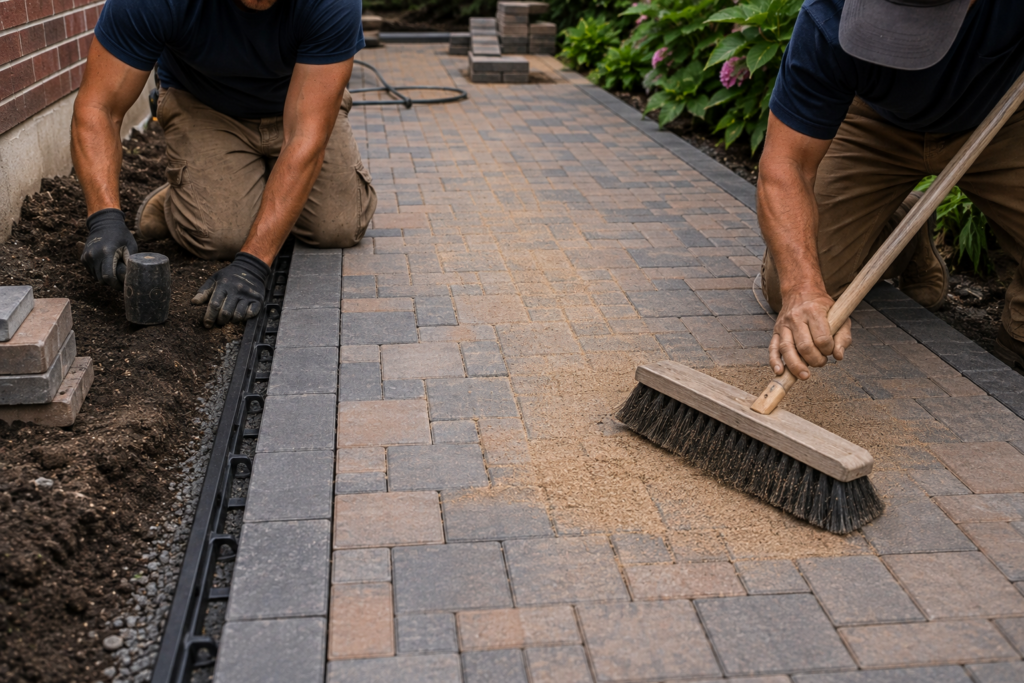
Step 10: Compact and Fill the Joints
After the pavers are laid, a final pass with the plate compactor (using a protective pad to avoid marking the pavers) seats them into the bedding layer. Joint sand, often polymeric sand, is then swept into the gaps between pavers. Polymeric sand hardens when activated with water, locking pavers together and helping resist weed growth and sand washout. Installation requirements vary by manufacturer. Some need to be swept, misted, and cured in specific steps, so follow the product instructions for the specific sand being used rather than assuming every brand behaves the same way.
Step 11: Final Inspection
Walk the finished walkway and check for alignment issues, low spots where water might collect, loose or rocking pavers, fully filled joints, and secure edge restraints. It’s much easier to fix a small issue now than after a full season of freeze-thaw cycles has had a chance to work on it.
Common Paver Walkway Installation Mistakes
Installing pavers directly over soil. This is the fastest way to get a walkway that looks fine for a few months and then sinks unevenly. Soil compresses and shifts on its own; without a proper base, the pavers move with it.
Poor or inconsistent compaction. A walkway that wasn’t compacted in proper layers may look level on installation day. Homeowners often notice the problem the following spring, when certain sections have dropped slightly while others haven’t.
Getting the drainage wrong. A walkway sloped even slightly toward a building instead of away from it can quietly direct water toward the foundation for years before anyone connects the dots between a damp basement and a paver project.
Using bedding sand to compensate for a bad base. It creates an inconsistency that tends to settle unevenly, showing up later as a dip in one specific spot rather than a uniform problem across the whole walkway.
Skipping edge restraints, or installing them loosely. The border pavers are the first thing to move. Once they do, the rest of the walkway starts to spread and loosen from the outside in.
Poor or rushed cuts. Small, awkward cut pieces along the edges are more prone to cracking and popping out, and they’re usually one of the first things a homeowner notices is “off” about the finished look.
Inconsistent joint spacing. It’s a small detail, but uneven joints are one of the clearest signs to a trained eye, and often to the homeowner too, that the layout wasn’t carefully controlled during installation.
Ignoring nearby downspouts. A walkway built near a downspout without accounting for where that extra water goes can end up with a chronically saturated section of base, which accelerates settling in exactly that spot.
Not planning for New York freeze-thaw conditions. A base and drainage plan that might hold up fine in a milder, drier climate can fail here specifically because the ground repeatedly freezes, expands, thaws, and contracts through the winter months.
How New York Weather Affects a Paver Walkway
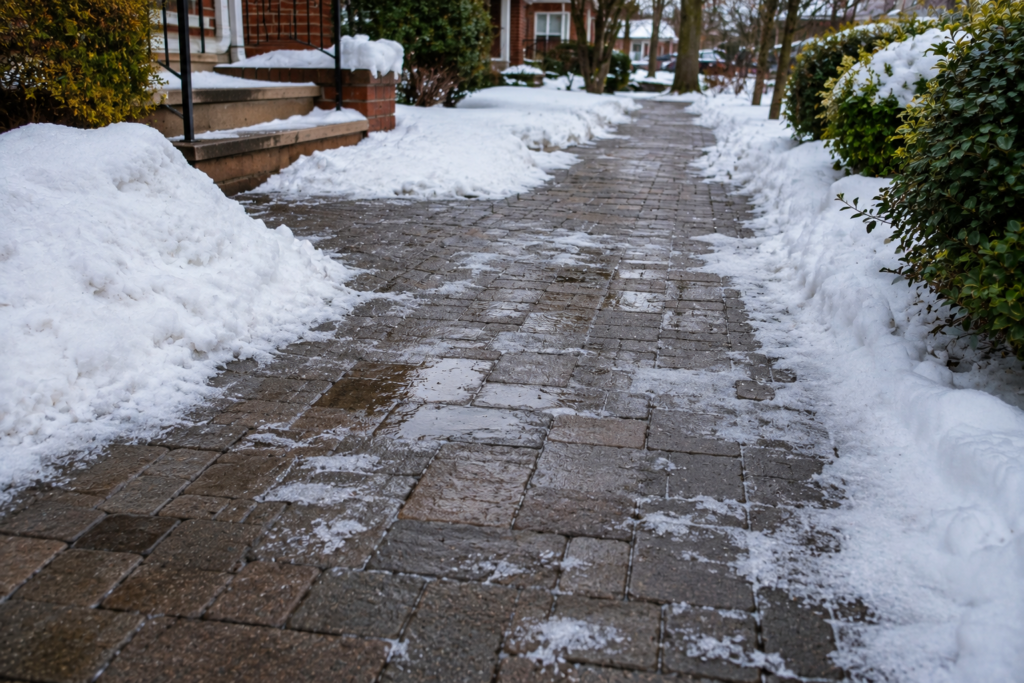
New York’s climate puts more stress on a walkway than a lot of homeowners expect. Winters bring repeated freeze-thaw cycles: the ground freezes, water in the soil expands, then it thaws again, sometimes several times in a single winter. Every one of those cycles pushes and pulls on whatever is beneath the pavers. A well-compacted base with proper drainage shrugs most of that off. A weak or poorly drained base moves with it, a little more each cycle, until the surface is visibly uneven.
Snow and ice add another layer to it. Standing water that doesn’t drain properly can freeze on the surface, creating a slip hazard, and ice that forms within the joints or base material contributes to the same expansion-and-contraction process working against the structure underneath. Heavy rainfall throughout the rest of the year tests drainage just as much as winter does. A walkway that can’t move water away efficiently is going to show wear faster regardless of the season.
Winter deicing is worth a mention too. Not all deicing products are equally gentle on pavers and joint sand, so it’s worth checking that whatever’s being used on your walkway is appropriate for the paver material you have.
None of this means a paver walkway can’t hold up well in New York. It means the base and drainage work has to be done with this climate specifically in mind, not treated as a formality.
DIY vs Professional Walkway Paver Installation
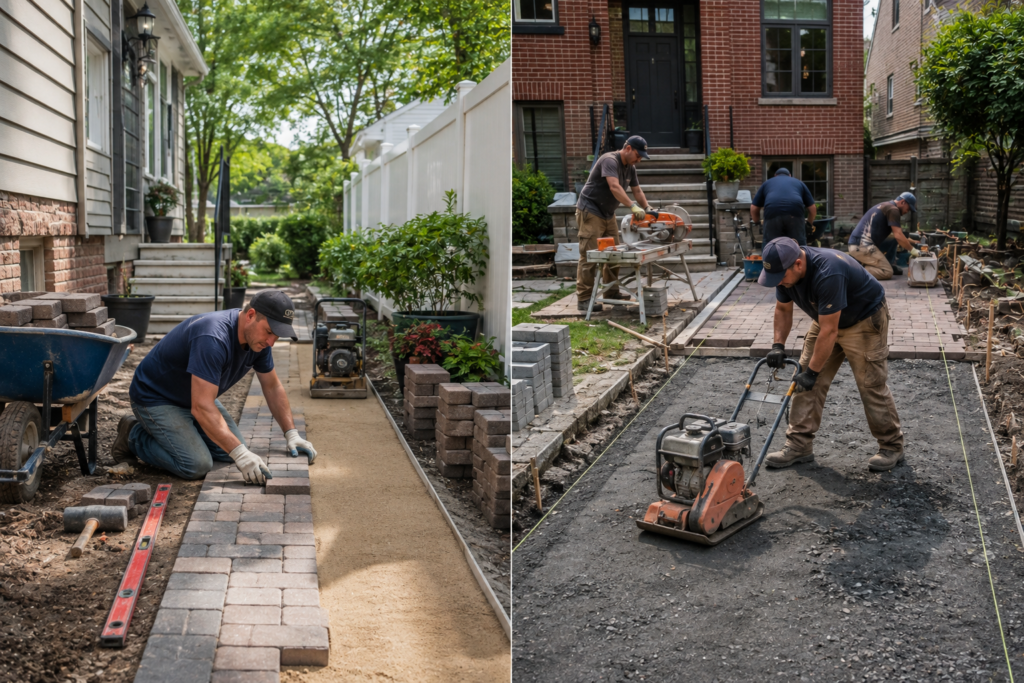
| Factor | DIY Installation | Professional Installation |
| Labor | You provide all the labor, which saves money but takes real time and physical effort | Labor cost is built in, but the work moves faster with an experienced crew |
| Equipment | Plate compactors and paver saws are typically rented, adding cost and logistics | Contractors generally already own or maintain the right equipment |
| Time | Often slower for first-timers, especially through the base preparation stages | Experienced crews usually complete comparable projects faster |
| Cutting | Doable for simple straight cuts; curves and tight corners are harder to get clean | Generally more consistent, especially on complex patterns or borders |
| Base preparation | Achievable with patience and attention to compaction in proper lifts | Typically more consistent due to repeated experience reading soil and site conditions |
| Drainage | Manageable on simple, flat sites; riskier near foundations or existing drainage issues | Better suited to correcting existing drainage problems or complex grading |
| Complex layouts | Intricate patterns, curves, or tie-ins to steps and porches are harder to execute well | More equipped to handle layout complexity and custom cuts |
| Quality control | Depends entirely on the installer’s own attention to detail and willingness to redo sections | Built-in through experience, though quality still varies by contractor |
A short, simple, flat walkway with no drainage complications is a reasonable DIY undertaking for someone patient enough to prioritize the base over the visible surface. A project involving significant excavation, existing concrete removal, drainage correction, tight urban access, or a larger residential or commercial layout is usually where bringing in professional walkway paver installation experience starts to pay for itself, both in the finished result and in avoiding a redo a few years down the line.
How to Maintain a Paver Walkway After Installation
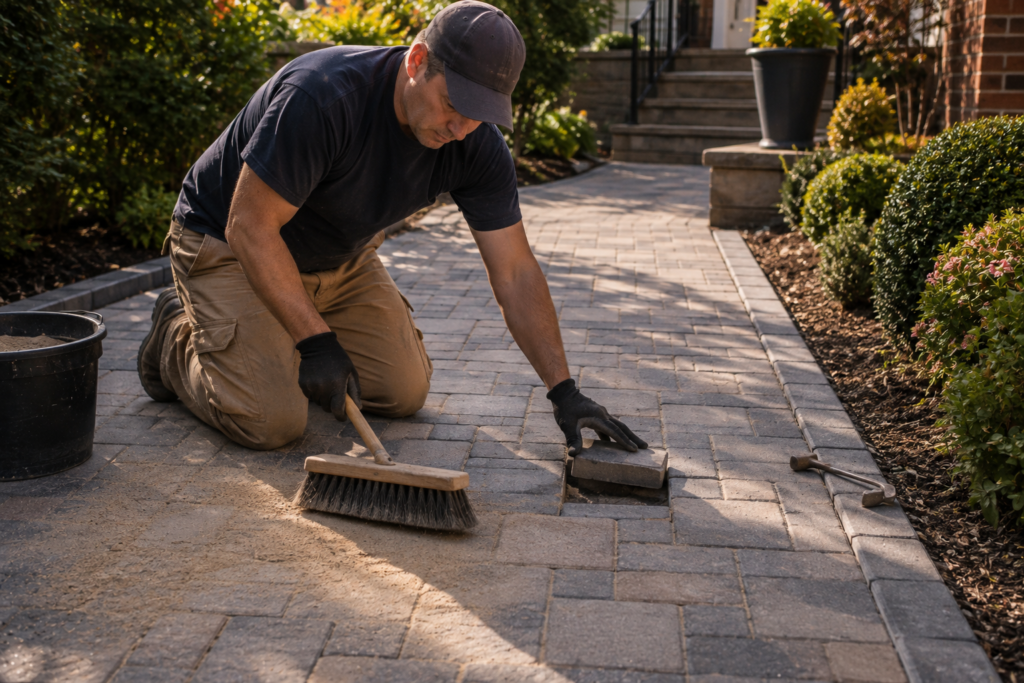
Regular sweeping keeps debris and organic material from building up in the joints, which helps limit weed growth before it starts. When weeds do show up in the joints, dealing with them early is a lot less work than letting them establish a root system.
Joint sand isn’t permanent it can wash out gradually over time, especially in areas with heavy rain or snowmelt runoff. Checking the joints periodically and topping off sand as needed keeps the pavers locked together the way they were designed to be.
Stains from things like leaf tannins, rust from patio furniture, or oil are usually easier to deal with the sooner they’re addressed, using a cleaner appropriate for the specific paver material.
Keep an eye out for any pavers that start to rock, sink, or sit noticeably higher or lower than their neighbors; that’s often an early sign of base movement worth investigating before it spreads.
Check drainage periodically too, particularly after major storms, to make sure water is still moving off the walkway the way it did when it was first installed. Landscaping changes, soil settling, or nearby construction can shift drainage patterns over the years even when the walkway itself hasn’t changed.
In winter, use a deicing product appropriate for your specific paver material, and avoid metal shovels or aggressive scraping tools that can chip paver edges.
If an individual paver cracks or is damaged, it can usually be replaced on its own without redoing the surrounding walkway, provided the base underneath that section is still sound.
How Long Does It Take to Install a Paver Walkway?
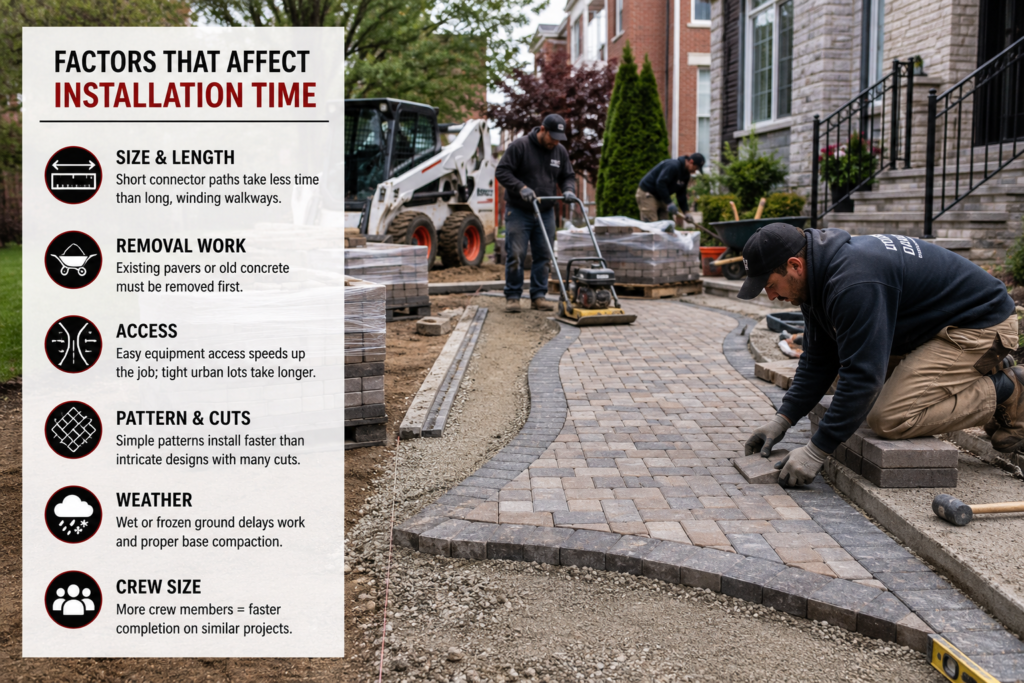
There’s no single timeline that applies to every walkway, because the variables involved differ so much from one project to the next. Walkway size and length are the obvious ones: a short connector path takes far less time than a long, winding walkway across a large property. Whether there’s an existing walkway or old concrete to remove first adds real time before installation even begins.
Access matters more in New York than in a lot of other markets. A backyard or front walkway with easy equipment access moves faster than a project on a tight urban lot where materials have to be moved by hand or through a narrow side yard. Pattern complexity and the amount of cutting required also affect the timeline. A simple running-bond layout goes in faster than an intricate pattern with a lot of custom cuts around curves or obstacles. Weather plays a role too; wet or frozen ground isn’t workable for proper base compaction. Finally, crew size changes the math significantly: a two-person job and a four-person crew aren’t going to finish at the same pace on a comparable project.
Frequently Asked Questions
In general terms: plan the route and layout, excavate to a depth appropriate for your paver and base specifications, establish proper grade and drainage, install and compact a base material in layers, add a thin bedding sand layer, lay and align the pavers, cut edge pieces as needed, install edge restraints, and finish by compacting the surface and filling the joints with sand.
Can you lay walkway pavers directly on dirt?
No. Pavers set directly on soil without a proper compacted base are very likely to settle unevenly, since soil shifts and compresses on its own over time, especially through New York’s freeze-thaw cycles.
What should go underneath walkway pavers?
A compacted base layer of crushed stone or similar aggregate, topped with a thin layer of bedding sand right before the pavers go down.
How deep should you dig for a paver walkway?
It depends on the paver thickness, base specification, soil type, drainage needs, and expected use of the walkway; there isn’t one depth that applies to every project. A qualified installer can assess this based on your specific site.
Do you need sand under walkway pavers?
Yes, a thin bedding sand layer sits between the compacted base and the pavers to create a level, consistent setting surface. It shouldn’t be relied on to correct problems in the base itself.
How do you keep walkway pavers from moving?
Proper base compaction, correctly installed edge restraints along both sides, and well-filled joints (often with polymeric sand) all work together to keep pavers locked in place.
Is installing a paver walkway a good DIY project?
For a short, simple, flat walkway with no drainage complications, it can be a realistic DIY project for a patient homeowner. Larger projects, significant excavation, drainage correction, or tight-access urban sites are usually better suited to professional installation.
How long does a paver walkway last?
Longevity depends heavily on how well the base, drainage, and edge restraints were installed and maintained over time, along with material choice and local climate conditions. A properly built and maintained walkway can last many years.
How does New York winter weather affect pavers?
Repeated freeze-thaw cycles cause soil beneath the walkway to expand and contract, which stresses a poorly built base far more than a properly compacted one. Snow, ice, and deicing products add further considerations for both structure and surface maintenance.
When should you hire a professional paver installer?
Generally, when a project involves significant excavation, existing concrete or walkway removal, drainage correction, complex patterns or cuts, tight urban access, or a larger residential or commercial scope, the cost of getting it wrong outweighs the savings of doing it yourself.
CTA
A short, simple walkway on a flat, well-drained lot is a project a patient DIY homeowner can realistically take on, as long as the base gets the attention it needs. But if your project involves drainage problems, significant excavation, uneven grading, tight access on an urban lot, or a larger residential or commercial layout, it’s worth having someone experienced take a look before you start digging. If you’d like an assessment or estimate for professional walkway paver installation, reach out, and we can take a look at your property and talk through what the site actually needs.