
I get this question a lot, usually from someone standing in their backyard with a pallet of pavers already delivered, trying to figure out if they really need to rent a plate compactor and haul in gravel.
The honest answer is yes, you can technically lay pavers directly on dirt or grass. People do it every weekend across New York. But “can” and “should” are two very different things, and after twenty-plus years of installing patios, driveways, and walkways from Long Island to the Hudson Valley, I can tell you which projects hold up and which ones end up as repair calls.
Skipping the base is tempting. It saves time, cuts out the cost of gravel and delivery, and skips the most physically demanding part of the job. I understand the appeal. But before you skip it, you should know exactly what you’re trading away.
Can You Lay Pavers Without a Base?
Yes, you can lay pavers without a base, but it’s rarely a good idea for anything permanent. Without a compacted gravel base, pavers shift, sink, and settle unevenly, especially through New York’s freeze-thaw winters. Skipping the base works only for temporary or very low-traffic projects like a short garden path.
That’s the short version. Here’s the longer one.
If you’re working on a small decorative path through a flower bed, something nobody’s going to walk on with regularity or drive a wheelbarrow over, you can get away with laying pavers on compacted soil or a thin layer of sand. I’ve seen plenty of these hold up fine for years because the loads are light and the area is small enough that any minor settling isn’t a big deal.
But for a patio, walkway, driveway, or anything near a house foundation, skipping the base is a mistake I’ve been called out to fix more times than I can count. New York soil isn’t forgiving. We’ve got clay-heavy ground in a lot of areas; we get real winters with deep frost, and heavy rain events that used to be occasional are happening more often. All three of those conditions punish an installation that doesn’t have proper support underneath it.
Professionals don’t recommend skipping the base because pavers themselves aren’t what holds the surface together. The base is. The pavers are just the top layer sitting on a system that’s supposed to handle drainage, weight, and ground movement. Take that system away, and you’re basically hoping the dirt underneath cooperates. It usually doesn’t.
Why a Proper Base Is So Important
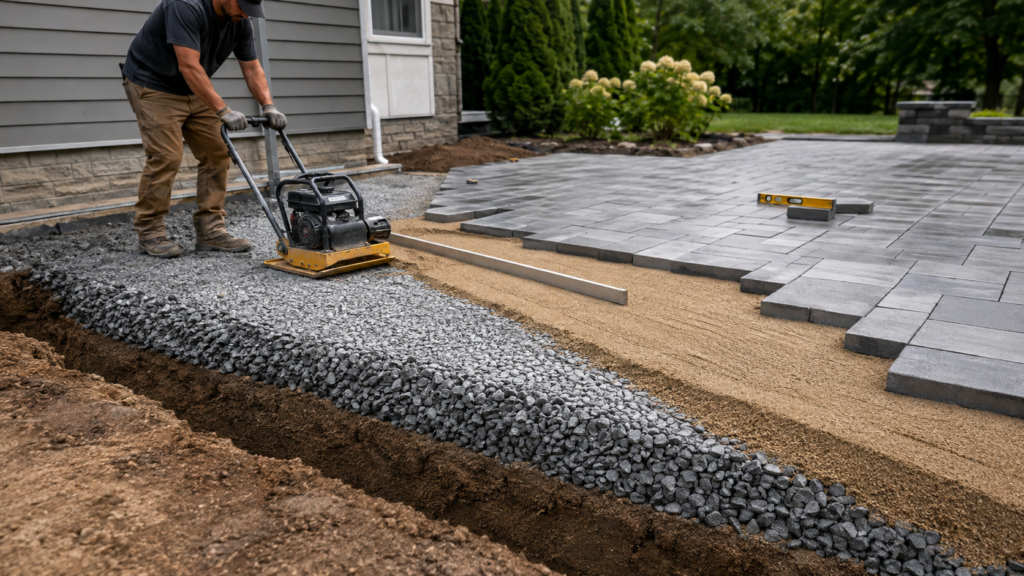
A paver base isn’t just filler material. It’s doing several jobs at once, and each one matters.
Stability. Compacted gravel locks together and creates a firm, load-bearing surface. Without it, pavers rest directly on soil that shifts with moisture, temperature, and foot traffic.
Drainage. Water needs somewhere to go. A properly graded gravel base lets water move through and away from the pavers instead of pooling on the surface or seeping into the joints.
Weight distribution. Whether it’s people walking across a patio or a car parked on a driveway, the base spreads that weight out across a wider area so no single spot takes the full impact.
Frost protection. This one is huge in New York. When water sits under pavers and freezes, it expands. That expansion pushes pavers up and out of alignment. A properly built base, especially one that extends below the frost line for driveways, reduces how much that freeze-thaw cycle can move things around.
Long-term durability. Put all of the above together, and you get a surface that stays flat, drains correctly, and holds its shape for decades instead of a couple of seasons.
Here’s a side-by-side look at what you’re really choosing between.
| Factor | Without Base | Proper Base Installation |
| Stability | Shifts and sinks over time | Stays firm under foot and vehicle traffic |
| Drainage | Water pools on surface | Water drains through and away |
| Weight handling | Pavers bear load directly | Load spread across compacted stone |
| Frost resistance | Highly vulnerable to heaving | Built to handle freeze-thaw cycles |
| Weed growth | Common through gaps and soft ground | Minimized by compacted layers |
| Lifespan | 1–3 years before major issues | 20–30+ years with basic upkeep |
| Repair frequency | Frequent, often within the first year | Rare, mostly routine maintenance |
What Happens When You Skip the Base?
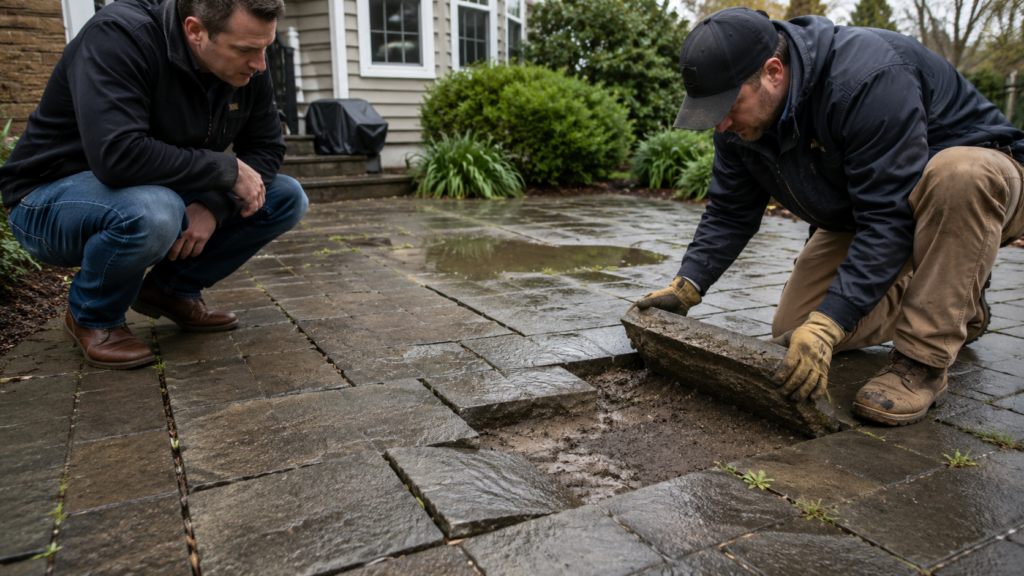
I’ve walked onto a lot of properties where someone laid pavers straight on dirt because a video made it look simple. The early stages usually look fine. It’s what happens over the following months that tells the real story.
Uneven settling is the first thing homeowners notice. Foot traffic compresses soft ground unevenly, so certain pavers start sitting lower than their neighbors. Once that starts, it doesn’t stop on its own.
Weed growth becomes a constant fight. Without a compacted base blocking growth from underneath, weeds and grass push up through the joints within a single growing season.
Water pooling shows up after the first heavy rain. Instead of draining through a graded base, water sits on top of the pavers or collects in low spots, which is exactly the kind of thing that turns a patio into a mosquito breeding ground.
Loose pavers follow soon after. With nothing locking them into place from below, individual pavers start rocking underfoot. I’ve had homeowners call me because a paver flipped up and became a trip hazard.
Cracking happens more with concrete pavers than natural stone, but it happens either way once there’s a void underneath from settling. Pavers aren’t designed to span gaps. They need consistent support.
Frequent repairs are the result of all of the above. I’ve re-done entire patios that were installed without a base less than two years earlier, and the homeowner ended up paying for the labor twice.
One project that sticks with me was a small backyard patio in Nassau County. The homeowner had laid the pavers himself on packed dirt to save on the gravel base. It looked great for about eight months. Then the edges started sinking near the low corner of the yard, water started collecting there after every rain, and by the following spring, a third of the patio had to be pulled up and redone properly.
When Is It Acceptable to Lay Pavers Without a Base?
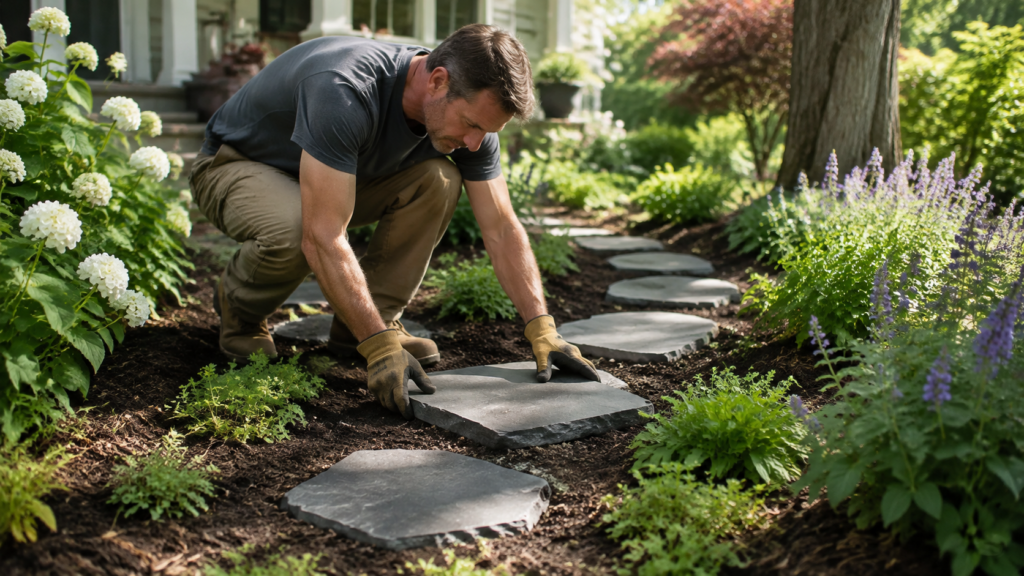
There are situations where skipping the base is a reasonable call, not just a shortcut.
Temporary walkways. If you need a path for a season, an event, or while you’re planning a bigger renovation, laying pavers on compacted soil is fine. You’re not expecting permanence.
Decorative garden paths. A stepping-stone style path through a garden bed, where each paver mostly just needs to stay roughly in place and isn’t carrying much weight, can work without a full base.
Lightweight landscaping projects. Small accent areas, stepping pads near a shed, or low-traffic decorative sections can sometimes skip the full gravel build-out, especially if the ground underneath is already firm and well-draining.
The reason these exceptions work is scale and expectation. Nobody’s driving a car over a garden path. Nobody’s expecting a temporary walkway to last fifteen years. Once you’re talking about a driveway, a main patio, or anything that sees regular use, the math changes completely.
Step-by-Step Guide to Installing Pavers the Right Way
If you’re doing this project properly, here’s the process I follow on every job, from a small walkway to a full driveway paver installation.
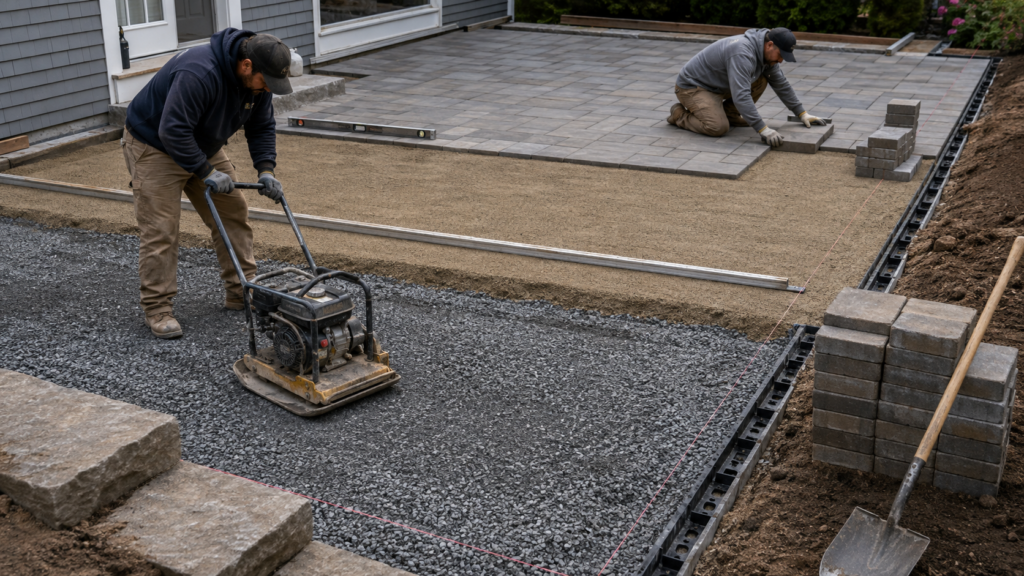
Step 1 – Planning and measuring
Measure the area, account for slope, and plan for drainage before you touch a shovel. Pavers should slope slightly away from your house, generally about a quarter inch per foot. Skipping this step is one of the most common paver installation mistakes I see, even among people who did everything else right.
Step 2 – Excavation
Dig out the area to the proper depth. For a patio, that’s usually 7 to 9 inches total once you account for base, sand, and paver thickness. Driveways need more, often 10 to 12 inches, because they’re carrying vehicle weight.
Tip: Don’t eyeball the depth. Use a string line and check it in multiple spots. Uneven excavation depth is where a lot of DIY jobs go sideways before they even get to the gravel.
Step 3 – Installing gravel base
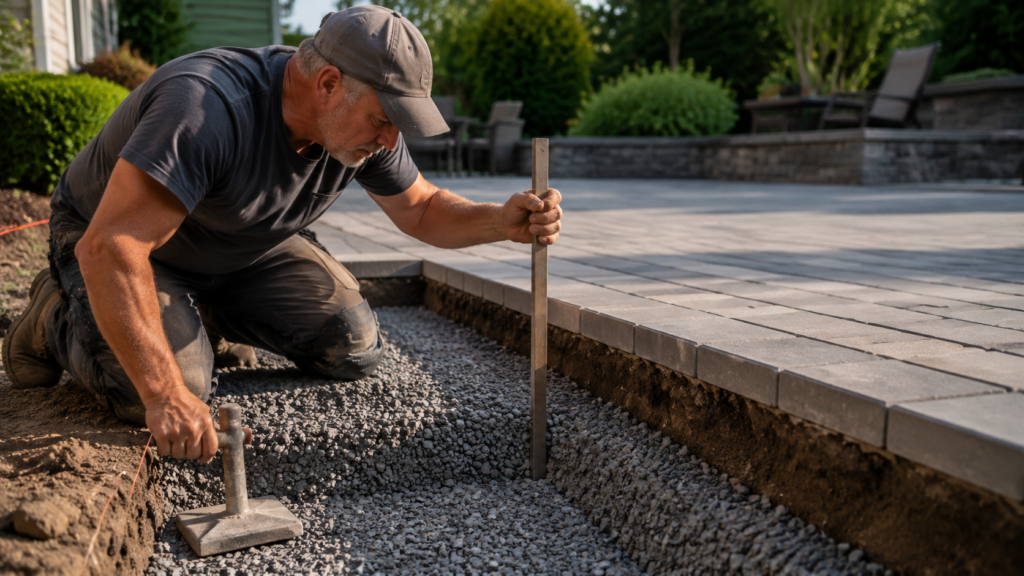
Add crushed gravel in layers, usually 4 to 6 inches for patios and more for driveways. This compacted gravel base is the foundation everything else depends on.
Tip: Use angular crushed stone, not smooth pea gravel. Angular stone locks together when compacted; round stone just shifts around.
Step 4 – Compacting the base
Compact the gravel in layers, not all at once. A plate compactor run over 2-inch lifts gets you a far denser, more stable base than trying to compact 6 inches in one pass.
Tip: Run the compactor over each layer at least twice, in overlapping passes, from different directions.
Step 5 – Adding bedding sand
Screed about an inch of coarse bedding sand over the compacted base. This is what the pavers actually sit in and get their final level from.
Tip: Don’t compact the sand before laying pavers. It needs to stay loose enough for the pavers to settle into it slightly during the final compaction step.
Step 6 – Laying pavers
Set pavers according to your pattern, working from a fixed edge or corner. Keep consistent joint spacing and check level frequently as you go.
Tip: Pull string lines across the work area every few rows so small errors don’t compound into a visibly crooked pattern by the time you reach the far side.
Step 7 – Installing edge restraints
Install plastic or metal edge restraints along all open edges. These lock the outer pavers in place and stop the whole field from spreading apart over time.
Tip: This step gets skipped more than any other on DIY jobs, and it’s one of the fastest ways to end up with pavers drifting apart within a year.
Step 8 – Compacting and joint sanding
Run the compactor over the finished surface, then sweep polymeric sand into the joints and compact again to lock everything together.
Tip: Water-activate the polymeric sand according to the manufacturer’s instructions, and don’t skip this if you want long-term joint stability instead of joints that wash out after a season of rain.
Common DIY Mistakes to Avoid
Even homeowners who know they need a base sometimes get tripped up on the details. The mistakes I see most often:
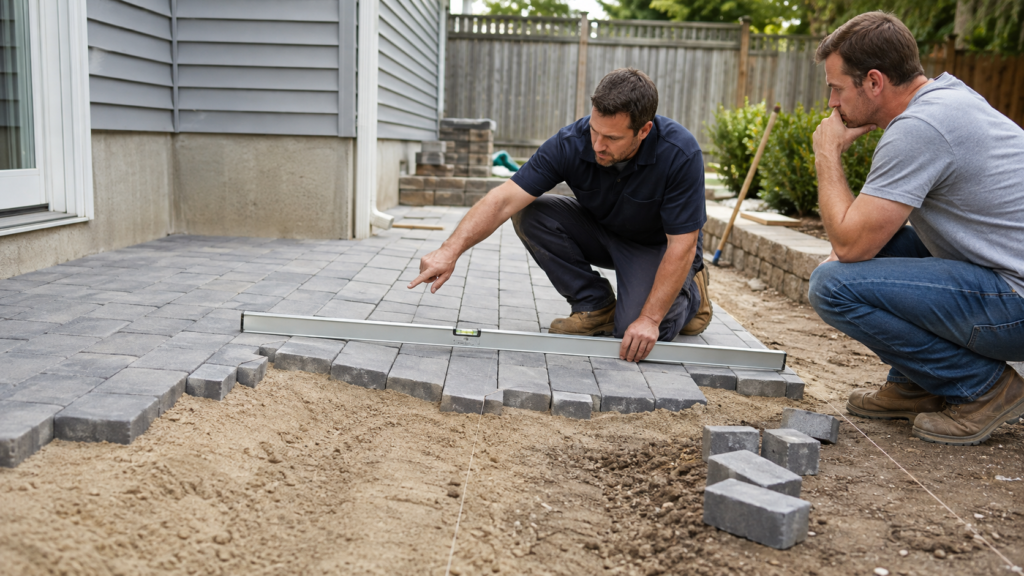
- Skipping excavation depth. Digging down 3 or 4 inches when the project needs 8 leaves no room for a real base.
- Using the wrong sand. Fine mason sand or beach sand doesn’t compact or drain the way coarse concrete sand does.
- Poor drainage planning. Laying a flat or improperly sloped surface leads to standing water no matter how good the base is.
- Uneven compaction. Compacting the whole base depth in one pass instead of thin layers leaves weak spots underneath the surface.
- Missing edge restraints. Without them, the entire installation slowly spreads apart at the perimeter, even with a perfect base underneath.
Case Study
A homeowner in Suffolk County reached out to me after a patio he’d installed himself the previous summer started falling apart. He’d laid the pavers directly on leveled dirt with a thin layer of sand, no gravel base at all, to keep the project under budget.
By late fall, he noticed a few pavers near the grill area had sunk slightly and were rocking when stepped on. He figured it was minor and left it alone through winter. Come spring, after the frost cycles, the problem had spread. Nearly a quarter of the patio had visible dips, water was pooling near the back corner after rain, and weeds had come up through several joints.
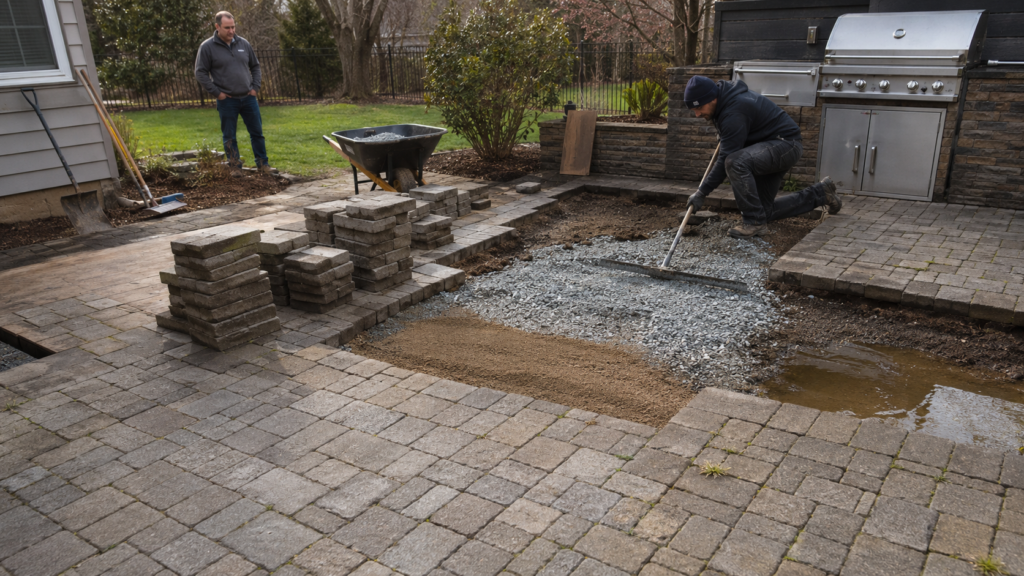
When I came out to look at it, the issue was straightforward. There was nothing structural under the pavers to keep them from moving with the ground. We ended up pulling up the affected section, excavating properly, installing a compacted gravel base and bedding sand, and resetting the pavers with edge restraints this time.
The homeowner’s takeaway, in his own words, was that the money he saved skipping the base ended up costing him more once he factored in the redo. That’s the pattern I see most often with a failed installation. It’s rarely that the pavers themselves were bad. It’s almost always what’s underneath, or what wasn’t there.
Expert Insight
“The base is the part nobody sees once the job is finished, which is exactly why it’s the part people are most tempted to cut corners on. But it’s the single biggest factor in whether a paver installation lasts three years or thirty. I’ve torn out more failed patios because of a missing base than for any other reason combined.”
That’s been my experience across two decades of both new installations and repair work throughout New York.
Cost Comparison
| Installation Method | Upfront Cost | Long-Term Maintenance | Expected Lifespan |
| Without Base | Lower initial cost, minimal materials | Frequent repairs, re-leveling, possible full redo | 1–3 years before major issues |
| Standard Base Installation | Higher upfront cost due to gravel, labor, compaction | Occasional joint sand refresh, minor upkeep | 20–30+ years with proper care |
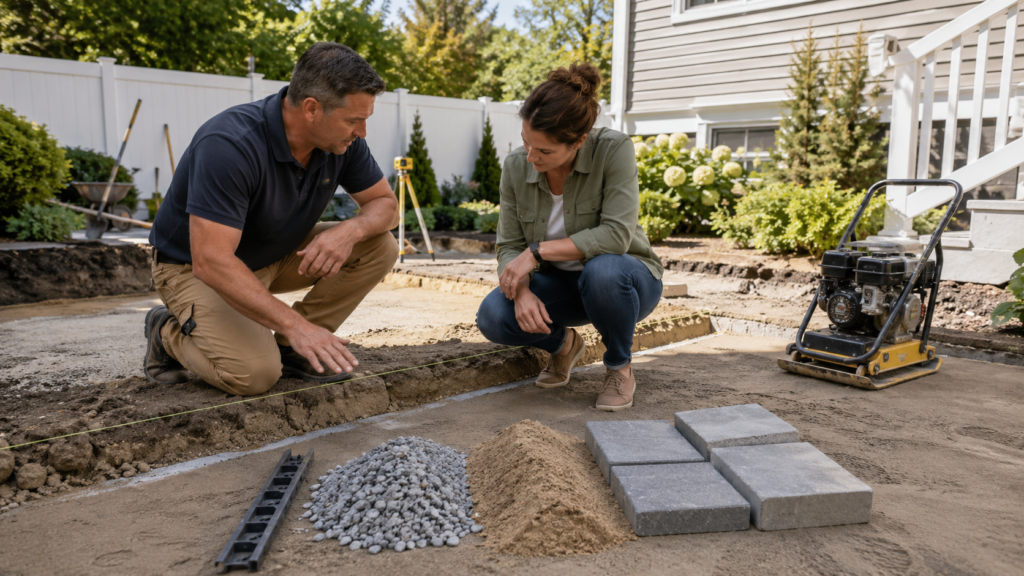
When you spread the standard base installation cost over its actual lifespan, it’s almost always the cheaper option in the long run. The no-base route tends to turn into paying for the project twice.
Frequently Asked Questions
Can you lay pavers directly on dirt?
You can, but it’s only advisable for temporary or very low-traffic areas like a short garden path. For patios, walkways, or driveways, dirt alone won’t provide the stability or drainage pavers need to last.
Can pavers be installed without gravel?
Technically yes, using sand alone over soil, but this significantly shortens the lifespan of the installation and increases the risk of settling, shifting, and drainage problems.
How thick should a paver base be?
Most patios need a 4 to 6 inch compacted gravel base, while driveways typically need 8 to 12 inches due to the added weight from vehicles.
Will pavers sink without a base?
Yes, over time, pavers laid without a base will sink and settle unevenly as the soil beneath them compresses and shifts, especially after rain or freeze-thaw cycles.
What is the best base material for pavers?
Angular crushed gravel, often labeled as crusher run or dense grade aggregate, is the standard choice because it compacts tightly and locks together for a stable foundation.
How long do properly installed pavers last?
With a properly compacted gravel base and routine maintenance, pavers can last 20 to 30 years or longer, even in a climate with harsh winters like New York’s.
Conclusion
Laying pavers without a base isn’t impossible, and for small, low-stakes projects like a garden path, it can be a reasonable shortcut. But for anything that sees regular foot traffic, vehicle weight, or has to survive a New York winter, skipping the base almost always turns into a more expensive problem down the road.
The base is the part of the job nobody notices when it’s done right. It’s also the part that determines whether you’re looking at a patio that lasts decades or one that needs to be torn up and redone within a couple of years. If you’re planning a paver patio installation, driveway, or walkway this season, it’s worth taking the time to do the foundation right the first time.
If you’re not sure what your project needs, it’s worth talking to an experienced paver contractor before you start digging. A quick site visit can save you from a much bigger repair bill later.