
You step onto your patio and one paver rocks under your foot. Or maybe it’s the driveway: there’s a low spot near the garage that fills with water every time it rains, even though the rest of the surface drains fine. If you’ve noticed pavers that have dropped, tilted, or created a dip you can feel when you walk over them, you’re dealing with a settlement problem. It’s worth understanding what’s actually going on underneath before you decide how to fix it.
This happens on driveways, patios, and walkways all over New York, and it’s rarely random. Something changed beneath those pavers, and the sunken section is just where it first became visible.
Why Pavers Sink in the First Place
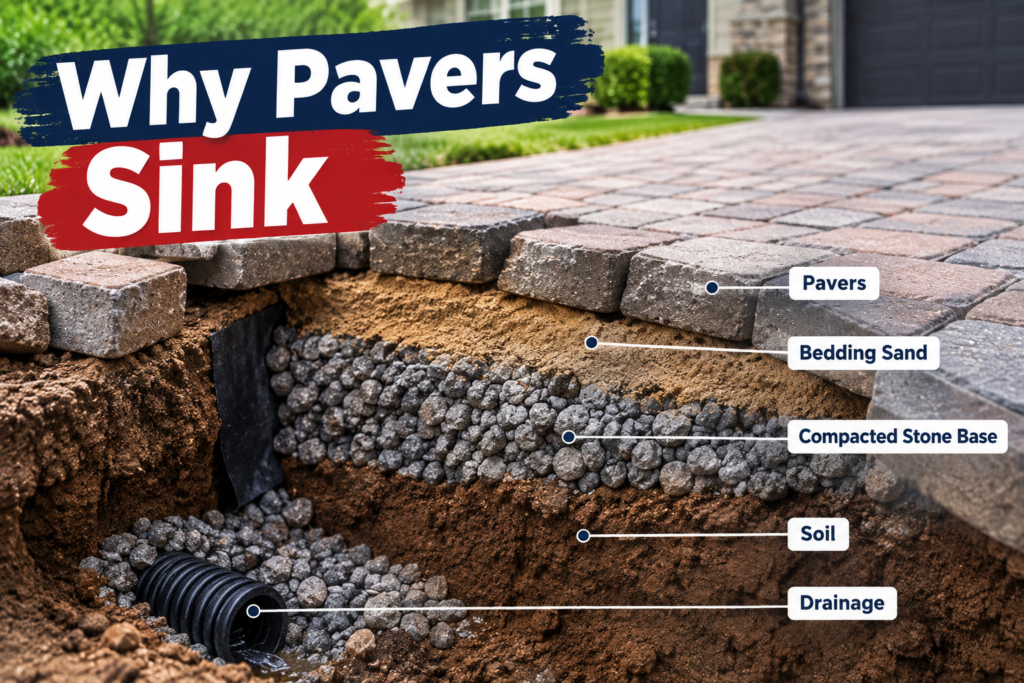
Pavers themselves are just the surface layer. What holds them in place and what fails when they sink is almost always the material underneath: the compacted base, the bedding sand, and the drainage that’s supposed to move water away from that base instead of through it.
A few things cause most of the settlement we see:
- A base that wasn’t compacted well to begin with. If the crushed stone base under a paver section wasn’t compacted in thin layers, it can keep settling under normal foot or vehicle traffic for months or years after installation.
- Water finding its way under the pavers. Once water gets into the base, it can wash fine particles out from between the stones, leaving voids. The surface above that void has nothing to support it, so it drops.
- Freeze-thaw movement. Water that sits in the base freezes, expands, and shifts material around. When it thaws, things don’t always settle back the way they were.
- Poor drainage or grading. If water has nowhere to go, it pools in the same spot repeatedly, which speeds up erosion underneath.
- Joint sand loss. When the sand between pavers washes out, the pavers lose lateral support and can shift or rock even before you notice a dip.
- Heavy loads on a base that wasn’t built for them. A base designed for foot traffic won’t necessarily hold up under a loaded truck or trailer parked in the same spot repeatedly.
- Tree roots. Roots growing under a paved area can lift sections in one place and, as they grow or die back, leave gaps that lead to settlement nearby.
Here’s the distinction that matters most: the sunken paver is a symptom. The problem is what happened to the material underneath it. Fix the paver without addressing that, and you’re just delaying the same repair.
Can Sunken Pavers Be Fixed?
In most cases, yes, a single paver or a small cluster that’s dropped can usually be lifted, the base corrected, and the section reset so it sits flush again. This is a normal, expected repair for interlocking pavers, which is part of why they’re used in the first place. Unlike poured concrete, individual units can come out and go back in without redoing the whole surface.
Where it gets more complicated is widespread settlement multiple areas sinking, a whole section of driveway that’s gone wavy, or the same spot sinking again after a previous repair. That usually points to a larger drainage or base issue that a bag of polymeric sand isn’t going to solve. In those situations, patching the visible symptom without figuring out the underlying cause tends to be a short-term fix at best.
How to Fix Sunken Pavers
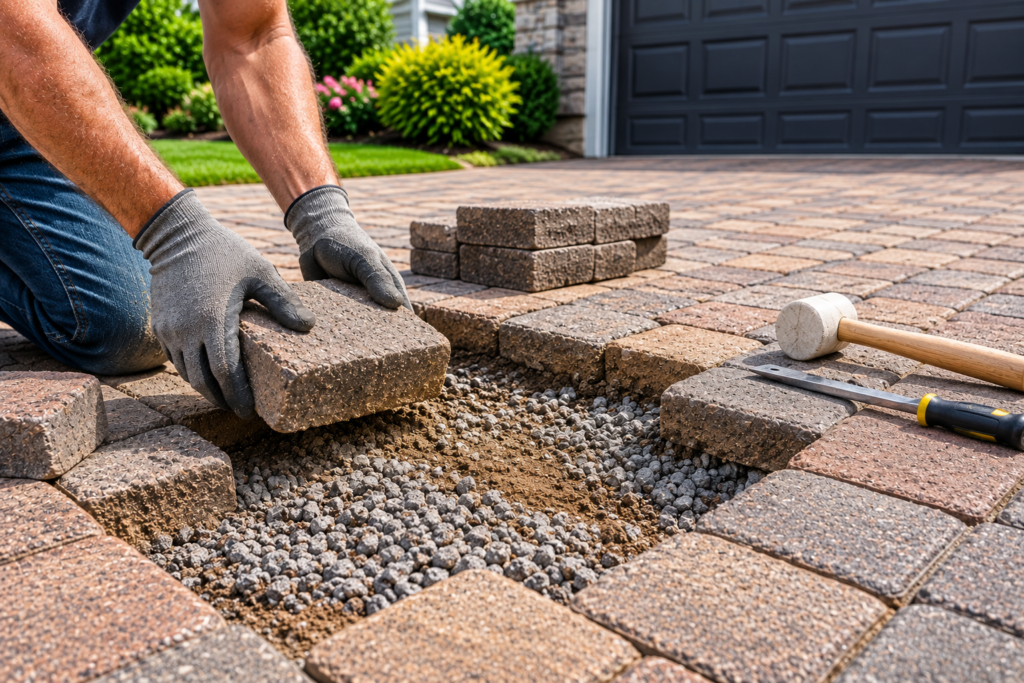
The general process is the same whether you’re dealing with a patio corner or a driveway low spot, though the scope obviously changes with the size of the problem.
- Identify the full extent of the affected area. Sunken sections often extend slightly beyond what’s visually obvious. Walking the area and checking with a straightedge or level helps show exactly which pavers are affected.
- Remove the affected pavers carefully. They’re usually reusable, so this is done by hand, working from the edges in.
- Inspect what’s underneath. This is the step that actually tells you why the paver sank: a soft or wet base, a void, eroded material, or a root.
- Determine the cause before rebuilding. If water caused the problem, rebuilding without addressing where that water came from just resets the clock.
- Correct drainage or base issues. This might mean improving grading nearby, adding a drainage path, or removing a root and backfilling properly.
- Restore and compact the base material in thin layers rather than dumping it in all at once, which is part of why the original base may have failed.
- Add and screed the bedding layer to a consistent depth so the pavers sit level.
- Reset the pavers in their original pattern, checking alignment as you go.
- Check the finished grade against the surrounding surface, confirming water will move away rather than pool.
- Refill the joints with sand, sweeping it in and compacting so it locks the pavers together.
- Compact the finished section so everything settles into place uniformly rather than shifting under the first heavy rain or vehicle load.
Site conditions vary a lot: soil type, how deep the original base was built, what’s causing the water problem, and how large the affected area is all change what the repair actually involves. Severe settlement, standing water that won’t drain, large uneven areas, or anything near a retaining wall or structure is worth having a professional look at before you start digging.
Common DIY Mistake: Adding Sand on Top
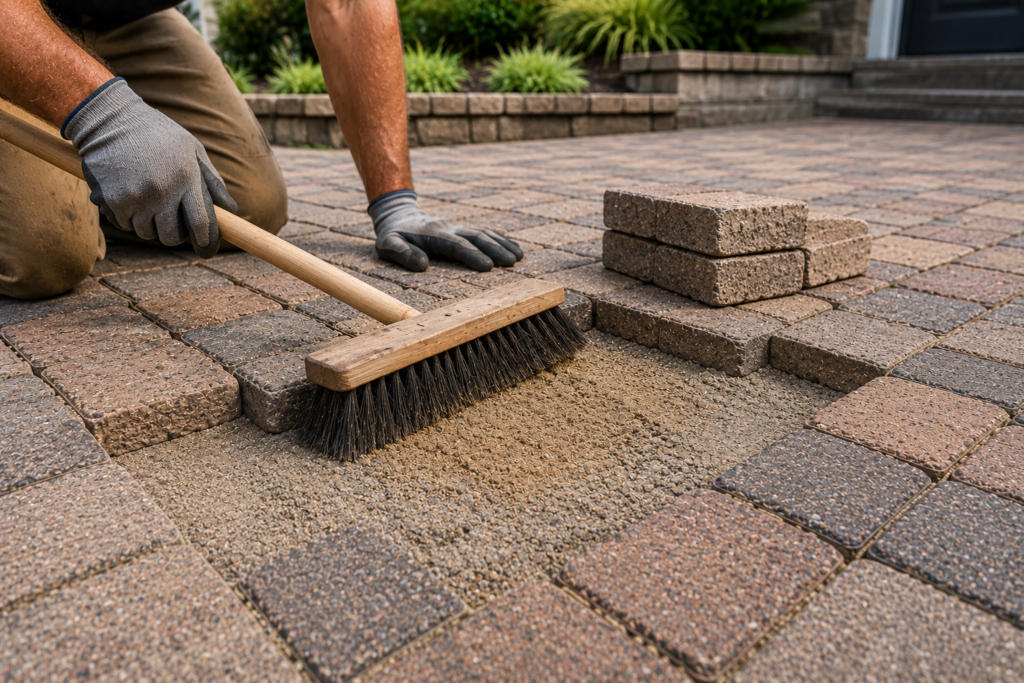
This is probably the most common shortcut, and, understandably, a low paver is annoying, and a bag of sand seems like an easy fix. Spreading sand over a sunken paver, or repeatedly topping off the joints, can make the surface look level again for a little while. It doesn’t touch the actual problem underneath.
If the base has a void or the drainage issue that caused the settlement is still there, the same spot will typically sink again, sometimes worse than before, because the added material can wash out along with everything else. If you’ve topped off the same low spot more than once, that’s usually a sign the base needs to be opened up and looked at rather than covered again.
How to Prevent Pavers From Sinking Again
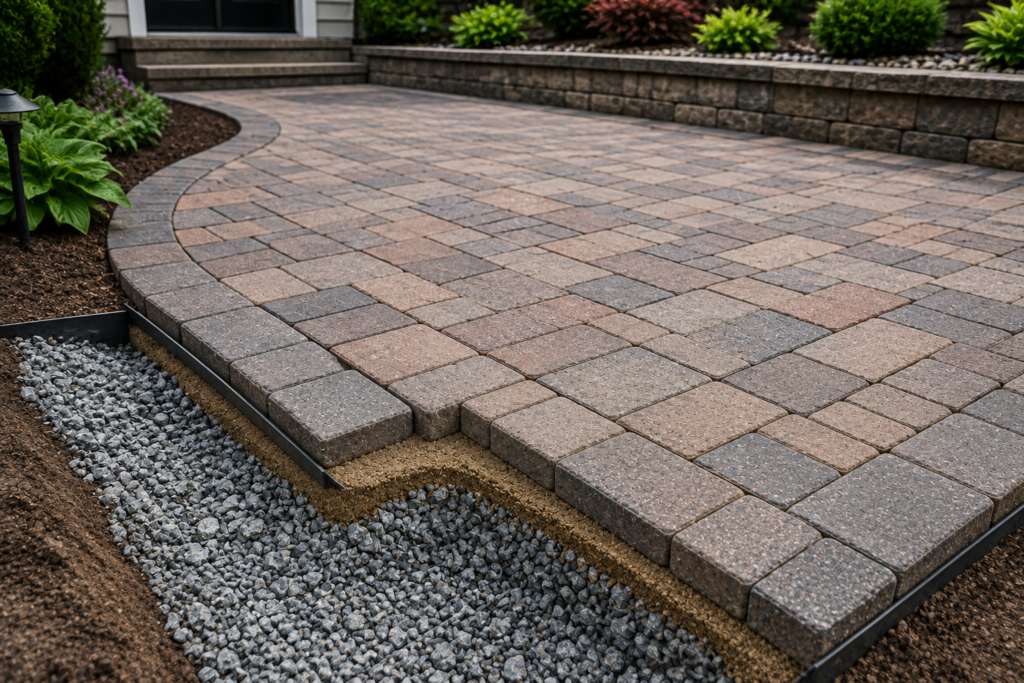
Prevention mostly comes down to getting the things that failed the first time right, plus paying attention afterward.
- Base depth and compaction matter more than people expect. A base compacted in layers holds up far better than one dumped and compacted all at once.
- Grading should move water away from the paved area, not toward the house or into a low corner.
- Edge restraint keeps pavers from spreading sideways over time, which contributes to joint sand loss and shifting.
- Joints need occasional attention. Sand does wash out gradually, especially in high-runoff areas, and refilling it before it’s completely gone helps keep pavers locked together.
- Downspouts and runoff paths should be checked, especially if they discharge anywhere near the paved surface.
- Watch for the same low spot coming back. If an area you’ve had leveled starts dipping again, that’s worth investigating sooner rather than later.
- Driveways carrying vehicle loads need a base built for that use, not the lighter base typically used under a walkway.
New York Weather and Paver Settlement
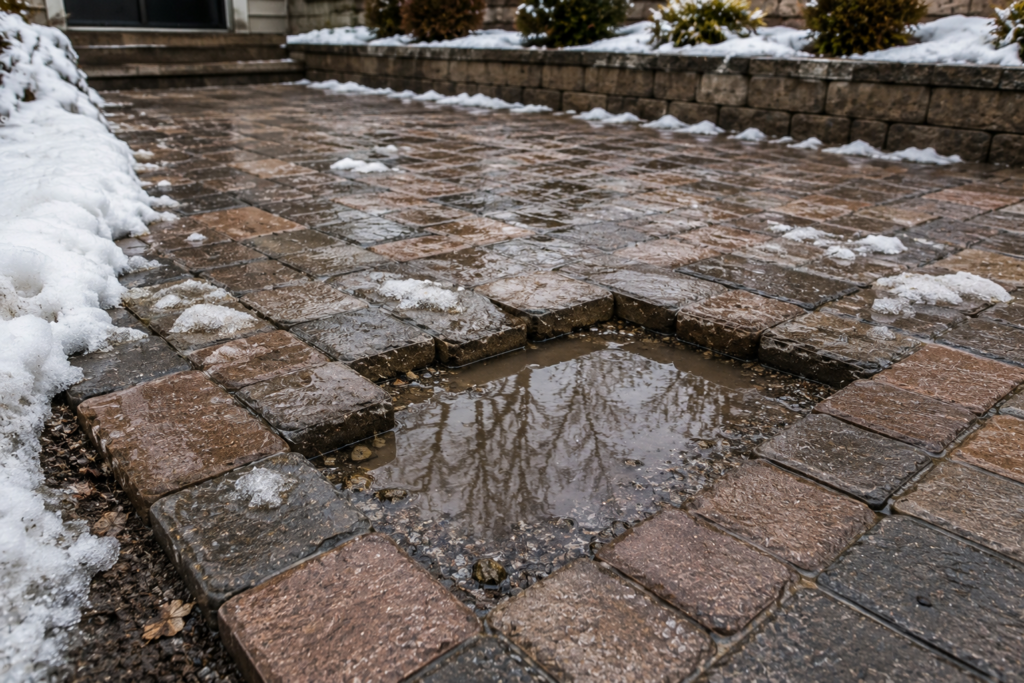
New York’s freeze-thaw cycle is a real factor in paver settlement, but it’s not the whole story it tends to make an existing weak spot worse rather than create the problem on its own. Water that’s already gotten into the base from poor drainage or eroded material freezes in winter, expands, and shifts things around. When it thaws, the material doesn’t always settle back evenly, which is why a lot of settlement problems seem to show up or get worse in spring.
Heavy spring rainfall adds to this by moving more water through any weak points that opened up over winter. That’s part of why so many settlement calls come in during the first few weeks of warmer weather: the underlying issue was there already, and winter just made it visible.
Repair or Reinstall?
| Condition | Likely Approach | Why |
| One or two low pavers | Localized lift-and-reset | Usually an isolated base issue that doesn’t require touching the surrounding area |
| Small, contained depression | Lift-and-reset with base correction | The affected area is limited, so the fix can stay localized |
| Repeated sinking in the same spot | Base and drainage investigation | Recurrence usually means the original cause was never addressed |
| Large uneven area | Reinstall of that section | Widespread movement often points to base failure across the whole area, not just individual pavers |
| Standing water on the surface | Drainage correction, then repair | Fixing the pavers without addressing water flow tends to repeat the problem |
| Loose or spreading edges | Edge restraint repair or replacement | Pavers without proper containment shift laterally, which affects everything nearby |
These are general patterns, not a substitute for someone actually looking at the site. Two driveways with similar-looking sinking can have very different causes underneath.
Illustrative Case Example
Here’s a scenario that reflects the kind of thing property owners commonly run into. This is a representative example, not a specific past project.
A homeowner in a New York suburb notices three pavers near the base of a downspout gradually dropping over the course of a summer. From the surface, it looks like a simple settling issue. Once the pavers are lifted, though, it becomes clear that the downspout has been discharging directly onto the base for years, and the runoff has slowly washed material out from underneath, leaving a shallow void.
A repair limited to resetting those three pavers would likely sink again within a season or two, because the water source hasn’t changed. Addressing it properly means extending the downspout discharge away from the paved area or adding a drainage path, rebuilding the base with proper compaction, and then resetting the pavers. The fix that actually holds is the one that deals with where the water was going, not just the pavers on top of it.
Warning Signs You Shouldn’t Ignore
- Water pooling in the same spot after every rain
- A paver that rocks or clicks when you step on it
- Joint sand that keeps disappearing faster than it should
- A height difference between adjacent pavers that’s getting more noticeable
- Multiple pavers dipping together rather than one isolated spot
- Edges that are separating or spreading outward
- An area that’s been repaired before and is sinking again
Any one of these on its own might not mean much. Several happening in the same area, or a repeat of a repair, usually does.
Simple Maintenance Advice
A quick walk-through a couple of times a year catches most problems early, before they turn into a bigger repair. Late fall, after winter, and after any unusually heavy rain are good times to look.
Check for standing water after a rainstorm, look for pavers that feel loose or uneven underfoot, and check joint sand levels, especially near downspouts, low points, or areas that see heavy vehicle traffic. Catching a small dip early is a much smaller job than dealing with a section that’s been sinking, unnoticed, for a year.
FAQs
How do you fix sunken pavers?
Lift the affected pavers, find out what happened to the base underneath, correct the drainage or compaction issue that caused it, rebuild the base and bedding layer, then reset the pavers and refill the joints. Skipping the “find out why” step is the most common reason repairs don’t last.
Why do my pavers keep sinking in the same spot?
Recurring settlement in one location almost always means the original cause usually water getting into the base was never actually fixed the first time. Topping the area with sand covers the symptom without addressing it.
Can you lift and relay existing pavers?
Yes, in most cases. Interlocking pavers are designed to be removable, which is one advantage over poured concrete. As long as the pavers themselves aren’t damaged, they can typically be lifted, the base repaired, and the same units reset.
Can I put sand under sunken pavers?
You can, but if there’s a void or drainage problem underneath, added sand often washes out the same way the original material did. It’s better as a fix once the actual cause has been addressed than as a stand-alone solution.
How do you level pavers that have sunk?
Leveling involves removing the pavers, correcting the base so it’s uniformly compacted, adding a consistent bedding layer, and resetting the pavers so they sit flush with the surrounding surface. A straightedge or level helps confirm the grade is even and drains properly.
Why do pavers sink after winter?
Freeze-thaw cycles move water that’s already in a weak base, and that movement often becomes visible once things thaw in spring. The underlying issue is usually there before winter; the freeze-thaw cycle tends to reveal it rather than cause it outright.
How can I prevent pavers from sinking again?
Proper base compaction, grading that actually moves water away from the paved area, solid edge restraint, and keeping an eye on joint sand levels all help. Managing where runoff and downspouts discharge is also a big factor, especially in areas that see a lot of rain.
When should sunken pavers be professionally repaired?
Widespread settlement, standing water that won’t drain, a repair that’s failed before, or anything near a structure or retaining wall is worth having evaluated by someone who can look at the base directly. A single low paver in an open area is often manageable as a DIY project if you’re comfortable with the work.
When Sunken Pavers Need Professional Attention
A single sunken paver can often be fixed by lifting it, correcting the base underneath, and resetting it properly. However, if pavers keep sinking, several areas are becoming uneven, or the same low spots continue to return, the underlying base or drainage may need closer attention.
If you’re dealing with sunken or uneven pavers on a driveway, patio, or walkway in New York, contact Kings Pavers & Concrete for a professional assessment. Our team can inspect the area, identify what’s causing the pavers to sink, and recommend the right repair approach for your property.