Your driveway takes a beating every single day: rain, ice, UV rays, oil drips, and the weight of vehicles rolling across it year after year. Most homeowners don’t think about it until a crack appears. By then, the damage has already started.
The truth is, learning how to maintain a concrete driveway isn’t complicated. It doesn’t require professional tools or a big budget. What it does require is consistency and knowing what to look for before small problems grow into expensive ones.
Neglected driveways can cost anywhere from $1,500 for a basic resurfacing to over $10,000 for a full replacement. Preventive concrete driveway maintenance, on the other hand, costs a fraction of that, and it works.
This guide walks you through everything: why cracks form, how to stop them, when to seal, and what warning signs you should never ignore.
Why Concrete Driveways Crack
Concrete is strong, but it isn’t flexible. It expands in heat and contracts in cold. It shifts when the ground beneath it moves. Over time, those stresses add up, and cracks are the result.
Here are the most common culprits behind driveway damage:
Freeze-Thaw Cycles
In colder climates, water seeps into tiny pores in the concrete, freezes, and expands. That expansion puts enormous pressure on the slab from the inside out. Over many winters, this process chips, flakes, and cracks even a well-poured driveway.
Poor Installation
Not all concrete jobs are created equal. A driveway poured without proper sub-base preparation, insufficient thickness, or inadequate curing time is a driveway that will crack earlier than it should. This is why hiring a reputable contractor matters as much as the concrete itself.
Heavy Vehicle Loads
Residential concrete driveways are typically designed for passenger vehicles, not delivery trucks or heavy equipment. Parking a loaded moving truck or renting a dumpster that sits directly on your driveway can fracture the slab, especially along edges where the concrete is thinnest.
Tree Roots
A mature tree planted near your driveway may look beautiful until its roots push up under the slab. Root intrusion causes uneven lifting and cracking that’s difficult and expensive to repair without addressing the tree itself.
Soil Movement
Shifting soil underneath the concrete causes sections to sink or heave. This is especially common in areas with clay-heavy soil, poor compaction during installation, or after heavy periods of rain that erode the sub-base.
Water Infiltration
Water is the enemy of concrete. When it gets under the slab through cracks, expansion joints, or poor drainage, it weakens the sub-base, promotes root growth, and accelerates every other cause on this list.
Here’s a quick reference for risk levels and prevention methods:
| Cause | Risk Level | Prevention Method |
| Freeze-Thaw Cycles | High | Seal regularly; improve drainage |
| Poor Installation | High | Hire reputable licensed contractors |
| Heavy Vehicle Loads | Medium | Avoid parking heavy equipment on slab |
| Tree Roots | Medium | Plant trees at least 10 ft from driveway |
| Soil Movement | Medium | Proper sub-base compaction during install |
| Water Infiltration | High | Seal cracks promptly; manage runoff |
How to Maintain a Concrete Driveway Properly
Good concrete driveway maintenance comes down to four habits. None of them are difficult; the key is doing them consistently.
Regular Inspections
Walk your driveway every few months with fresh eyes. Look for new cracks (even hairline ones), any spots that feel uneven underfoot, discoloration, or areas where water pools after rain. Catching problems early is the difference between a $30 fix and a $3,000 one.
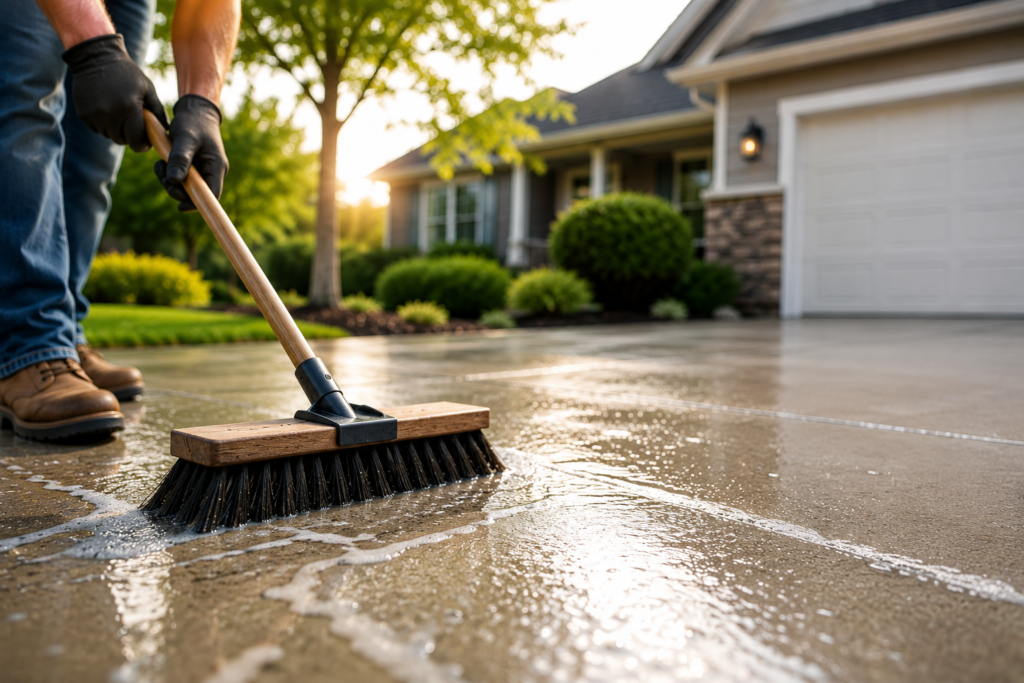
Cleaning Routines
Oil, gasoline, and road salt are corrosive to concrete over time. Clean up spills promptly with an absorbent material and rinse the area thoroughly. Give the entire driveway a proper wash with a stiff broom and mild detergent at least twice a year, once in spring and once heading into fall.
Avoid using a pressure washer on aging or already-cracked concrete. High pressure can force water into existing fissures and worsen the damage.
Drainage Management
Water that sits on or flows across your driveway accelerates wear. Check that your gutters and downspouts direct water away from the slab, not toward it. Look for low spots where water pools and consider having a contractor adjust the grade or install a channel drain if the problem is recurring.
Weed and Root Control
Weeds growing in expansion joints might seem harmless, but their roots are quietly prying those joints wider. Pull weeds by hand as soon as you see them; don’t let them establish a root system. Apply a joint filler or polymeric sand to expansion joints to reduce the space where seeds can germinate.
Step-by-Step Guide to Prevent Concrete Driveway Cracking
Follow these six steps to give your driveway the best chance at a long, crack-free life.
Step 1: Clean the Surface Regularly
Use a stiff-bristle push broom and a mild concrete-safe detergent to remove dirt, debris, and organic material. Rinse thoroughly. Do this at minimum twice per year. For oil stains, use a degreaser and let it sit for 10–15 minutes before scrubbing.
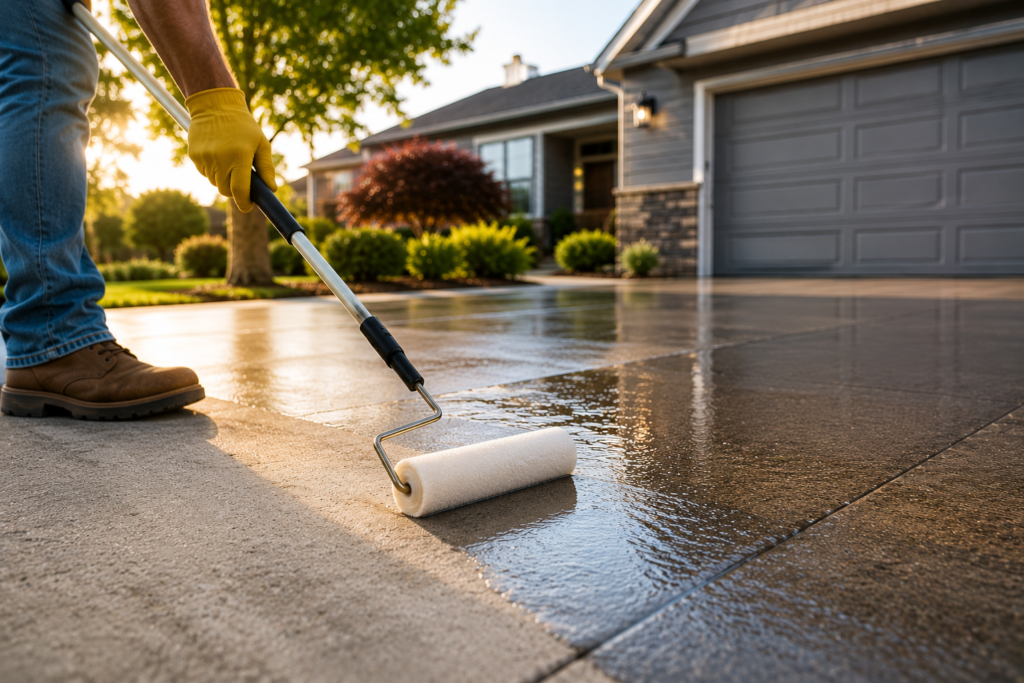
Step 2: Seal the Driveway Every Few Years
Sealing a concrete driveway is the single most effective thing you can do to extend its life. A quality sealer creates a moisture barrier that protects against freeze-thaw damage, staining, and surface wear. Plan to reseal every 2–3 years, or sooner if you notice the surface has become porous or dull.
Step 3: Address Small Cracks Immediately
Don’t wait on cracks, not even small ones. Water entering a hairline crack will widen it during the first freeze. Use a high-quality liquid concrete filler or polyurethane caulk for cracks under 1/4 inch. For wider cracks, use a cement-based patching compound. Clean the crack thoroughly before applying any filler.
Step 4: Improve Drainage
Extend downspouts at least 6 feet away from your driveway. If water runs across the slab from a neighboring yard or lawn, consider adding a small berm or swale to redirect it. Improving drainage is one of the highest-impact, lowest-cost ways to prevent driveway damage.
Step 5: Avoid Excessive Weight Loads
Keep heavy construction equipment, overloaded delivery trucks, and full dumpsters off your residential driveway. If a heavy load is unavoidable, place thick plywood sheets under the load to distribute the weight across a larger area of the slab.
Step 6: Prepare for Winter Weather
Before the first frost, fill any open cracks and apply a fresh coat of sealer. During winter, remove snow with a plastic shovel rather than a metal one to avoid surface scratching. Avoid rock salt and sodium chloride de-icers, which accelerate surface flaking. Instead, use sand for traction or a concrete-safe de-icer like magnesium chloride.
The Importance of Sealing Your Concrete Driveway
If there’s one concrete driveway care tip that professionals consistently emphasize, it’s this: seal it.
An unsealed driveway absorbs moisture, oil, and road chemicals directly into the surface. A sealed one repels them. That one layer of protection slows wear, reduces staining, and dramatically extends driveway lifespan.
Benefits of Sealing:
• Prevents water infiltration and freeze-thaw damage
• Reduces oil and chemical staining
• Protects against UV fading and surface oxidation
• Makes the driveway easier to clean
• Maintains a fresh, finished appearance
Recommended Sealing Schedule:
For most U.S. climates, reseal every 2–3 years. In areas with harsh winters or extreme heat, lean toward every 2 years. New concrete should cure for at least 30 days before the first sealer application.
Common Sealing Mistakes to Avoid:
• Applying sealer to a dirty or wet surface – it won’t bond properly
• Over-applying sealer – thick coats peel and become dangerously slippery
• Skipping crack repair before sealing – sealer doesn’t bridge cracks; it just covers them temporarily
• Using an interior concrete sealer outdoors – they aren’t UV-resistant and will fail quickly
Warning Signs Your Driveway Needs Attention
Don’t wait for a major failure. These signs mean it’s time to act now:
Hairline Cracks
These are the earliest warning signs. They look minor and often are, but they’re the entry point for water. Fill them immediately with a liquid concrete filler before they grow.
Surface Flaking (Spalling)
If the top layer of concrete is chipping or flaking away in patches, it usually means the surface was damaged by salt, freeze-thaw cycling, or a poorly mixed pour. Left untreated, spalling spreads quickly and weakens the entire slab.
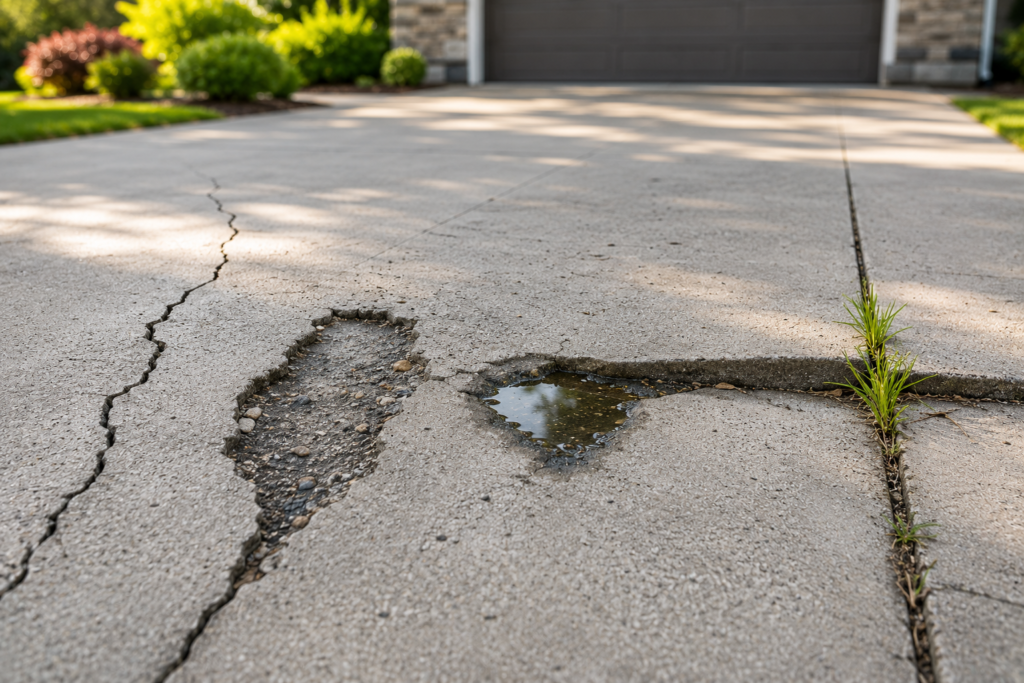
Pooling Water
Standing water after rain signals that either the driveway has settled unevenly or drainage is inadequate. Water that sits on the surface accelerates deterioration and is a slip hazard.
Uneven or Sunken Sections
If part of your driveway is visibly higher or lower than the rest, the sub-base beneath it has shifted or eroded. This is a trip hazard and a sign of structural instability. A professional should evaluate it promptly.
Expansion Joint Damage
Expansion joints are the thin lines intentionally cut into concrete to control where cracking occurs. When they’re damaged, filled with debris, or growing weeds, water enters freely, and the joints can no longer do their job. Clean, seal, or refill them as needed.
Frequently Asked Questions
How do you maintain a concrete driveway?
Keep it clean, keep it sealed, and keep water away from the edges. Inspect it a few times a year, fill cracks as soon as they appear, and apply a fresh sealer every 2–3 years. Those four habits alone will dramatically extend the life of any concrete driveway.
How often should a concrete driveway be sealed?
For most U.S. climates, every 2 to 3 years is the standard recommendation. If you live somewhere with harsh winters and heavy road salt use, err toward every 2 years. A simple test: sprinkle water on the surface. If it absorbs rather than beads up, it’s time to reseal.
What causes driveway cracks?
The most common causes are freeze-thaw cycles, water infiltration, poor sub-base preparation, and heavy vehicle loads. Tree roots and soil movement also contribute. Most cracks can be traced back to moisture getting somewhere it shouldn’t.
Can small driveway cracks be repaired?
Yes, and they should be repaired immediately. Cracks under 1/4 inch wide can be filled easily with liquid concrete filler or polyurethane caulk. Wider cracks may need a cement-based patching compound. Always clean the crack thoroughly before applying any filler.
How long does a concrete driveway last with proper maintenance?
With consistent maintenance- regular cleaning, sealing every 2–3 years, and prompt crack repair- most concrete driveways last 30 to 40 years. Some well-maintained driveways last even longer. Without maintenance, that lifespan can drop to 15 years or less.
Is sealing a driveway worth it?
Without question. Professional sealing typically costs $300–$800 and can push off a full replacement that costs $5,000–$10,000 or more. It’s one of the best returns on investment in home maintenance.
Protect Your Investment
Concrete driveways don’t fail overnight. They fail gradually through years of skipped sealings, ignored cracks, and water that had nowhere else to go. The good news is that most of that damage is completely preventable.
A consistent routine of cleaning, sealing, inspecting, and filling cracks as they appear is all it takes. If you’ve already noticed warning signs, the best time to act is now, before the next winter makes things worse.
Not sure where your driveway stands? A professional inspection can give you a clear picture of what’s needed and what can wait. Request a professional driveway inspection today and get ahead of the damage before it gets ahead of you.