
How to Build a Paver Patio Without Digging: Is It the Right Choice?
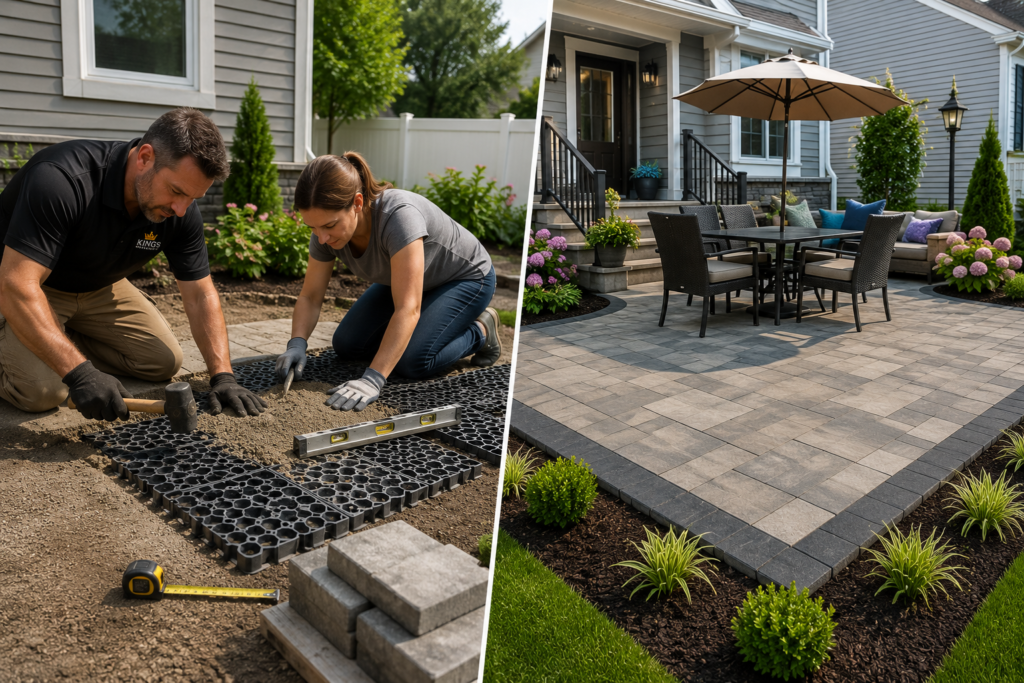
I get this question more than almost any other: “Can’t we just skip the digging part?” I understand why. Digging out a patio area is the part homeowners dread most. It’s slow, it’s dirty, and if you’re doing it yourself on a Saturday, it can turn into a weekend you’d rather forget. So the idea of a no-dig paver patio sounds like a dream: less labor, less mess, and pavers down in a fraction of the time. Here’s the honest answer, from someone who has put in hundreds of patios across New York: yes, you can build a paver patio without digging in the traditional sense. But it only works in certain situations, and it comes with real trade-offs. I’ve seen homeowners save themselves a weekend of backbreaking work with this method. I’ve also seen patios sink, shift, and heave after one New York winter because someone skipped a step they didn’t know mattered. This guide walks through when a no-dig paver patio installation makes sense, when it doesn’t, and how to do it right if you decide to go that route. Can You Really Build a Paver Patio Without Digging? Technically, yes. But “no dig” doesn’t mean “no prep.” That’s the part that gets lost in a lot of the DIY videos out there. A traditional installation removes several inches of soil, replaces it with compacted gravel, and builds a stable base from the ground up. A no-dig paver patio installation instead relies on the existing surface usually a flat lawn, a compacted dirt area, or an old patio slab and adds a shallow leveling layer or interlocking base panel system directly on top. This only works if a few things line up: The surface has to already be reasonably flat. I’m talking about maybe an inch of variation across the whole area, not more. If your yard slopes toward the house or has low spots that pool water after rain, a no-dig method is going to bake those problems right into your new patio. Drainage has to already be working. No-dig installs don’t fix drainage issues; they sit on top of whatever drainage situation already exists. If water sits in your yard now, it’ll sit under your pavers later. Soil type matters more than people expect. Sandy or well-draining soil handles a shallow base reasonably well. Heavy clay soil, which is common in a lot of the older neighborhoods I work in around New York, expands and contracts with moisture and freeze-thaw cycles. That movement is exactly what a shallow no-dig base struggles to handle over time. Here’s how the two approaches compare side by side: Traditional Installation No-Dig Installation Removes 6–9 inches of soil Minimal to no soil removal Full compacted gravel base Thin leveling layer or base panels Handles slopes and drainage issues Requires an already-flat, well-drained site Works on any soil type Best on sandy or well-draining soil Longer install time (2–5 days) Faster install (1–2 days for small areas) Higher upfront labor cost Lower labor cost 20+ year lifespan when done right 5–10 years, site dependent Handles heavy loads (kitchens, fire pits) Best for light foot traffic areas That table tells the real story. No-dig isn’t a shortcut version of the same result; it’s a different product with a different lifespan, built for a narrower set of conditions. Pros and Cons of Building a No-Dig Patio Advantages Disadvantages Best Applications Small seating areas, a patch of ground under a table and chairs, garden paths, temporary layouts you might redo in a few years, or areas where you’re testing out a layout before committing to a full installation. When Not Recommended Sloped yards, clay-heavy soil, anywhere water already collects, large patios meant for daily heavy use, or any space that’ll carry a grill station, pergola footings, or built-in seating. Tools and Materials You’ll Need Tool Purpose Plate compactor Compacts the base layer and sets the pavers Rubber mallet Taps pavers into place without cracking them Level (4-foot) Checks flatness across the surface Paver base panels or landscape fabric Creates the leveling layer on top of existing ground Screed rail or straight 2×4 Levels the leveling material evenly Wet saw or paver splitter Cuts edge pieces to fit Broom Spreads and works joint sand into paver gaps Garden hose Rinses and settles joint sand Material Why It’s Needed Paver base panels (interlocking) Provides a stable, load-distributing layer without excavation Bedding sand or leveling sand Fills small surface irregularities and helps pavers sit level Polymeric jointing sand Locks pavers together and resists weeds and ants Edge restraints (plastic or metal) Keeps pavers from spreading outward over time Landscape fabric Blocks weed growth from underneath Pavers The finished surface: concrete, natural stone, or clay brick Step-by-Step Guide Step 1: Choose the location. Walk the space at different times of day. Watch where water naturally runs after a rainstorm; that’s information you won’t get from just looking at dry ground. Step 2: Measure the patio. Measure the full area and add a small buffer, usually 3–4 inches per side, to account for edge restraints and cutting. Step 3: Prepare the surface. Remove grass, weeds, roots, and any loose debris. The surface underneath needs to be firm, not soft or spongy. If you press your heel into the ground and it sinks, that spot needs attention before you go any further. Step 4: Install the base panels or leveling material. Lay interlocking base panels or spread a thin, even layer of bedding sand across the prepared surface. This is the layer that determines how flat your finished patio will be, so take your time here. Step 5: Lay the pavers. Start from a corner or straight edge and work outward in your chosen pattern. Check level every few rows, not just at the end. Step 6: Cut edge pieces if necessary. Use a wet saw or paver splitter for clean cuts along borders and curves. Dry-fit pieces before cutting to avoid wasting material. Step 7: Install edging restraints. Secure
How Do You Build a Patio with Pavers? A Step-by-Step Guide for Lasting Results
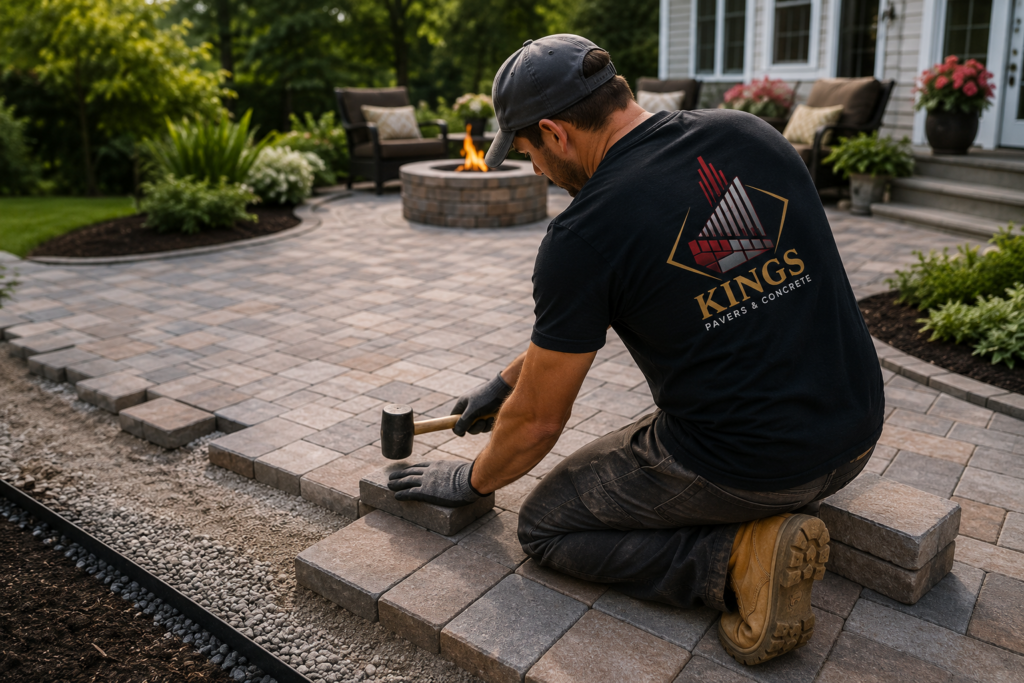
I’ve been installing patios around New York for over twenty years, and I can tell you the patios that hold up aren’t the ones with the fanciest pavers. They’re the ones built on a base that was done right the first time. Paver patios are everywhere in New York backyards right now, and for good reason. They handle our freeze-thaw winters better than poured concrete; they look better with age rather than worse; and they add real value if you ever sell the house. This guide walks through how to build a patio with pavers, as I’d explain it to a client standing in their backyard. It’s not complicated, but it is unforgiving of shortcuts. Skip a step, and you’ll be calling someone in three years to fix a patio that’s heaving or sinking. Why Choose Pavers for a Patio? I get asked all the time why pavers instead of a poured slab. A few reasons come up on almost every job. Durability. A properly installed paver patio can outlast a concrete slab, especially here in New York where the ground freezes and thaws repeatedly every winter. Concrete cracks under that movement. Pavers flex with it. Design flexibility. You can mix colors, patterns, and shapes in ways you just can’t with poured concrete. I’ve done herringbone patterns, running bond, circular kits around fire pits; the options are wide open. Easy repairs. This is the one homeowners appreciate most once they understand it. If a paver cracks or a tree root pushes something up, you pull that section, fix the base, and reset it. No jackhammer required. Weather resistance. Good drainage and a solid paver base mean water moves through the joints instead of pooling on top, which matters a lot during a New York spring thaw. Property value. An outdoor living space that’s usable and attractive is one of the few home improvements that consistently shows up as a plus in real estate listings. Here’s how the three most common materials stack up: Material Lifespan Maintenance Best Uses Concrete pavers 25–35 years Low occasional sweeping, resanding joints every few years Backyard patios, walkways, pool decks Brick pavers 20–30 years Low to moderate; can chip over time, benefits from sealing Traditional or colonial-style homes Natural stone pavers 30+ years Moderate; irregular joints need more attention; sealing recommended High-end patios, formal outdoor living space Tools and Materials You’ll Need Before you touch a shovel, get everything staged. Running back to the supply yard mid-project is how weekends turn into two-week ordeals. Step-by-Step Guide to Building a Patio with Pavers Step 1 – Plan the Layout and Measure the Area Sketch the patio, mark where it meets the house, and think about how people will actually walk through the space. I’ve seen patios built beautifully in the wrong spot because nobody thought about the door swing or where the grill would go. Contractor tip: Lay a garden hose or spray paint the outline first and live with it for a day or two before you dig. It’s the cheapest design change you’ll ever make. Step 2 – Mark and Excavate the Site Once your paver patio design is settled, excavate to a depth that accounts for your base, sand, and paver thickness, usually 7 to 9 inches total in our climate. Contractor tip: Slope the excavation about a quarter-inch per foot away from the house. Get this wrong, and you’ll be dealing with water in the basement, not just a wet patio. Step 3 – Prepare the Base Lay landscape fabric across the excavated area before adding gravel. It keeps the base material separated from the soil underneath, which stops weeds and prevents the gravel from working its way down into the dirt over time. Step 4 – Compact the Gravel Add the gravel in layers of about 2 inches, compacting each layer with the plate compactor before adding the next. This is the step people rush, and it’s the single biggest reason patios fail later. Contractor tip: Don’t dump the whole base in at once and compact it as one thick layer. It looks compacted on top and stays loose underneath; you won’t know until it settles unevenly next spring. Step 5 – Add and Level Bedding Sand Spread about an inch of bedding sand over the compacted base and screed it level using guide pipes or rails. This layer is what your pavers actually sit on, so it needs to be even. Step 6 – Lay the Pavers Start from a fixed edge, usually the house, and work outward in your chosen pattern. Keep consistent joint spacing as you go, tapping each paver into place with the rubber mallet. Contractor tip: Work off the pallet in the order the pavers were manufactured whenever you can. Color can vary slightly batch to batch, and mixing from multiple pallets as you go blends it out instead of leaving a visible line. Step 7 – Cut Border Pieces if Needed Along the edges, you’ll almost always need cut pieces to fill gaps. A wet saw or paver splitter gives cleaner results than trying to break pavers by hand. Step 8 – Install Edge Restraints Edge restraints lock the outer pavers in place, so the whole field doesn’t spread apart over time. This is a step homeowners doing it themselves often skip to save money, and it’s a mistake every time. Step 9 – Spread Polymeric Sand Sweep polymeric sand into the joints, then activate it with water per the product instructions. It locks the pavers together and helps prevent weeds and ants from getting into the joints. Contractor tip: Sweep the surface completely clean before you add water. Any sand left on top of the pavers will haze and stain the surface once it’s wet. Step 10 – Compact and Finish Run the plate compactor over the finished patio one more time to seat everything and settle the joint sand fully. Clean up, check for any low spots, and give it a final