
I’ve been installing patios around New York for over twenty years, and I can tell you the patios that hold up aren’t the ones with the fanciest pavers. They’re the ones built on a base that was done right the first time.
Paver patios are everywhere in New York backyards right now, and for good reason. They handle our freeze-thaw winters better than poured concrete; they look better with age rather than worse; and they add real value if you ever sell the house.
This guide walks through how to build a patio with pavers, as I’d explain it to a client standing in their backyard. It’s not complicated, but it is unforgiving of shortcuts. Skip a step, and you’ll be calling someone in three years to fix a patio that’s heaving or sinking.
Why Choose Pavers for a Patio?
I get asked all the time why pavers instead of a poured slab. A few reasons come up on almost every job.
Durability. A properly installed paver patio can outlast a concrete slab, especially here in New York where the ground freezes and thaws repeatedly every winter. Concrete cracks under that movement. Pavers flex with it.
Design flexibility. You can mix colors, patterns, and shapes in ways you just can’t with poured concrete. I’ve done herringbone patterns, running bond, circular kits around fire pits; the options are wide open.
Easy repairs. This is the one homeowners appreciate most once they understand it. If a paver cracks or a tree root pushes something up, you pull that section, fix the base, and reset it. No jackhammer required.
Weather resistance. Good drainage and a solid paver base mean water moves through the joints instead of pooling on top, which matters a lot during a New York spring thaw.
Property value. An outdoor living space that’s usable and attractive is one of the few home improvements that consistently shows up as a plus in real estate listings.
Here’s how the three most common materials stack up:
| Material | Lifespan | Maintenance | Best Uses |
| Concrete pavers | 25–35 years | Low occasional sweeping, resanding joints every few years | Backyard patios, walkways, pool decks |
| Brick pavers | 20–30 years | Low to moderate; can chip over time, benefits from sealing | Traditional or colonial-style homes |
| Natural stone pavers | 30+ years | Moderate; irregular joints need more attention; sealing recommended | High-end patios, formal outdoor living space |
Tools and Materials You’ll Need
Before you touch a shovel, get everything staged. Running back to the supply yard mid-project is how weekends turn into two-week ordeals.
- Patio pavers (concrete, brick, or natural stone pavers enough for your square footage plus 10% extra for cuts and waste)
- Crushed gravel for the paver base (typically ¾-inch minus)
- Bedding sand (coarse, washed sand, not play sand)
- Polymeric sand for the joints
- Edge restraints (plastic, aluminum, or concrete)
- Plate compactor (rent one, don’t try to skip this)
- 4-foot level and a laser level for larger areas
- Rubber mallet
- Landscape fabric
- Shovels, a rake, and a wheelbarrow
- Measuring tape, string line, and wood stakes
- A masonry saw or paver splitter for border pieces
Step-by-Step Guide to Building a Patio with Pavers
Step 1 – Plan the Layout and Measure the Area
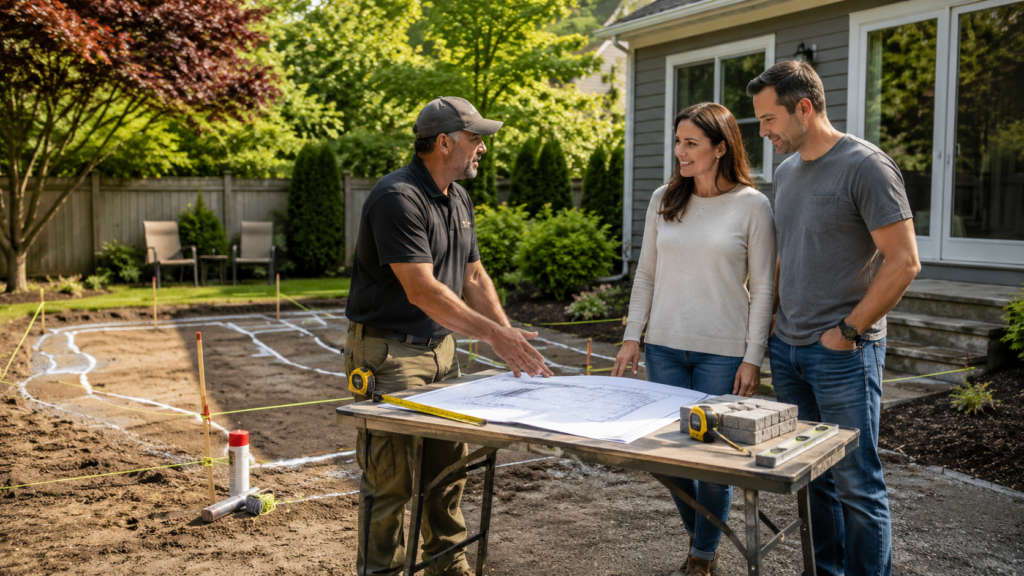
Sketch the patio, mark where it meets the house, and think about how people will actually walk through the space. I’ve seen patios built beautifully in the wrong spot because nobody thought about the door swing or where the grill would go.
Contractor tip: Lay a garden hose or spray paint the outline first and live with it for a day or two before you dig. It’s the cheapest design change you’ll ever make.
Step 2 – Mark and Excavate the Site
Once your paver patio design is settled, excavate to a depth that accounts for your base, sand, and paver thickness, usually 7 to 9 inches total in our climate.
Contractor tip: Slope the excavation about a quarter-inch per foot away from the house. Get this wrong, and you’ll be dealing with water in the basement, not just a wet patio.
Step 3 – Prepare the Base
Lay landscape fabric across the excavated area before adding gravel. It keeps the base material separated from the soil underneath, which stops weeds and prevents the gravel from working its way down into the dirt over time.
Step 4 – Compact the Gravel
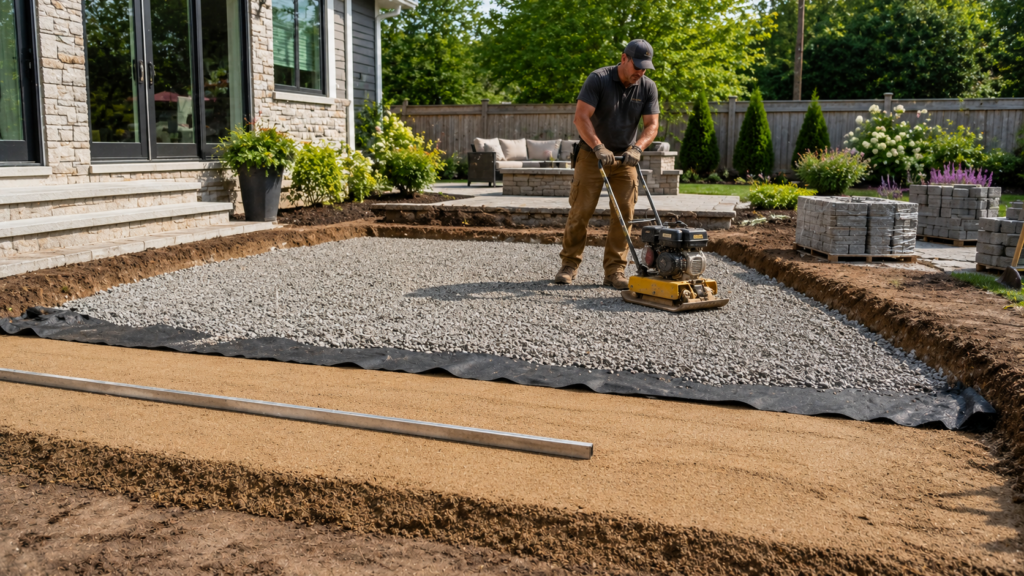
Add the gravel in layers of about 2 inches, compacting each layer with the plate compactor before adding the next. This is the step people rush, and it’s the single biggest reason patios fail later.
Contractor tip: Don’t dump the whole base in at once and compact it as one thick layer. It looks compacted on top and stays loose underneath; you won’t know until it settles unevenly next spring.
Step 5 – Add and Level Bedding Sand
Spread about an inch of bedding sand over the compacted base and screed it level using guide pipes or rails. This layer is what your pavers actually sit on, so it needs to be even.
Step 6 – Lay the Pavers
Start from a fixed edge, usually the house, and work outward in your chosen pattern. Keep consistent joint spacing as you go, tapping each paver into place with the rubber mallet.
Contractor tip: Work off the pallet in the order the pavers were manufactured whenever you can. Color can vary slightly batch to batch, and mixing from multiple pallets as you go blends it out instead of leaving a visible line.
Step 7 – Cut Border Pieces if Needed
Along the edges, you’ll almost always need cut pieces to fill gaps. A wet saw or paver splitter gives cleaner results than trying to break pavers by hand.
Step 8 – Install Edge Restraints
Edge restraints lock the outer pavers in place, so the whole field doesn’t spread apart over time. This is a step homeowners doing it themselves often skip to save money, and it’s a mistake every time.
Step 9 – Spread Polymeric Sand
Sweep polymeric sand into the joints, then activate it with water per the product instructions. It locks the pavers together and helps prevent weeds and ants from getting into the joints.
Contractor tip: Sweep the surface completely clean before you add water. Any sand left on top of the pavers will haze and stain the surface once it’s wet.
Step 10 – Compact and Finish
Run the plate compactor over the finished patio one more time to seat everything and settle the joint sand fully. Clean up, check for any low spots, and give it a final look under good light; low spots are much easier to see with the sun low in the sky.
Common Mistakes to Avoid
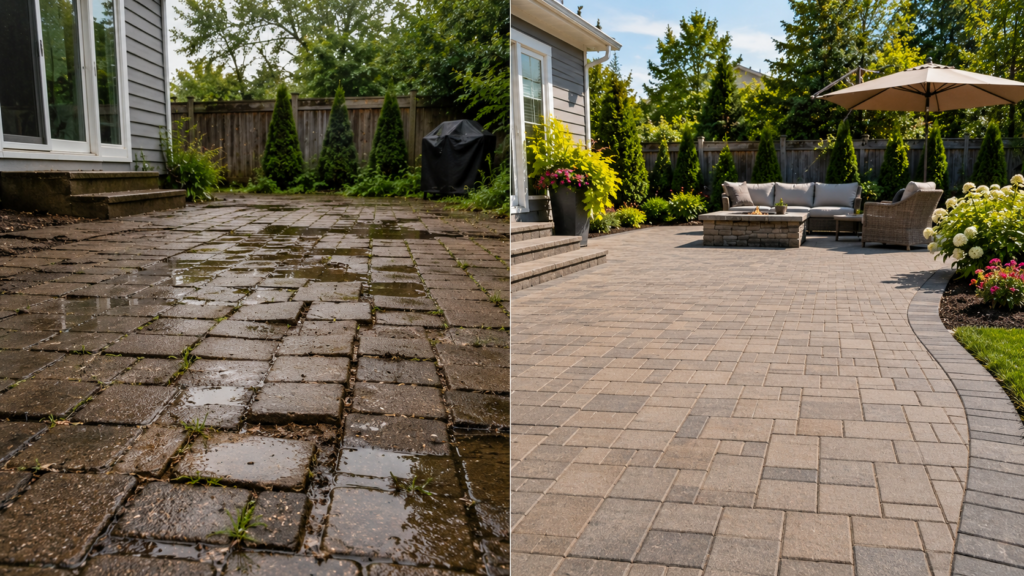
I’ve been called out to fix more paver patios than I can count, and it’s almost always one of these.
Poor drainage. Water pooling on the surface or running toward the house instead of away from it. This is nearly always a grading problem from Step 2.
Skipping compaction. The base looks fine on installation day and settles unevenly a year or two later. There’s no shortcut here; the compactor has to touch every layer.
Thin base. New York’s freeze-thaw cycles need a proper base depth. A base that’s too shallow will heave.
Uneven sand. Bedding sand that isn’t screed level shows up as pavers that rock or sit slightly high or low next to their neighbors.
Ignoring edge restraints. Without them, the whole field of pavers slowly spreads apart, and joints widen year after year.
Incorrect joint spacing. Joints that are too tight don’t leave room for polymeric sand to lock things together; joints too wide look sloppy and invite weeds.
How Long Does It Take to Build a Paver Patio?
DIY timeline: For a first-time DIYer, a modest 200-square-foot patio usually takes a full weekend to a week, spread across excavation, base work, and laying pavers, especially if you’re renting equipment and learning as you go.
Professional timeline: A crew that does this daily can typically finish a similar-sized paver patio installation in 2 to 4 days, including base prep and finishing.
Weather considerations: In New York, spring and fall are the easiest seasons to work in. Summer heat can affect how quickly polymeric sand sets, and you generally want to avoid excavation during a hard freeze or heavy rain.
How Much Does a Paver Patio Cost in New York?
Costs vary with material choice, site access, and design complexity, but here’s a general range I give clients during early conversations.
| Patio Size | Estimated Cost Range | Typical Installation Time |
| Small (100–150 sq ft) | $2,500 – $5,000 | 2–3 days |
| Medium (200–300 sq ft) | $6,000 – $12,000 | 3–5 days |
| Large (400+ sq ft) | $13,000 – $25,000+ | 1–2 weeks |
These figures reflect material and labor for concrete pavers; natural stone pavers typically run higher due to material and cutting costs.
Case Study: A Backyard Patio in Queens
A homeowner in Queens reached out about her backyard: a cracked, decades-old concrete slab that pooled water every time it rained and had started tilting toward the house foundation.
We planned a 280-square-foot paver patio design in a running bond pattern with concrete pavers, tying into her existing deck steps. Removing the old slab took longer than expected once we found it was poured directly over compacted clay with no real base underneath, which explained the drainage problems from day one.
We excavated deeper than originally planned to get a proper gravel base in and regraded the whole area to slope away from the foundation. The rest of the paver patio installation went smoothly: base, sand, pavers, edge restraints, polymeric sand- done in four days.
The lesson from that job, and one I bring up with a lot of clients now: what’s under an existing patio or slab isn’t always what you’d guess from the surface. Always plan for the possibility that the base needs real work, not just a fresh layer on top.
Expert Insight
I asked a longtime colleague of mine, a paver contractor who’s worked across the Hudson Valley for close to twenty-five years, which step homeowners underestimate the most.
“It’s the base compaction, every time,” he told me. “People want to see pavers going down because that’s the part that looks like progress. But the base is what you’re standing on ten years from now. If it’s not compacted right, everything above it is just waiting to fail.”
That matches what I’ve seen on every callback I’ve ever gotten for a sunken or uneven patio. The pavers rarely fail on their own; the ground underneath them does.
Maintenance Tips for Long-Lasting Paver Patios
Cleaning. A regular sweep and an occasional rinse with a garden hose keep most patios looking good. Save the pressure washer for tougher stains, and keep the pressure low enough not to blow out the joint sand.
Weed prevention. Polymeric sand handles most of this on its own, but check joints each spring and refresh any spots that have thinned out.
Sealing. Sealing isn’t required, but it does deepen color and make cleanup easier, especially for natural stone pavers. Plan on resealing every 2 to 3 years depending on foot traffic and sun exposure.
Joint sand maintenance. Polymeric sand breaks down slowly over time. Top it off when you start noticing gaps or small weeds working their way in.
Winter care. Use a plastic shovel rather than metal to clear snow, and skip rock salt; calcium chloride-based ice melts are gentler on paver surfaces.
Frequently Asked Questions
How do you build a patio with pavers?
You excavate the area, install a compacted gravel base, add a level layer of bedding sand, lay the pavers in your chosen pattern, cut border pieces as needed, install edge restraints, and finish with polymeric sand in the joints.
What is the best base for patio pavers?
Crushed gravel, typically ¾-inch minus, compacted in layers, is the standard paver base for durability in freeze-thaw climates like New York.
Can I build a paver patio myself?
Yes, for smaller, straightforward areas. Larger patios, complex drainage situations, or sites near a foundation are usually better left to a professional with the right equipment.
How deep should the base be?
Most New York installations use a base depth of 6 to 8 inches, though it can vary based on soil conditions and whether the patio will see vehicle traffic.
Do patio pavers need mortar?
No. Pavers are designed to be installed on a compacted base with sand joints, which allows for natural movement and easier repairs. Mortar is used for other applications, not standard paver patios.
How long do paver patios last?
A properly installed paver patio typically lasts 25 to 35 years or more, depending on material choice and maintenance.
Wrapping Up
Building a paver patio comes down to what’s underneath it. Get the excavation, base, and compaction right, and the pavers themselves are almost the easy part. Rush that groundwork, and no amount of nice pavers will keep a patio from settling, shifting, or pooling water down the line.
If you’re planning a backyard patio and want a second opinion on your design or a realistic sense of cost, reach out for a consultation. A quick site visit is often enough to catch issues like drainage or soil conditions before they turn into expensive problems later.