
You notice a crack in your driveway. It’s thin, maybe just a hairline running along one edge. Easy to ignore, right?
Here’s the thing. I’ve been repairing asphalt driveways in New York for over 20 years, and almost every major repair I’ve done started as something a homeowner noticed but put off fixing. A crack that could’ve been sealed for the cost of a tube of filler turns into a section that needs to be cut out and repatched. Sometimes it turns into a full resurfacing job.
New York doesn’t make this easy on asphalt. We get real winters, real freeze-thaw cycles, and driveways that see everything from salt to snowplows to summer heat that softens the surface. That combination is hard on asphalt, and it’s exactly why small cracks here don’t stay small for long.
This guide walks through why cracks form, how to fix them yourself when that makes sense, and how to tell when it’s time to call someone like me instead.
Why Asphalt Driveways Crack
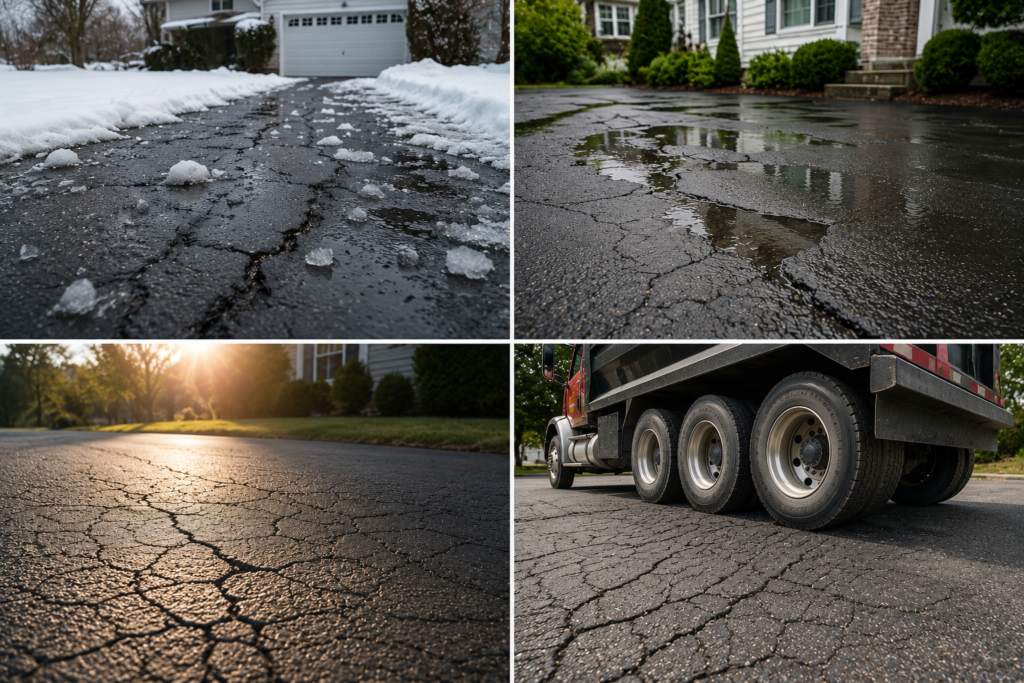
Asphalt is flexible by design, but it’s not indestructible. A few things wear it down over time, and usually it’s a combination of factors, not just one.
Freeze-thaw cycles are probably the biggest culprit around here. Water gets into tiny pores or existing cracks, freezes, expands, and pries the asphalt apart. Then it thaws, and the cycle repeats the next cold snap. By the end of a New York winter, a crack that started as a hairline can be wide enough to catch your shoe.
Water penetration goes hand in hand with that. Once water gets underneath the surface layer, it weakens the base material the asphalt sits on. A driveway is only as strong as what’s beneath it.
UV exposure dries out the oils that keep asphalt flexible. Older driveways that haven’t been sealed in years get brittle, and brittle asphalt cracks instead of flexing under weight.
Heavy vehicles, trucks, RVs, and dumpsters dropped off for a renovation put more stress on asphalt than it’s built for in spots not reinforced for that load.
Aging asphalt naturally loses flexibility. Most residential driveways start showing their age somewhere around the 12–15 year mark, sooner if maintenance was skipped.
Poor drainage sends water pooling in low spots instead of running off, which speeds up nearly every other problem on this list.
Tree roots growing underneath the driveway push up from below, and no amount of surface repair fixes that until the root pressure is addressed.
| Cause | Severity | Can It Be Prevented? |
| Freeze-thaw cycles | High | Partially sealing helps reduce water intrusion |
| Water penetration | High | Yes, with proper sealing and drainage |
| UV exposure | Medium | Yes, with regular sealcoating |
| Heavy vehicles | Medium | Yes, by avoiding overloading the surface |
| Aging asphalt | High | No, but maintenance slows it down |
| Poor drainage | High | Yes, with grading and drainage fixes |
| Tree roots | Medium | Sometimes, with root barriers or removal |
Types of Asphalt Driveway Cracks
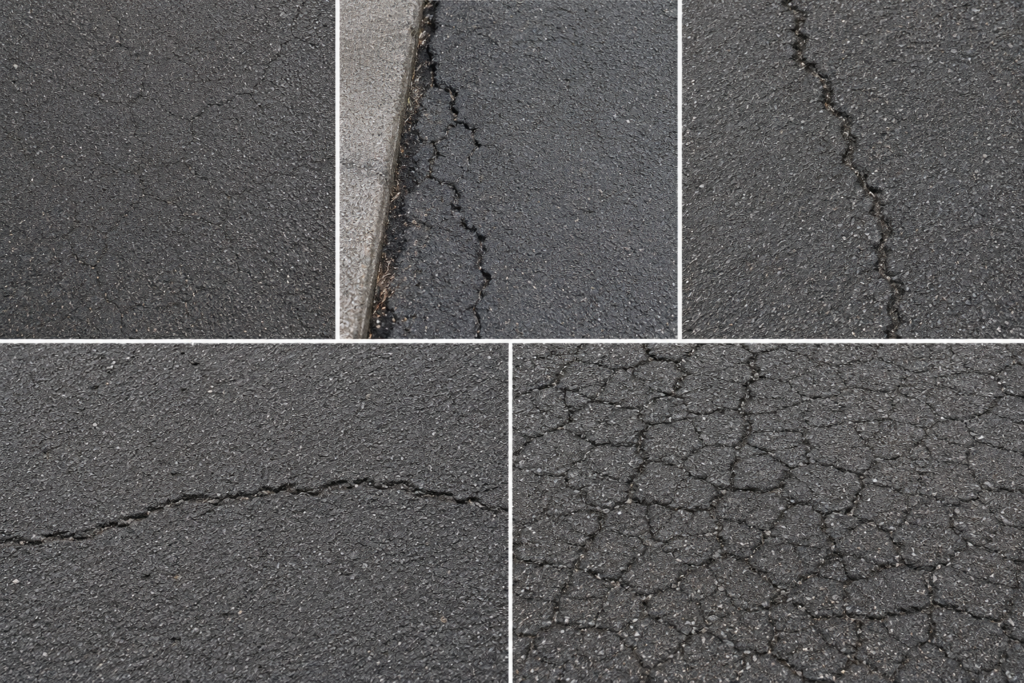
Not all cracks mean the same thing, and knowing which type you’re dealing with changes how you approach the repair.
Hairline cracks are thin, shallow, and usually cosmetic at first. They look like a fine line across the surface, sometimes barely visible until the light hits them right. These are the easiest to fix and the ones most worth catching early.
Edge cracks run along the sides of the driveway, often where it meets grass or landscaping. They tend to show up when there’s insufficient support along the border, or from water runoff eroding the edge over time.
Fatigue cracks, also called alligator cracks, look exactly like the name suggests: a web of interconnected cracks resembling reptile skin. This is a structural problem, not a surface one. It usually means the base underneath has failed.
Longitudinal cracks run parallel to the length of the driveway, often following the direction the asphalt was laid. These can start small but widen if not addressed.
Transverse cracks run perpendicular, cutting across the width of the driveway. Temperature swings are usually behind these, as the asphalt contracts and expands.
If you’re standing in your driveway trying to figure out which one you’ve got: a single thin line means simple crack repair. A spiderweb pattern means it’s time for a real conversation about what’s happening underneath.
How to Fix Cracks in an Asphalt Driveway (Step-by-Step)
Step 1: Inspect the damage. Walk the length of the crack. Note the width, depth, and whether it’s a single line or branching into others. This tells you whether you’re dealing with a simple fix or something bigger.
Step 2: Clean the crack thoroughly. Use a wire brush or crack cleaning tool to remove loose debris, dirt, and old filler. A leaf blower works well for clearing out the fine dust afterward. Skipping this step is one of the most common reasons DIY repairs fail: filler doesn’t bond well to a dirty crack.
Step 3: Choose the correct crack filler. For hairline cracks, a pourable asphalt crack filler works fine. For wider cracks, look for a cold-pour rubberized filler that stays flexible. Trying to use the wrong product for the crack size is another common mistake; filler that’s too thin just sinks into a wide crack without actually sealing it.
Step 4: Apply the repair material properly. Pour or apply the filler slightly above the surrounding surface level, since it settles as it cures. Smooth it with a putty knife or trowel, feathering the edges so it blends with the existing asphalt.
Step 5: Allow proper curing. Give it the full time listed on the product, usually 24 to 48 hours depending on temperature and humidity. Keep vehicles off it during this window. I’ve seen plenty of repairs get driven over too soon and pull right back apart.
Step 6: Seal the driveway if needed. Once repairs are cured, a fresh coat of sealcoat over the whole driveway protects the new repair and the surrounding asphalt from UV and water damage going forward.
DIY vs Hiring a Professional
| DIY Repair | Professional Repair |
| Lower upfront cost | Higher upfront cost |
| Good for hairline and small cracks | Handles all crack types, including structural issues |
| Takes a weekend, plus curing time | Often completed same day with commercial equipment |
| Repairs can fail if base issues aren’t addressed | Diagnoses underlying base or drainage problems |
| Best for small residential driveways | Best for larger driveways, commercial lots, or extensive damage |
| Shorter lifespan on the repair itself | Longer-lasting repair with proper materials and technique |
DIY repair makes sense for a homeowner with one or two hairline cracks and some patience. It doesn’t make sense once you’re looking at alligator cracking, sunken sections, or cracks that keep coming back in the same spot no matter how many times you fill them.
When Crack Repair Isn’t Enough
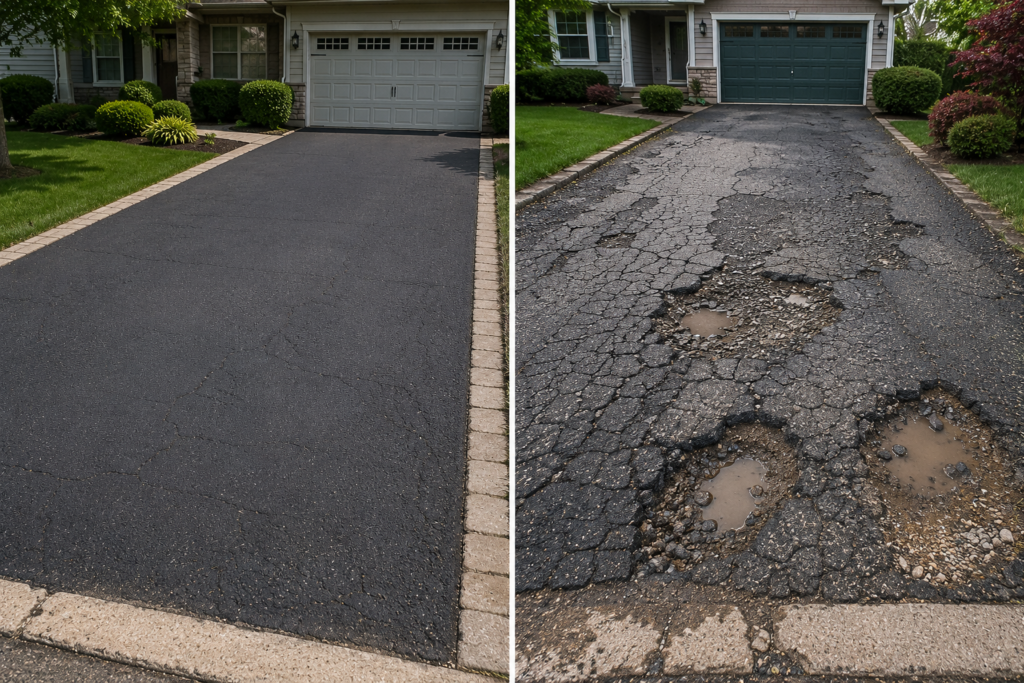
Sometimes a homeowner calls me about “a few cracks,” and what we find on inspection is a driveway that’s past the point where filler is going to help.
Extensive alligator cracking across large sections usually means the base has failed. Filling the surface cracks without addressing the base is a temporary fix at best, sometimes lasting less than a season.
Base failure happens when the layer beneath the asphalt has broken down, often from long-term water intrusion. No amount of surface patching fixes this. It needs to be excavated and rebuilt.
Drainage problems that go unaddressed will keep causing new cracks even after old ones are repaired. If water has nowhere to go, it’s going to keep finding its way under your asphalt.
Large potholes are usually a sign the damage has gone beyond crack repair territory. Once you’re patching holes instead of sealing cracks, it’s worth getting a full inspection.
In these situations, resurfacing (adding a new layer of asphalt over the existing driveway) or full replacement often ends up being the more cost-effective choice, even though it’s a bigger investment upfront. Patching a driveway that needs replacing usually means paying for the same repair more than once.
Expert Insight
I asked a colleague of mine, who’s been sealing and repairing driveways across the region for close to 15 years, what he tells homeowners who put off crack repair until spring.
His take: waiting through winter is the worst timing possible. Every freeze-thaw cycle that passes while a crack sits open lets more water in, and that water does the real damage. Fall, before the first hard freeze, is the best window to get ahead of it. Once spring comes around, you’re often not looking at a simple fix anymore; you’re looking at a repair that grew over the winter into something bigger.
How to Prevent Future Asphalt Cracks
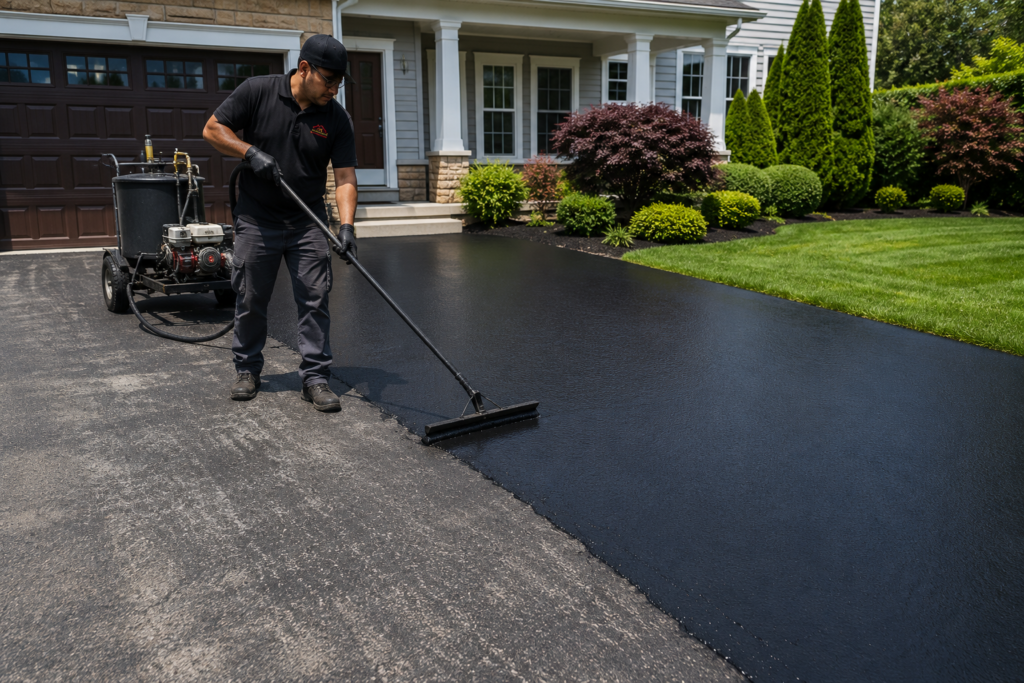
Regular sealing. Sealcoating every 2–3 years protects the surface from UV damage and water penetration, the two biggest drivers of crack formation.
Cleaning. Sweep debris and clear standing water when you can. Dirt and organic material trapped against the surface hold moisture longer than you’d think.
Drainage improvements. If water regularly pools on or near your driveway, address the grading before it becomes a crack problem.
Snow removal tips. Use a plastic shovel or plow blade set slightly above the surface. Metal edges dragged across asphalt, especially aging asphalt, can chip and crack the surface.
Avoiding heavy loads. Keep dumpsters, RVs, and heavy equipment off the driveway when possible, or use plywood to distribute the weight if you can’t avoid it.
Annual inspections. Walk your driveway once a year, ideally in fall, and catch small cracks while they’re still a five-minute fix.
Frequently Asked Questions
How do you fix cracks in an asphalt driveway?
Clean the crack thoroughly, apply the appropriate filler for the crack’s width, smooth it to level with the surrounding surface, and let it fully cure before driving on it.
Can I repair asphalt cracks myself?
Yes, for hairline and small cracks. Wider cracks, alligator cracking, or cracks tied to drainage or base issues are better handled by a professional.
What’s the best filler for driveway cracks?
Pourable fillers work for hairline cracks. Cold-pour rubberized fillers hold up better in wider cracks since they stay flexible through temperature changes.
Should I seal my driveway after repairs?
Yes. Sealing protects both the repaired area and the surrounding asphalt from the UV and water damage that caused the cracking in the first place.
How much does asphalt crack repair cost?
DIY materials typically run under $50 for small jobs. Professional repair costs vary with the extent of damage, but early repairs are almost always cheaper than waiting until the problem worsens.
When should I replace instead of repair?
When you’re dealing with widespread alligator cracking, base failure, or recurring potholes across a large portion of the driveway, replacement or resurfacing usually offers better long-term value than repeated patching.
Conclusion
Cracks in an asphalt driveway aren’t just a cosmetic issue. They’re an entry point for water, and water is what turns a small problem into an expensive one. Catching cracks early, understanding what type you’re dealing with, and knowing when a repair is enough versus when it’s time for something bigger can save you real money over the life of your driveway.
Regular maintenance, a little attention each fall, and not putting off that first small crack goes a long way.
If you’ve noticed cracking in your driveway and aren’t sure whether it’s a simple fix or something more, reach out for an inspection. A quick look now can save you from a much bigger repair later.