Can You Lay Pavers Without a Base? What Every New York Property Owner Should Know
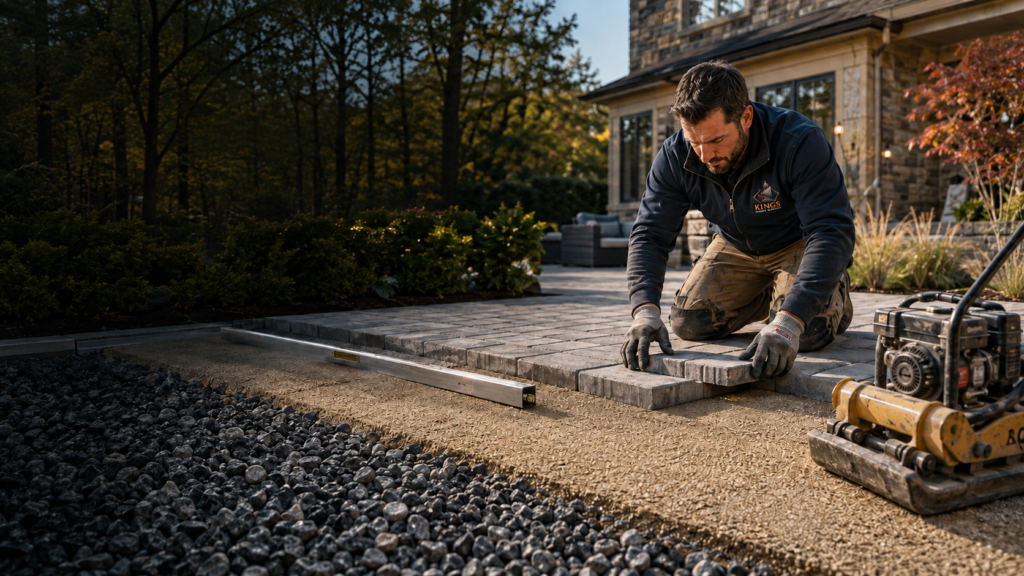
I get this question a lot, usually from someone standing in their backyard with a pallet of pavers already delivered, trying to figure out if they really need to rent a plate compactor and haul in gravel. The honest answer is yes, you can technically lay pavers directly on dirt or grass. People do it every weekend across New York. But “can” and “should” are two very different things, and after twenty-plus years of installing patios, driveways, and walkways from Long Island to the Hudson Valley, I can tell you which projects hold up and which ones end up as repair calls. Skipping the base is tempting. It saves time, cuts out the cost of gravel and delivery, and skips the most physically demanding part of the job. I understand the appeal. But before you skip it, you should know exactly what you’re trading away. Can You Lay Pavers Without a Base? Yes, you can lay pavers without a base, but it’s rarely a good idea for anything permanent. Without a compacted gravel base, pavers shift, sink, and settle unevenly, especially through New York’s freeze-thaw winters. Skipping the base works only for temporary or very low-traffic projects like a short garden path. That’s the short version. Here’s the longer one. If you’re working on a small decorative path through a flower bed, something nobody’s going to walk on with regularity or drive a wheelbarrow over, you can get away with laying pavers on compacted soil or a thin layer of sand. I’ve seen plenty of these hold up fine for years because the loads are light and the area is small enough that any minor settling isn’t a big deal. But for a patio, walkway, driveway, or anything near a house foundation, skipping the base is a mistake I’ve been called out to fix more times than I can count. New York soil isn’t forgiving. We’ve got clay-heavy ground in a lot of areas; we get real winters with deep frost, and heavy rain events that used to be occasional are happening more often. All three of those conditions punish an installation that doesn’t have proper support underneath it. Professionals don’t recommend skipping the base because pavers themselves aren’t what holds the surface together. The base is. The pavers are just the top layer sitting on a system that’s supposed to handle drainage, weight, and ground movement. Take that system away, and you’re basically hoping the dirt underneath cooperates. It usually doesn’t. Why a Proper Base Is So Important A paver base isn’t just filler material. It’s doing several jobs at once, and each one matters. Stability. Compacted gravel locks together and creates a firm, load-bearing surface. Without it, pavers rest directly on soil that shifts with moisture, temperature, and foot traffic. Drainage. Water needs somewhere to go. A properly graded gravel base lets water move through and away from the pavers instead of pooling on the surface or seeping into the joints. Weight distribution. Whether it’s people walking across a patio or a car parked on a driveway, the base spreads that weight out across a wider area so no single spot takes the full impact. Frost protection. This one is huge in New York. When water sits under pavers and freezes, it expands. That expansion pushes pavers up and out of alignment. A properly built base, especially one that extends below the frost line for driveways, reduces how much that freeze-thaw cycle can move things around. Long-term durability. Put all of the above together, and you get a surface that stays flat, drains correctly, and holds its shape for decades instead of a couple of seasons. Here’s a side-by-side look at what you’re really choosing between. Factor Without Base Proper Base Installation Stability Shifts and sinks over time Stays firm under foot and vehicle traffic Drainage Water pools on surface Water drains through and away Weight handling Pavers bear load directly Load spread across compacted stone Frost resistance Highly vulnerable to heaving Built to handle freeze-thaw cycles Weed growth Common through gaps and soft ground Minimized by compacted layers Lifespan 1–3 years before major issues 20–30+ years with basic upkeep Repair frequency Frequent, often within the first year Rare, mostly routine maintenance What Happens When You Skip the Base? I’ve walked onto a lot of properties where someone laid pavers straight on dirt because a video made it look simple. The early stages usually look fine. It’s what happens over the following months that tells the real story. Uneven settling is the first thing homeowners notice. Foot traffic compresses soft ground unevenly, so certain pavers start sitting lower than their neighbors. Once that starts, it doesn’t stop on its own. Weed growth becomes a constant fight. Without a compacted base blocking growth from underneath, weeds and grass push up through the joints within a single growing season. Water pooling shows up after the first heavy rain. Instead of draining through a graded base, water sits on top of the pavers or collects in low spots, which is exactly the kind of thing that turns a patio into a mosquito breeding ground. Loose pavers follow soon after. With nothing locking them into place from below, individual pavers start rocking underfoot. I’ve had homeowners call me because a paver flipped up and became a trip hazard. Cracking happens more with concrete pavers than natural stone, but it happens either way once there’s a void underneath from settling. Pavers aren’t designed to span gaps. They need consistent support. Frequent repairs are the result of all of the above. I’ve re-done entire patios that were installed without a base less than two years earlier, and the homeowner ended up paying for the labor twice. One project that sticks with me was a small backyard patio in Nassau County. The homeowner had laid the pavers himself on packed dirt to save on the gravel base. It looked great for about eight months. Then the edges started sinking near the low corner of
Do Pavers Increase Home Value? A New York Homeowner’s Guide
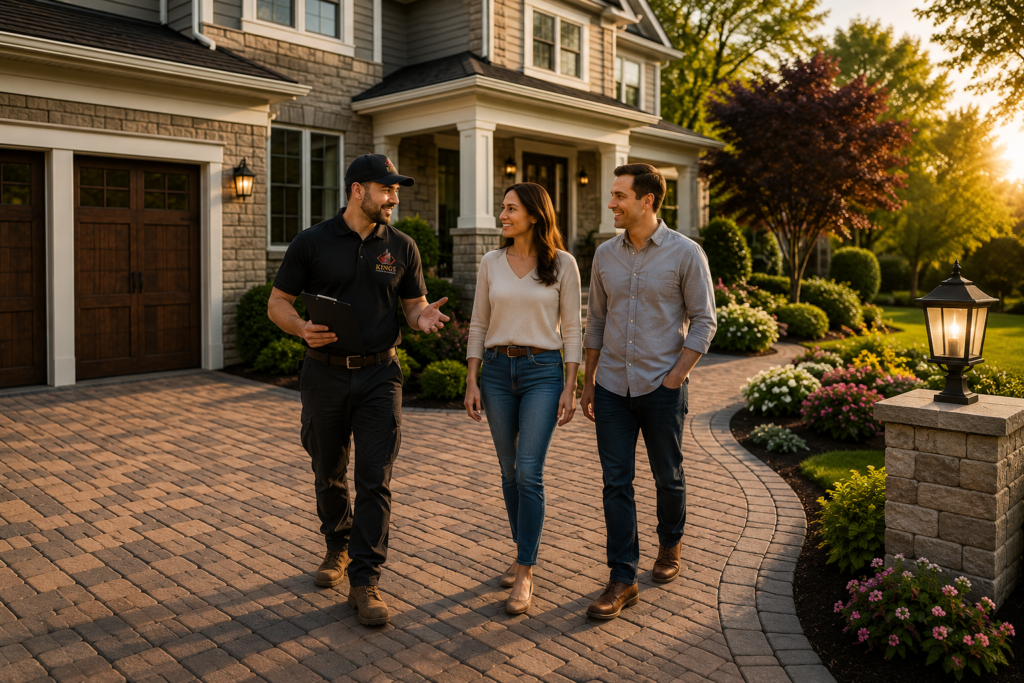
I get asked this question almost every week, usually while I’m standing in someone’s driveway pointing out cracks in twenty-year-old asphalt. “Is this actually worth it, or am I just throwing money at my driveway?” Fair question. You’re not just paying for stone. You’re deciding whether to put real money into your property, and you want to know it’s going to pay off. Here’s the honest answer: value isn’t only about what your house sells for someday. It’s also about how much you enjoy the space while you live there, how little you have to fuss with repairs, and how your home compares to the one next door when a buyer is deciding between the two. In this guide, I’ll walk you through what I’ve actually seen after installing driveways, patios, walkways, and pool decks across New York for over two decades: what adds value, what buyers respond to, and where homeowners sometimes waste money. Do Pavers Really Increase Home Value? Yes, in most cases, a professionally installed paver driveway, patio, or walkway increases home value by improving curb appeal, functionality, and buyer perception, while offering better long-term durability than poured concrete or asphalt. Actual ROI depends on installation quality, material choice, and your local market. A few things drive that value: Curb appeal. The driveway and front walkway are the first things a buyer sees, often before they even get out of the car. A clean, well-laid paver surface signals that the home has been cared for. Functionality. Pavers hold up to New York’s freeze-thaw cycles better than most surfaces when installed with proper base preparation and drainage. That matters here more than almost anywhere else in the country. Buyer perception. Buyers tend to associate pavers with a “finished,” upgraded property rather than a fixer-upper. Durability. A well-installed paver surface can be repaired section by section instead of being torn out entirely, which matters over a decade or two of ownership. Potential ROI. Outdoor hardscape projects are consistently cited by real estate and remodeling industry sources as among the better-performing home improvements for resale value, though exact returns vary widely by region and project. Here’s how paver driveways generally stack up against other common driveway materials I install or replace: Outdoor Upgrade Estimated ROI Impact on Curb Appeal Maintenance Level Paver Driveway Strong, varies by region High Low to moderate Concrete Driveway Moderate Moderate Low Asphalt Driveway Lower Low to moderate Moderate (resealing needed) Decorative Concrete Moderate to strong Moderate to high Moderate I want to be upfront: I’m not going to hand you a specific percentage return, because anyone who does without seeing your property, your neighborhood, and your market is guessing. What I can tell you is which projects tend to perform well and why. Why Buyers Prefer Homes with Pavers I’ve walked through a lot of open houses over the years, sometimes as a favor to past clients who wanted my opinion before listing. The homes with paver driveways and patios almost always get a comment from buyers, even ones who don’t know a paver from poured concrete. Premium appearance. Pavers come in enough colors, textures, and patterns that a driveway or patio can actually look designed, not just installed. Low maintenance. No large slabs to crack, no annual sealcoating like asphalt requires. A quick rinse and occasional joint sand top-up is usually all it takes. Durability. Individual pavers can be lifted and reset if something shifts, instead of jackhammering out an entire section like you would with concrete. Design flexibility. Borders, patterns, and material blends let a driveway or patio match the architecture of the house instead of looking like an afterthought. Outdoor entertaining spaces. A paver patio extends living space outside. I’ve had clients tell me their patio became the room they use most in the summer. One homeowner in Westchester told me her real estate agent specifically mentioned the paver walkway and front patio in the listing photos before anything else about the house. That’s not something I hear about every project, but it happens often enough that I pay attention to it. Which Paver Projects Add the Most Value? Not every paver project delivers the same return. Here’s how I’d rank them based on what I’ve seen buyers and appraisers respond to over the years. Project Type Value Added Best For Typical Lifespan Driveway High First impressions, daily use 25–30+ years with proper base Front Entrance/Walkway High Curb appeal, first impression 25–30+ years Patio High Outdoor living, entertaining 25–30+ years Pool Deck Moderate to high Homes with pools 20–30 years Garden Pathway Moderate Landscaping cohesion 20–25 years Outdoor Kitchen Moderate Entertaining-focused buyers Varies by components Driveways and front walkways tend to matter most because every buyer sees them, whether they’re touring the home or just driving by. Patios come in close behind, especially in a lot of New York suburbs where outdoor living space has become something buyers actively look for. Pool decks and outdoor kitchens add real enjoyment and can help a home stand out, but they appeal to a narrower slice of buyers, so I’d rank them slightly below driveway and patio work if you’re prioritizing resale value specifically. How Much ROI Can You Expect from Paver Installation? I wish I could give you a clean number here. I can’t, and honestly, any contractor who does is either guessing or trying to close a sale. ROI on a paver project depends on: Project quality. A driveway installed on a properly compacted base with correct drainage will hold its value. One installed by a crew cutting corners on base depth will develop problems within a few years, and that shows up during a home inspection. Neighborhood. A paver driveway on a street where every other home has plain asphalt stands out more than one on a street where paver driveways are already the norm. Material selection. Higher-end pavers with better color retention and finish tend to hold up better visually over time, which matters to future buyers. Installation workmanship. This
How Often Should Pavers Be Sealed? A New York Property Owner’s Guide
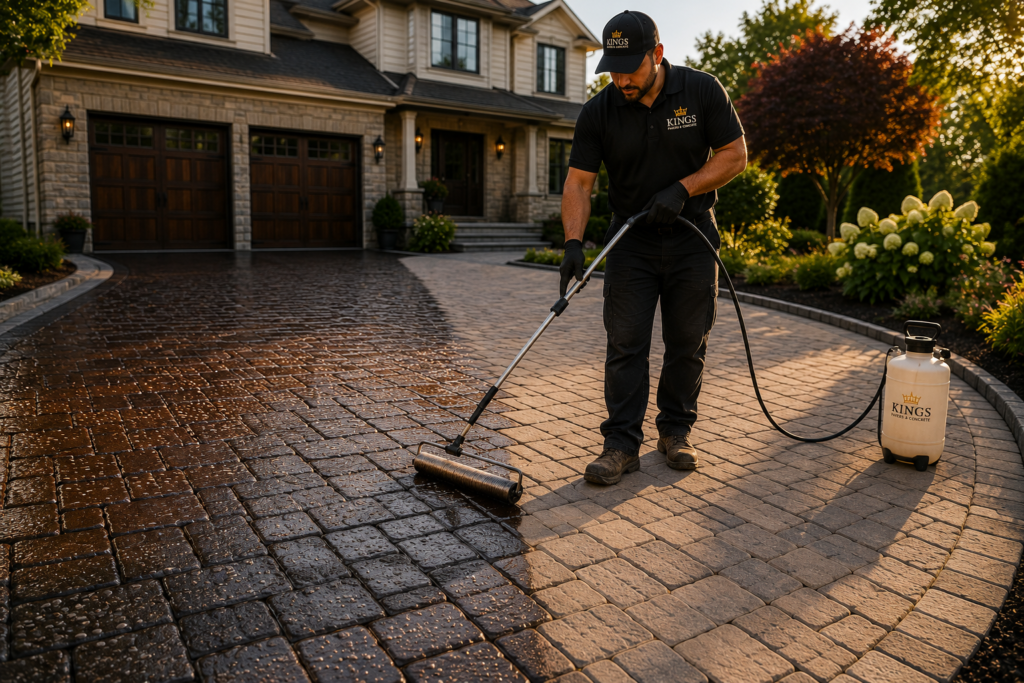
I get some version of this question almost every week: “I sealed my pavers when they were installed. Shouldn’t that be enough?” I understand why people think that way. A paver sealer job looks great on day one, and it’s easy to assume that finished look is permanent. But sealing isn’t a one-and-done project. It’s more like repainting a fence or staining a deck. It wears off, and New York weather makes sure of that. Between freezing winters, salt on the roads, humid summers, and rain that never seems to let up in spring, our pavers take a beating most other regions don’t deal with. That’s exactly why paver sealing needs to happen on a schedule, not just once. In this guide, I’ll walk you through how often pavers should actually be sealed, what changes that timeline, and how to tell when your pavers are asking for attention. This comes from two decades of kneeling on driveways and patios across New York, not from a textbook. Why Do Pavers Need to Be Sealed? A good sealer does a lot of quiet work that homeowners rarely think about until something goes wrong. Protection from moisture. Pavers are porous. Without a sealer, water soaks in, and in New York, that water freezes in winter. Ice expands. Over a few seasons, that expansion cracks and flakes the surface. UV protection. Sun exposure fades color faster than most people expect, especially on south-facing driveways and open patios with no shade. Preventing stains. Oil drips, leaf tannins, and rust from patio furniture, mildew sealed pavers shed most of it. Unsealed pavers absorb it. Weed reduction. Sealer locks down the joint sand between pavers, which makes it much harder for weed seeds to take root in the joints. Joint sand stabilization. Speaking of joint sand, sealing helps keep it in place instead of washing out every time it rains hard. Easier maintenance. Sealed surfaces clean up faster. A hose and a soft brush usually do the job instead of a pressure washer and an hour of scrubbing. Here’s a simple side-by-side of what I typically see on jobs: Sealed Pavers Unsealed Pavers Color stays rich for years Fades noticeably within 1–2 seasons Water beads on the surface Water soaks in and can freeze Stains wipe off easily Oil, rust, and organic stains set in Joint sand stays put Joint sand erodes and washes away Fewer weeds between joints Weeds sprout in loose joints Cleaning takes minutes Cleaning takes real effort How Often Should Pavers Be Sealed? This is the question everyone actually wants answered, so here’s my straight answer: most residential pavers need resealing every 2 to 4 years. But that range shifts depending on the surface, the traffic it takes, and the sealer used. Paver Type Recommended Sealing Interval Notes Driveways Every 2–3 years Vehicle weight and road salt accelerate wear Patios Every 3–4 years Less traffic, but still exposed to weather Walkways Every 3–4 years Foot traffic is lighter than driveways Pool decks Every 2–3 years Chlorine, water splash, and sun exposure wear sealer faster Commercial pavers Every 1–2 years Heavy foot or vehicle traffic wears sealer down quicker I always tell clients these numbers are a starting point, not a guarantee. I’ve seen driveways that needed resealing in eighteen months because of a steep slope that channels meltwater across the surface all winter. I’ve also seen shaded patios go five years and still look decent. The surface tells you when it’s ready; more on that below. What Factors Affect Sealing Frequency? A handful of things determine whether your pavers land on the short end or long end of that sealing window. New York freeze-thaw cycles. This is the big one. Water gets into tiny surface pores, freezes, expands, and stresses the sealer and the paver itself. Homes in colder pockets of the state, or anywhere with a lot of shade that keeps ice around longer, tend to need more frequent sealing. Heavy vehicle traffic. A driveway with two cars coming and going daily wears differently than a rarely used side path. More weight, more friction, faster breakdown. Direct sunlight. UV rays break down sealer chemically, not just visually. A south-facing patio with no tree cover will need attention sooner than a shaded backyard space. Drainage. I’ve walked onto properties where the grading pushes water toward the pavers instead of away from them. Standing water is one of the fastest ways to shorten a sealer’s life. Tree coverage. Shade sounds like a benefit, and it is for UV protection, but falling leaves, sap, and berries stain surfaces and hold moisture against the pavers longer. Type of sealer. Water-based sealers generally need reapplication more often than solvent-based or high-performance sealers, though they’re often easier to apply and have lower odor. Paver material. Concrete pavers, brick pavers, and natural stone pavers all absorb and release moisture differently, which affects how long a sealer holds up on each. Installation quality. This one surprises people. A driveway installed with poor compaction or inconsistent joint sand will show wear faster, sealer or no sealer. Good sealing can’t fully make up for a rushed installation. Signs Your Pavers Need to Be Resealed You don’t need a calendar reminder if you know what to look for. I tell every client to check these things once a year, ideally in spring after the snow clears. Step-by-Step Guide to Sealing Pavers Here’s the process I follow on every job, whether it’s a small walkway or a full commercial plaza. Step 1: Inspect the surface. Walk the entire area and note cracked pavers, loose joints, drainage issues, or heavy staining before doing anything else. Step 2: Deep clean the pavers. A pressure washer with the right nozzle and a paver-safe cleaner removes dirt, algae, and old sealer residue. Skipping this step is the number one reason sealer jobs fail early. Step 3: Replace joint sand if necessary. If sand has washed out or eroded, it needs to be swept back in and compacted
How Long Do Pavers Last and How to Extend Their Lifespan
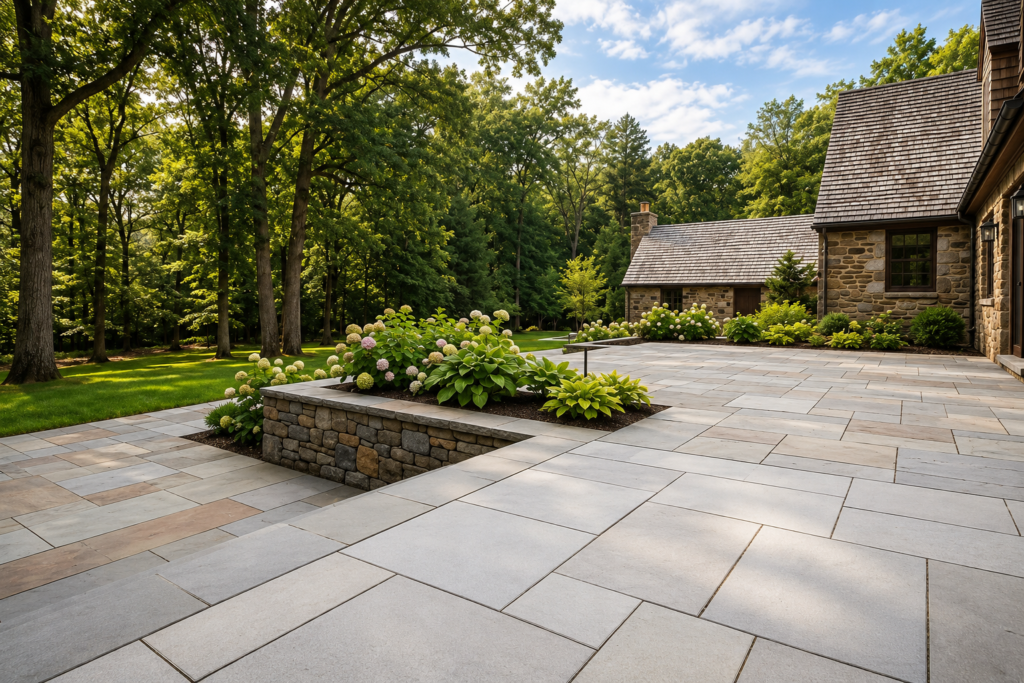
If you’re thinking about installing a new patio, driveway, or walkway, one of the first questions you probably have is: how long do pavers last? It’s a fair question; pavers aren’t cheap, and you want to know you’re making a smart long-term investment. The short answer? Pavers can last anywhere from 25 years to over 100 years, depending on the material, how well they’re installed, and how much care you give them. But that’s a wide range, and the details really matter, especially here in New York, where brutal winters, freeze-thaw cycles, and heavy foot and vehicle traffic can be hard on outdoor surfaces. In this guide, we’ll break down everything you need to know about paver lifespan, from material differences to maintenance strategies to the real-world factors that determine how long your pavers hold up. Whether you’re planning a backyard patio, a front walkway, a pool deck, or a commercial parking area, this guide has you covered. How Long Do Pavers Last on Average? Most quality paver installations last 25 to 30 years with basic maintenance. But the realistic ceiling is much higher than that. Here’s the thing: pavers were actually designed to last a very long time. Unlike poured concrete slabs, which can crack and require full replacement, individual pavers can be swapped out one at a time. That means even if a few pavers chip or crack over the years, you don’t have to redo the whole surface. When properly installed and maintained, many paver installations outlive the homeowners who put them in. It’s not unusual to see 50-year-old brick pavers in older New York neighborhoods that still look great with a little cleaning and re-sanding. That said, not all pavers are created equal. The material you choose plays a major role in how long your pavers last. Average Lifespan by Paver Type Concrete Pavers Concrete pavers are one of the most popular choices for residential driveways, patios, and walkways in New York. They’re durable, affordable, and come in a huge range of colors and styles. Average lifespan: 25–50 years Concrete pavers are manufactured under controlled conditions to achieve high compressive strength, making them tougher than poured concrete slabs. They handle heavy loads well, making them a solid choice for driveways. Over time, they can fade slightly in color, but structurally, they hold up very well. Brick Pavers Brick pavers have a classic look that works beautifully in both traditional and modern settings. They’re made from fired clay, which gives them a natural durability that’s hard to beat. Average lifespan: 50–100 years Brick pavers are extremely long-lasting. In fact, many historic New York streets are still paved with original clay bricks from the 19th and early 20th centuries. They’re naturally resistant to fading and can look even better as they age. The main vulnerability with brick is that it can be slightly more porous than concrete, which means sealing is important in freeze-thaw climates. Natural Stone Pavers Natural stone, such as bluestone, granite, travertine, slate, and flagstone, is the premium option. These pavers are quarried directly from the earth and, when properly maintained, can literally last for centuries. Average lifespan: 50–100+ years Granite pavers, for example, are virtually indestructible under normal use. Bluestone is extremely popular in New York for patios and walkways because it handles the climate well and has that timeless look. Travertine and slate are more porous and require more attention, but they’re still exceptional performers over the long run. Porcelain Pavers Porcelain pavers are a newer option that has been gaining popularity fast, especially for pool decks and modern outdoor spaces. Average lifespan: 30–50+ years Porcelain is incredibly dense, non-porous, and resistant to staining, fading, and frost damage. They’re a great choice for low-maintenance applications, though they can be more challenging to repair if cracked, since matching exact tiles later can be difficult. Factors That Affect Paver Longevity Knowing the average lifespan is just the starting point. The actual lifespan of your pavers depends on several key factors. Let’s walk through each one. 1. Installation Quality This is the single biggest factor, and it’s one that many homeowners underestimate. Even the best pavers will fail prematurely if they’re not installed correctly. Proper installation involves: When any of these steps are rushed or skipped, you’ll see problems within 5 to 10 years, settling, heaving, cracking, and water pooling. A quality installation by an experienced hardscaping contractor is always worth the investment. “The lifespan of pavers comes down to three things: the base, the base, and the base. Get the foundation right, and the pavers on top will take care of themselves for decades.” Mike Ferrara, Master Hardscape Installer with 25+ years of experience in the New York tri-state area 2. Drainage Poor drainage is the silent killer of paver installations. When water pools beneath or around pavers, especially in a freeze-thaw climate like New York, it causes the base to shift, heave, and crack. Good drainage means the surface is sloped slightly (typically 1/8 to 1/4 inch per foot) away from structures, and that the base material allows water to percolate through or redirect it safely away. 3. Traffic and Load A residential patio sees very different wear than a commercial driveway or a loading dock. Pavers for high-traffic or heavy-load applications need a deeper base and potentially a thicker paver to handle the stress. For driveways specifically, look for pavers rated for vehicular traffic, typically at least 2 3/8 inches thick for concrete pavers, and with a base depth of 8 to 12 inches of compacted aggregate. 4. Sealing Sealing your pavers protects them from moisture penetration, UV fading, staining, and the freeze-thaw cycle. It’s one of the most cost-effective things you can do to extend paver lifespan. Most pavers benefit from sealing every 3 to 5 years, depending on the product and the level of exposure. 5. Maintenance Habits Regular sweeping, occasional cleaning, and prompt attention to any settling or cracking all add years to a paver installation. Pavers that are
How to Install Paver Edging Like a Pro in 7 Easy Steps
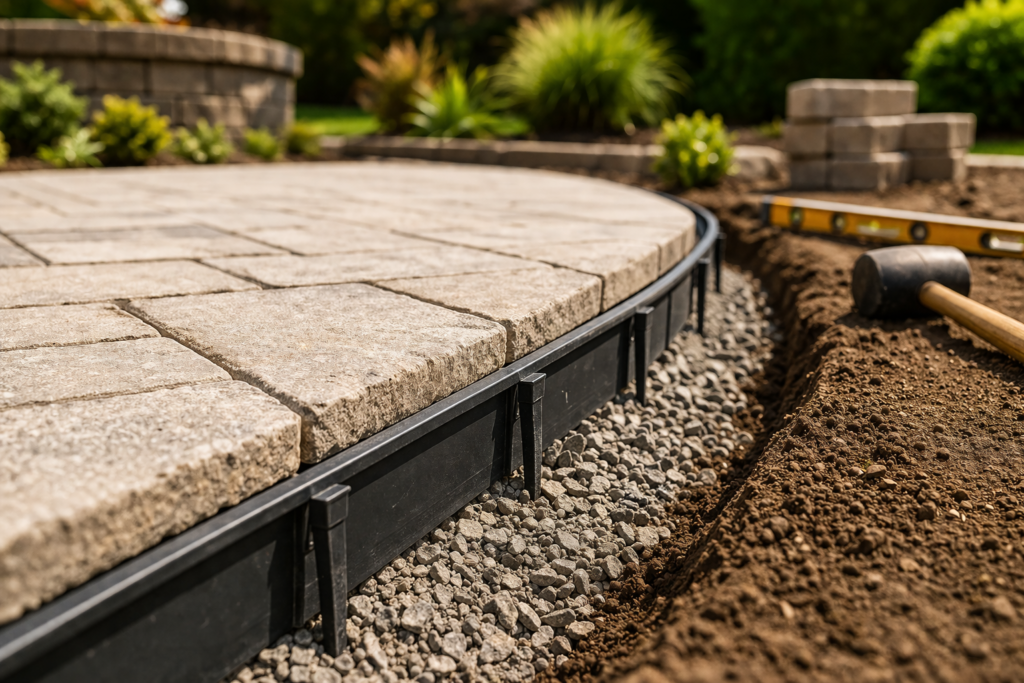
If your pavers are shifting, separating, or sinking after a season or two, the edging is almost always the culprit. Not the pavers themselves. Not the base. The edging or the lack of properly installed edging. Most DIY guides skip straight to “push the spike in, and you’re done.” That’s why so many installations fail. This guide covers every step the right way, including the prep work most people skip, so your paver edging holds for decades instead of seasons. What Actually Goes Wrong With Paver Edging Before the steps, let’s be honest about the failure points because understanding why things go wrong makes each step make sense. Pavers expand and contract with temperature changes. Without a firm perimeter holding them in place, they migrate outward. Once the edge starts to drift, the entire field loses its stability. Joints open up, weeds push through, and eventually you’re redoing the whole job. The three most common mistakes: What You’ll Need Step 1: Mark Your Layout Before You Touch a Shovel This step gets rushed, and it shouldn’t. Spend time here, and every step after it becomes easier. Use stakes and a string line to mark the exact perimeter of your paver field. For straight runs, pull the line tight and stake it at both ends. For curves, use a garden hose or spray paint to mark the radius, then follow that line exactly. Why this matters: Edging installed even an inch off your intended line will force you to cut pavers or leave awkward gaps. Mark it, step back, look at it from multiple angles, then dig. Step 2: Dig the Edging Trench Dig a narrow trench along your marked line. The trench needs to be deep enough so that once the edging is in place, the top lip sits flush with or just slightly below the top surface of your pavers. For most residential paver installations with a 4-inch paver, your trench depth will be around 5 to 6 inches. Width should be just wide enough to set the edging flange flat on the bottom, typically 3 to 4 inches. Keep the interior wall of the trench vertical and tight. A sloppy trench means the edging will wobble before you even spike it. Step 3: Set a Gravel Base in the Trench Add 1 to 2 inches of coarse gravel to the bottom of the trench and compact it with a hand tamper. This is the step most DIYers skip entirely, and it’s why their edging migrates. The gravel does two things: it gives the edging something stable to sit on, and it provides drainage so water doesn’t pool and freeze under the edging in winter. Freeze-thaw cycles are what push edging up and out of position over time in colder climates. Compact the gravel until it doesn’t shift under your foot. Then set the edging in and check the height before moving on. Step 4: Position and Align the Edging Set the edging into the trench and run it along your string line. The top edge should sit at or just slightly below paver height. You’ll fine-tune this as you install. For straight runs, aluminium or steel edging stays true with minimal effort. For curves, heavy plastic edging can be bent to follow gradual curves. For tighter curves (less than a 4-foot radius), score the back of the edging every few inches with a utility knife, so it flexes without kinking. Check your alignment every few feet. Don’t assume the trench will hold the edging true; it won’t. Step 5: Drive the Spikes This is where most of the holding power comes from, so don’t rush it. Drive 10-inch galvanised spikes through the pre-punched holes in the edging flange at a very slight outward angle (away from the paver field), about 5 to 10 degrees off vertical. This angle helps the spike resist the outward pressure pavers exert against the edging over time. Straight-vertical spikes pull straight out. Angled spikes have to fight against the direction of the load. Spacing: 12 inches on straight runs, 8 inches on curves and corners. Use a rubber mallet, not a steel hammer; a steel hammer will deform the spike head, making it harder to drive it flush. Drive each spike until the head sits flat against the edging. No gaps. If a spike bends during driving, pull it and start with a fresh one in a slightly different spot. Step 6: Backfill and Compact Once the edging is spiked in, backfill the trench on the outside with the excavated soil, then compact it firmly with a hand tamper or a plate compactor. This is what locks the system together; the edging can’t move outward if there’s compacted soil pressing back against it from the outside. Work in 2-inch lifts: add a little soil, tamp it, add more, tamp again. Don’t try to compact the entire trench in one pass. Check the edging alignment after compaction. The vibration from a plate compactor can shift things slightly. Make any small corrections now, before the pavers go in. Step 7: Sweep in Joint Sand and Do a Final Check With the edging secured and the paver field complete, sweep polymeric joint sand into all the joints – including the joint between the pavers and the edging itself. Polymeric sand hardens when wet, which adds lateral resistance and blocks weed germination. Sweep, compact with a plate compactor, sweep again, then mist with water to activate the binding agents. Let it cure for 24 hours before heavy foot traffic. Do a final perimeter walk. Push on the edging at several points. It should feel completely solid, no flex, no movement. If any section moves under hand pressure, add spikes before calling the job done. Why Choose Kings Pavers for Paver Edging Choosing the right contractor can make the difference between paver edging that lasts decades and one that fails within a few seasons. At Kings Pavers, every installation is done with proper base preparation, precise alignment,
What’s Under Your Pavers? Why Base Material is the Key to Longevity
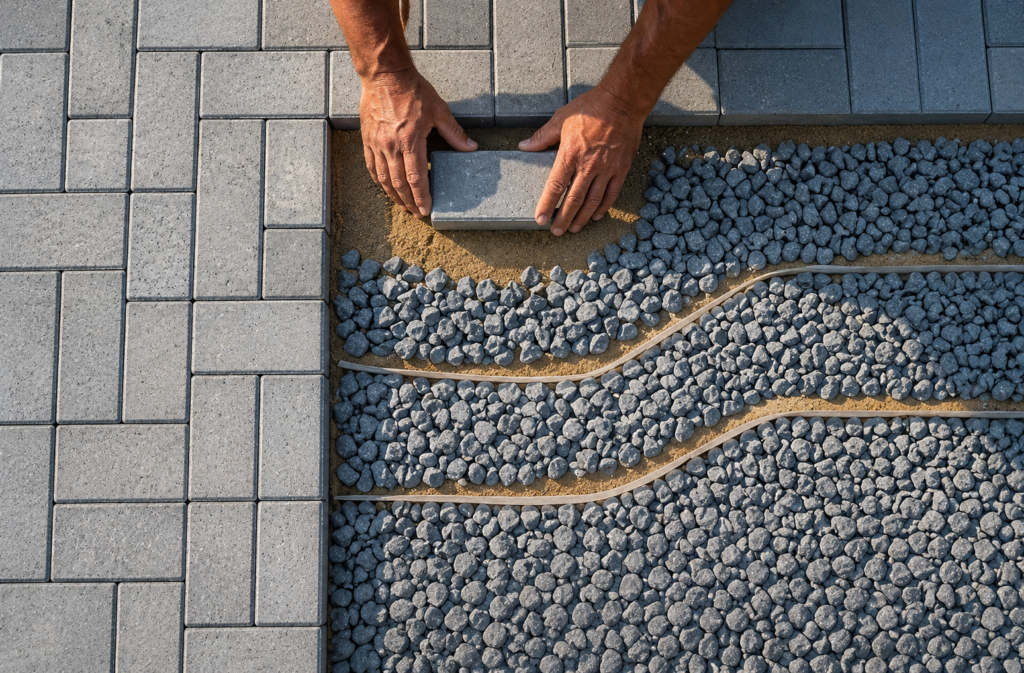
You spent good money on your driveway. Maybe it was a backyard patio, a walkway leading up to your front door, or a full commercial entrance. The pavers looked stunning the day they were laid crisp edges, tight joints, exactly what you envisioned. Then winter hit. Then spring came. And now, a year or two later, you’re looking at sunken sections, cracked stones, and joints that are starting to shift in ways that make you nervous about walking across them. Here’s the truth that a lot of homeowners don’t hear until it’s too late: the pavers themselves rarely fail. What fails is what’s underneath them. The base material is the invisible foundation that determines whether your paver installation lasts five years or fifty. Get it right, and your pavers will outlive the house. Get it wrong, and you’re looking at costly repairs before you’ve even finished paying for the original job. In this guide, we’re going to break down exactly what goes under pavers, how to properly prepare the base, and how deep that base needs to be depending on your specific project. Whether you’re a homeowner trying to understand what you’re paying for or someone who wants to know if a past install was done correctly, this one’s for you. Why Pavers Fail From the Ground Up Let’s start with what’s actually happening when pavers shift, crack, or sink. Most people assume it’s a material quality issue – that they got cheap pavers, or maybe the contractor rushed the job. Sometimes that’s true. But in the vast majority of cases, the problem is underground, and it started before a single paver was ever placed. The Most Common Paver Failures and What’s Actually Causing Them • Sunken pavers after heavy rain – Water has nowhere to go because the base isn’t draining properly. It pools under the surface, softens the ground, and pavers drop. • Cracking and movement after winter – In New York, freeze-thaw cycles are brutal. When water gets trapped in a poorly built base, it freezes, expands, and physically pushes pavers out of position. • Uneven surfaces that create trip hazards – This is almost always a compaction issue. If the base layers weren’t properly compacted during installation, the ground settles unevenly over time. • Pavers that look perfect at install but fall apart within a season or two – A quick, shallow base job might look fine on day one. But the moment it faces real-world stress – traffic, weather, soil movement – it starts to go. Here’s a figure that should make you pause: industry professionals estimate that up to 90% of paver failures can be traced directly back to improper base preparation. Not the pavers. The base. Think about what that means for your investment. You might be paying for premium concrete pavers, beautiful edge detailing, and a well-designed layout – and if the contractor cut corners underground, none of that matters. What Happens When the Base Is Done Wrong – The Real Cost We want to be direct with you here because we’ve seen what poor base work does to people’s properties – and it’s never cheap to fix. A beautiful surface over a bad base isn’t a driveway. It’s a problem that hasn’t shown up yet. What Actually Goes Under Pavers – Done Right Alright, let’s get into the meat of it. Here’s exactly what a properly built paver base looks like, from the ground up. The Layers of a Proper Paver Installation Think of a paver installation like a layered system, where each component has a specific job to do. Skip one layer or rush through it, and the whole system is compromised. 1. Native Soil / Subgrade – The Starting Point Before anything goes down, the existing soil needs to be evaluated and prepared. The subgrade is the native earth that everything else sits on. It needs to be stable, free of organic material (roots, debris, topsoil), and properly compacted. Soft or organic-rich soil must be removed and replaced with stable fill. In New York, where soil conditions vary significantly from one neighborhood to the next, this step is not optional. 2. Crushed Stone / Gravel Base – The Load-Bearing Layer This is the most important layer of the entire installation. Crushed angular stone – not rounded pea gravel, not sand, not dirt – is packed down in lifts to create a stable, load-distributing, water-draining foundation. The angular edges of crushed stone interlock when compacted, creating a base that resists movement and allows water to pass through and away from the surface. 3. Sand Bedding Layer – The Fine-Tuning Layer On top of the compacted gravel base, a thin layer of coarse sand (typically about 1 inch) is screeded to create a perfectly level surface for the pavers to sit on. This layer allows for minor adjustments in height and alignment. It is NOT a structural layer – it’s just there to help set the pavers evenly. Making this layer too thick is one of the most common DIY mistakes. 4. The Pavers – The Visible Surface Finally, the pavers themselves. By this point, if everything below has been done correctly, laying the pavers is almost the easy part. They’re set into the sand bed, tapped into place, and kept in alignment with edge restraints. 5. Polymeric Sand / Joint Sand – The Lock Once the pavers are in place and compacted, the joints between them are filled with polymeric sand. This material hardens when wet, locking the pavers together, preventing movement, and stopping weeds and insects from getting in through the joints. It’s the finishing step that holds the whole surface together. How Deep Should the Paver Base Be? This is one of the most searched questions when it comes to paver installation – and for good reason. The depth of
Ultimate Guide: How to Install a Paver Walkway Step-by-Step (2026)
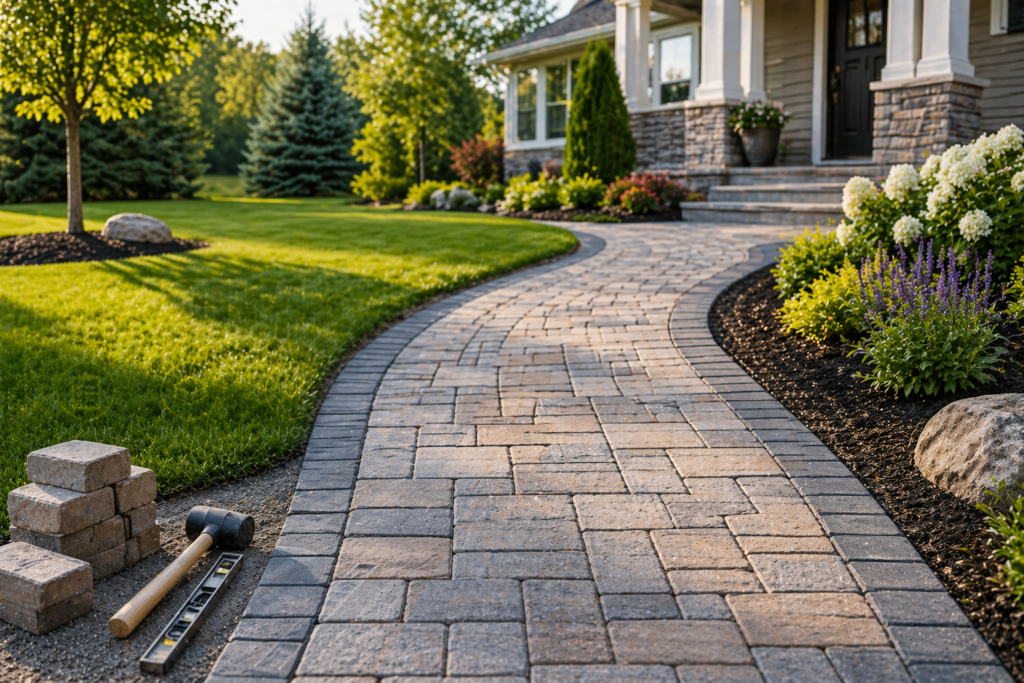
A well-designed paver walkway does more than just connect point A to point B; it significantly boosts your home’s curb appeal and overall market value. However, the difference between a path that lasts decades and one that shifts after the first rain lies in the technical execution. If you are wondering how to install a paver walkway that stands the test of time, you need a strategy that balances DIY grit with professional-grade standards. In this comprehensive 2026 guide, we break down every phase of the installation process. Whether you are planning a weekend DIY project or looking to hire a concrete contractor to ensure a flawless finish, this guide provides the technical depth missing from basic blogs. How to Install a Paver Walkway: The Quick Answer To install a paver walkway, start by excavating the area to a depth of 7–9 inches. Lay a 4-inch compacted gravel base, followed by a 1-inch layer of leveling sand. Arrange your pavers in the desired pattern, set edge restraints, fill joints with polymeric sand, and compact the surface to lock everything in place. 1. Pre-Installation: Planning and Permitting Before you move a single shovelful of dirt, you must have a blueprint. 2. Essential Tools and Materials Checklist To achieve professional results, you need more than just a shovel. 3. Step-by-Step Installation Process Step 1: Marking and Excavation Use stakes and string lines to outline your path. Excavate deep enough to account for 4 inches of base, 1 inch of sand, and the thickness of the paver itself. Step 2: Subgrade Compaction The soil at the bottom of your trench must be firm. Use a plate compactor to ensure the ground won’t settle later. Step 3: Laying the Base This is the most critical step. Add your crushed stone in 2-inch layers, wetting it slightly and compacting it between each layer. This creates a rock-solid foundation that prevents “dipping.” Step 4: Screeding the Sand Lay down two 1-inch pipes and pour bedding sand between them. Slide a straight 2×4 board across the pipes to create a perfectly level “floor” for your pavers. Step 5: Placing the Pavers Start at a straight edge or a corner. Lay pavers flat-do not slide them into place, as this disturbs the sand. Use a masonry saw for any custom cuts at the ends. Step 6: Edge Restraints and Finishing Install heavy-duty plastic or metal edging to keep the pavers from spreading outward. Sweep polymeric sand into the cracks, vibrate the surface with the compactor, and mist with water to “lock” the joints. 4. Why Precision Matters: The “Invisible” Layers Most homeowners focus on the color of the stones. However, the best concrete contractor knows that the “invisible” layers (the gravel and sand) dictate the lifespan. Without proper compaction, even the most expensive pavers will crack or become a tripping hazard within two seasons. 5. Common DIY Mistakes to Avoid 6. When to Hire a Concrete Contractor While a small garden path is a manageable DIY task, complex projects require professional intervention. You should consider looking to hire a concrete contractor if: 7. How to Choose the Best Concrete Contractor Finding a reliable professional is about more than just the lowest bid. Here is how to compare options: Check for Specialization Some companies only do large-scale commercial work. Look for someone who specializes in residential hardscaping and “local services” like sidewalks and decorative paths. Verify Licenses and Insurance Never hire a contractor who cannot provide a current COI (Certificate of Insurance). This protects you from liability if an accident occurs on your property. Ask the Right Questions Expert Tip: The best concrete contractor will always provide a written contract that includes a timeline, material specs, and a clear payment schedule. Benefits of Hiring a Professional Conclusion Learning how to install a paver walkway is a rewarding journey that enhances your home’s outdoor living space. By following a rigorous step-by-step process focused heavily on the foundation and drainage, you can create a stunning entrance. However, if the physical labor or technical requirements seem daunting, don’t settle for a subpar DIY result. Reaching out to a professional concrete contractor ensures that your investment is protected and your walkway remains beautiful for decades to match your home’s quality. Ready to transform your home’s exterior? Get a Free Professional Quote Today and see the difference expert craftsmanship makes! 8. Frequently Asked Questions